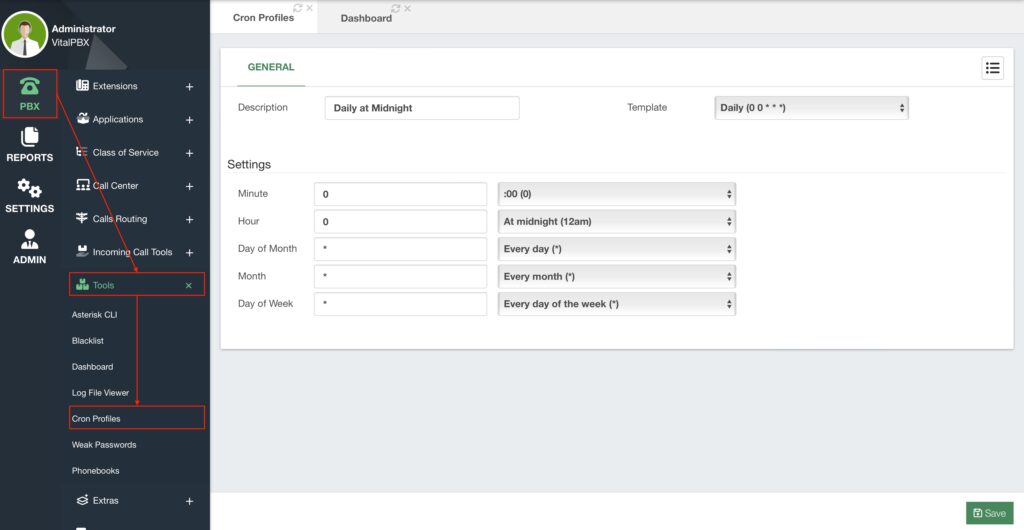
You might want to automate various scripts and operations within VitalPBX. For this, you can create Cron Profiles. Cron profiles are cron jobs that are executed in a specific schedule to automate different tasks within your VitalPBX server. To create a cron profile you must go to PBX > Tools > Cron Profiles.

First, enter a Description to identify this cron profile.
Cron jobs can be a little complicated to wrap your mind around if you have never worked with them before. This is why we have included a Template section to select some of the most common schedules.
Cron jobs are usually defined in a row of five columns. These have been displayed in the Settings section. The columns correspond to the Minutes, Hours, Day of the Month, Month, and Day of the Week. You can enter any number or a star () for each field. The number will correspond to its value for the field. For example, for 12:45 PM you enter 12 for the hours and 45 for the minutes. The same goes for the month, any number between 1-12, for the day of the month 1-31, and for the day of the week 0-6. The star () means every interval of the field. For example, a star next to the month field means every month, and the same goes for each field. Keep in mind that the time is strictly in a 24-hour format.
For simplicity, we have also added a template for every field. This will have the most common option for each field.
If we use the template called Daily, the settings will accommodate to run every day at 00:00 hours (midnight). It will look like in the following image. You can then click on Save and Apply Changes.


