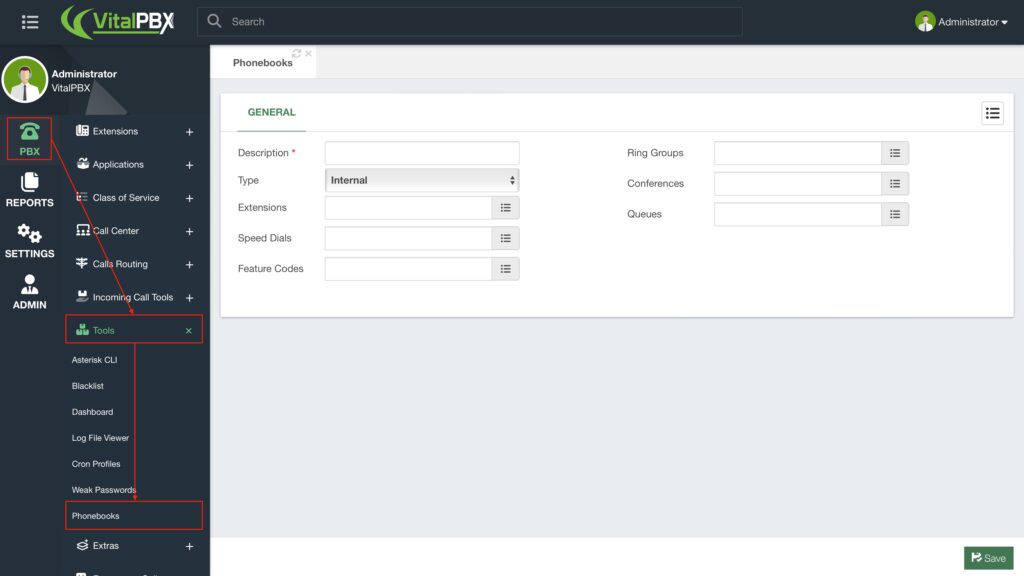
With VitalPBX, you can install our free Phonebooks add-on module. This allows you to centralize your contacts in a single location. Once you have installed the Phonebooks add-on, you can find it under PBX > Tools > Phonebooks.
There are two types of phonebooks, Internal and External. Internal Phonebooks can have a list of Extensions, Speed Dials, Feature Codes, Ring Groups, Conferences, and Queues. Meanwhile, External Phonebooks can have a list of contacts with numbers external to the VitalPBX.
Let’s make an internal phonebook first.
To create the phonebook, you will first need to enter a description. Next, you will need to select the type. By default, an internal phonebook is created.
Afterward, you can add any of the different options available. In this case, we will include the extensions we have created so far. For this, I click on the list icon on the Extensions field.

You are presented with the list of extensions. Remember, in this type of selection, everything you can select will appear in the left column, and everything that has been selected will appear in the right column. We press the Add All option to include all the extensions and then click on Accept.
Once you have selected everything you wish to add to this phonebook, click on the Save button in the bottom right-hand corner. The phonebook is created, and you can find it in the list in the upper right-hand corner of the module.
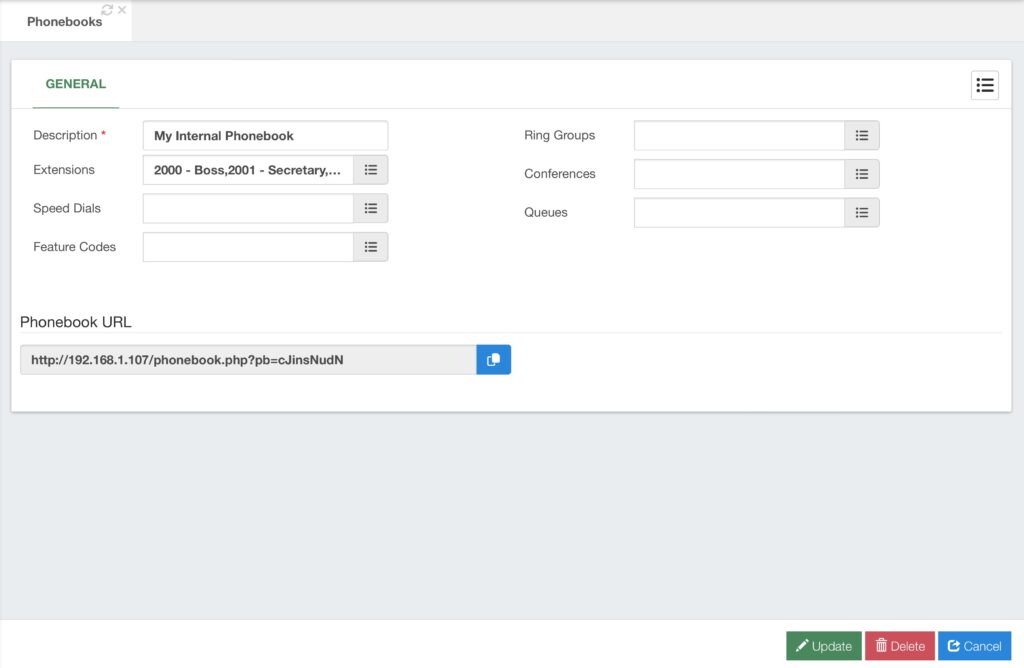
With the phonebook created you will now have a Phonebook URL. You can add this URL to any device that supports centralized phonebook URLs for remote directories. Additionally, you
ill now find a Contact Info tab in your extensions. This is to add additional information to be
displayed with centralized phonebooks.
Now, let’s create an external phonebook.
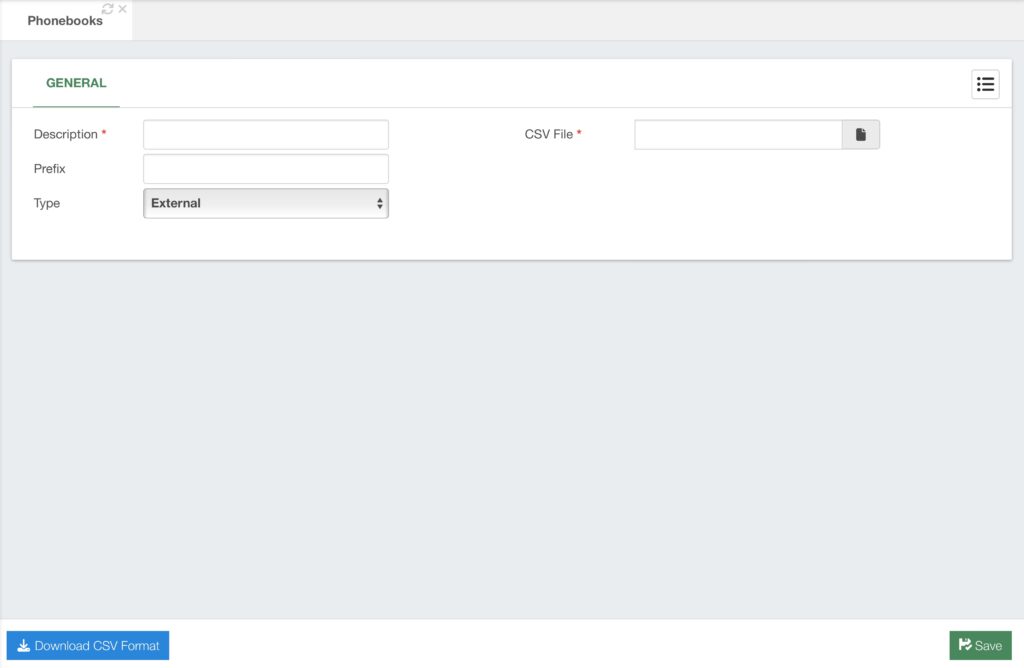
External phonebooks work a little differently, as you need a CSV file to import the contacts.
A CSV format template is available with a button in the bottom left-hand corner of the module.
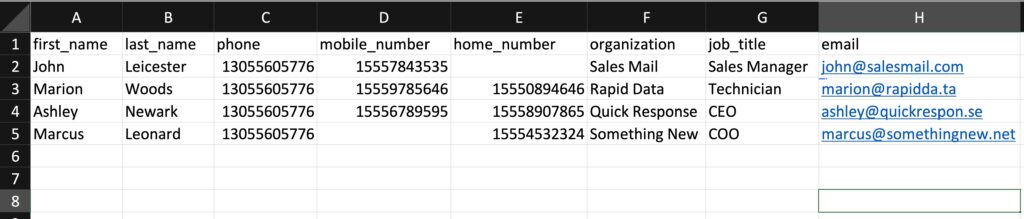
The CSV file is quite simple, storing the contact’s First and Last Name, Three Phone Numbers, Organization, Job Title, and Email. Once you have entered the contacts’ information, save the CSV file, and in the Phonebooks module, upload with the CSV File field.
Then, click the Save button in the lower right-hand corner.
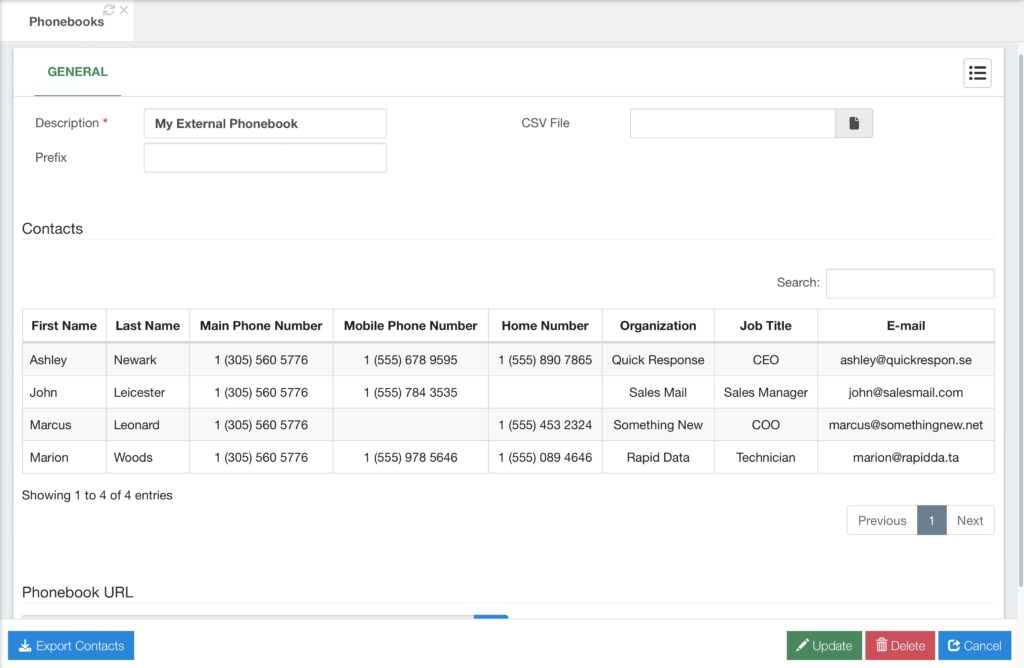
Now, you will see the external phonebook contacts listed in a table, similar to how they were listed in the CSV file.
You will also notice that external phonebooks have a Prefix field. The Prefix field in an external phonebook, allows you to add any prefix number needed to route the calls correctly. We will see more about outbound routes later, but sometimes you need additional numbers before a phone number so the call goes through the correct route. The prefix field allows you to add numbers that will be added automatically to the beginning of the contacts’ phone numbers. This way when selecting a contact from a device using an external directory with an external phonebook, the call will be placed correctly.
You will now find the ability to Export Contacts as well, by clicking on the button in the lower left-hand corner. So if the contacts are modified, you can download the current listing of contacts. You can modify contacts by uploading a new CSV file.
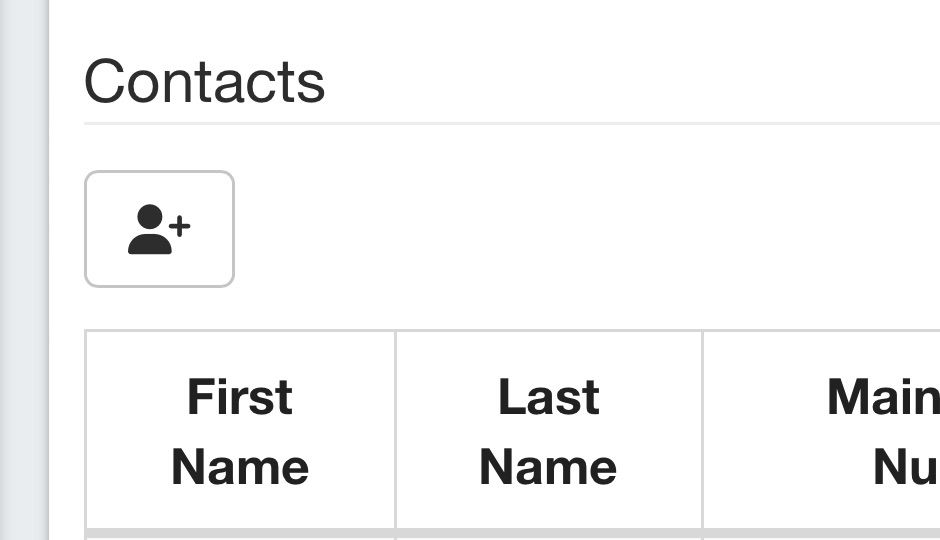
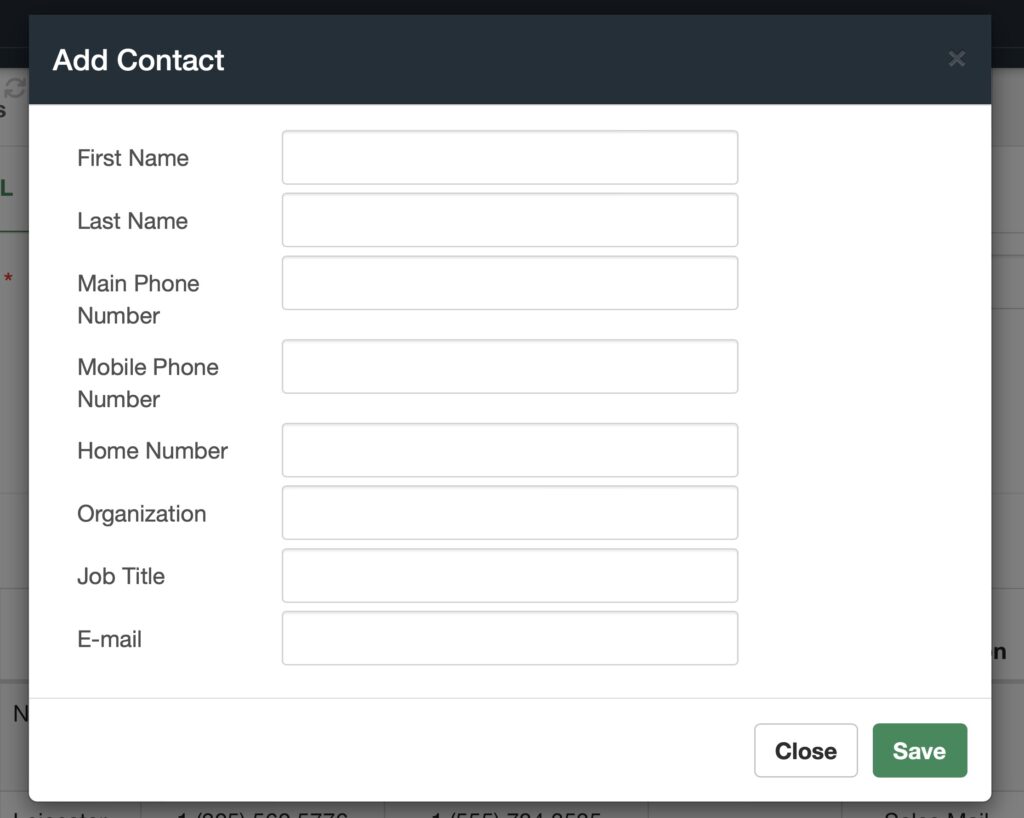
Additionally, if you have a Starter License or any of our Licensing Plans, you get access to the Add Contact extended feature. This extended feature allows you to create a new contact directly from the Phonebooks module.
Note…
Extended Features are additional configurations you can make when you have
a Starter License or a Licensing Plan registered with your VitalPBX installation.
We will go through these extended features as we progress with this guide.
Now you have centralized phonebooks you can use with multiple devices. The devices will have the contacts updated automatically as you update the phonebook contacts


