Keeping your conversations private is key for secure communications. With VitalPBX you can configure your calls to be encrypted, so they are secure from end to end. For this, we are going to be using TLS or Transported Layer Security.
The first thing we need to do is to create a new Device Profile for PJSIP. Go to Settings > Technology Settings > Device Profiles.
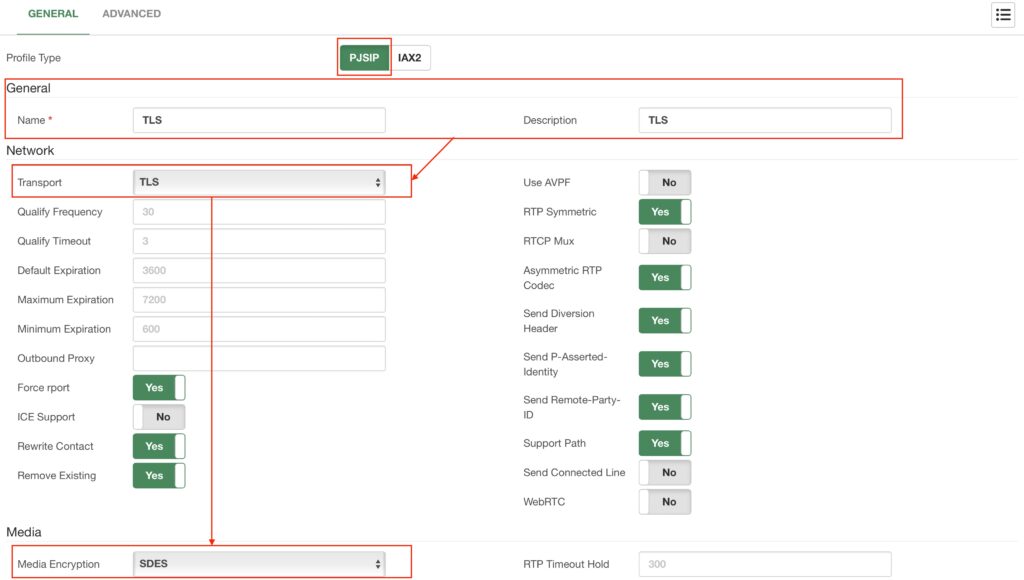
Here, we will select the PJSIP Profile Type. Then, enter a Name and Description to identify this device profile. Under Network, we will set the Transport to TLS. And under Media, we will set the Media Encryption to SDES.
Then click on Save, and then Apply Changes.
Next, we will create a new SSL Certificate. Go to Admin > System Settings > Certificates. In this example, we will be creating a Let’s Encrypt certificate. In this module, you can create self-signed certificates and custom SSL certificates you may acquire with an SSL Certificate vendor. Self-signed may be used in local network environments, but they are not recommended as many browsers consider sites using self-signed certificates risky.
For the Let’s Encrypt certificate, we need to enter a Description to identify the certificate, enter the Hostname for the VitalPBX server, and enter the Owner’s Email address.
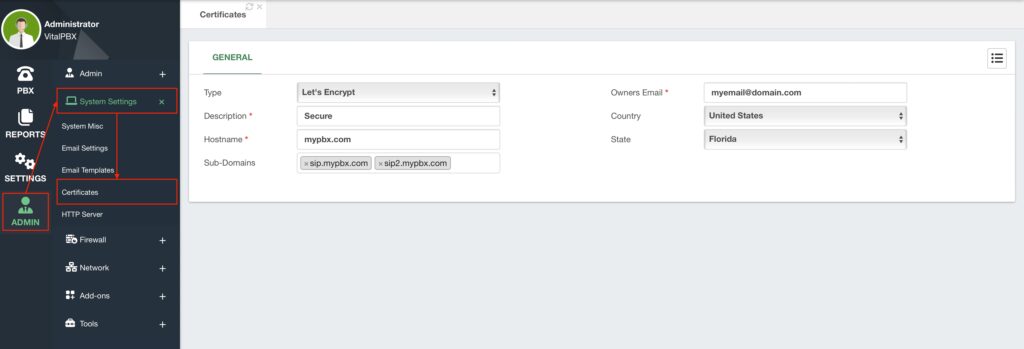
When creating a Let’s Encrypt certificate, we support Sub-Domains. This means that under hostname, you can enter the main valid FQDN. Then, you can enter a sub-domain, i.e. sip.mydomain.com, that you can use to access the VitalPBX installation if you use this certificate for an HTTPS connection. You can enter multiple sub-domains in this section. This is helpful if you want to separate different tenants by sub-domain, and still use a single VitalPBX instance.
With the fields configured, click Save.
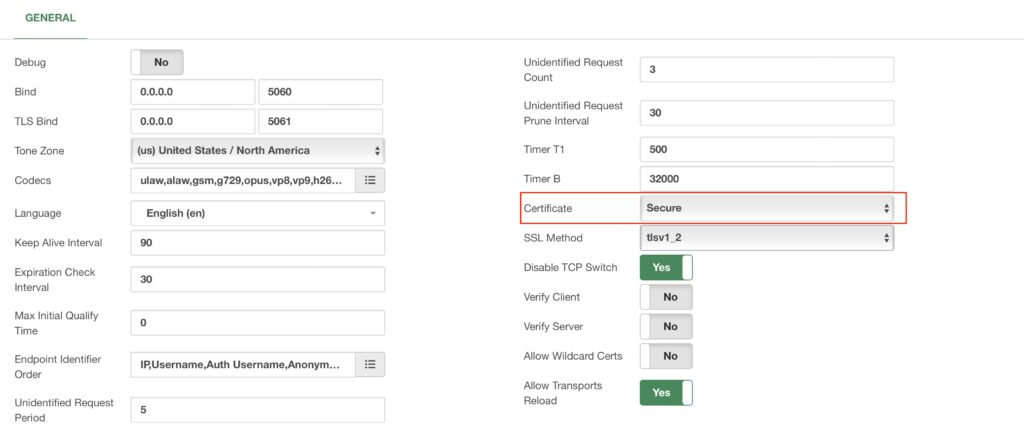
Now, go to Settings > Technology Settings > PJSIP Settings. Under Certificate select the certificate we just created. If you are using multiple sub-domains, you must also enable the Allow Wildcard Certs just created. If you are using multiple sub-domains, you must also enable the Allow Wildcard Certs option. Then, click on Save and then Apply Changes.
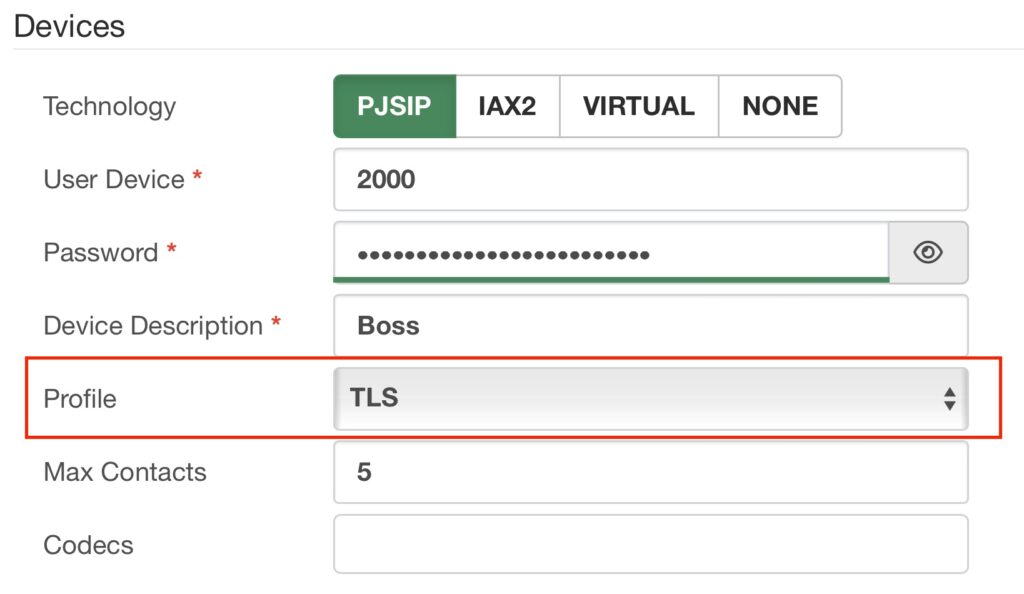
Afterward, we will need to assign the device profile we created to the devices we want to use TLS encryption with. Go to PBX > Extensions > Extensions, and under the device section on the Profile field, select the device profile we created.
All that is left is to register the extensions using the TLS port instead of the default port for PJSIP. By default, this is port 5061. Some devices will require you to enable encrypted calls so you are able to use TLS for the voice packets and change the signaling from UDP to TLS. With this, your devices will have their calls encrypted, making their conversations even more private and secure.


