To use a User Portal, you first need to enable it on the extension for the end-user. This can be done under PBX > Extensions > Extension > Advanced. Here, you will find the User Portal section at the bottom of the Advanced tab.
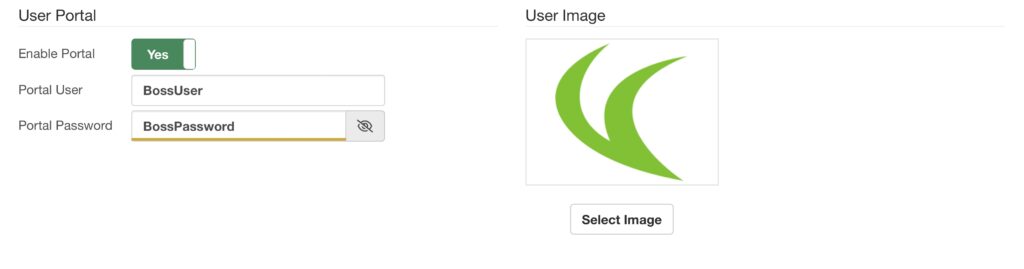
First, you need to set Enable Portal to Yes. Then, add a Portal User and Password. Optionally, you can add a User Image to identify the user. This image must be a square image in PNG or JPEG format. Then you can Save/Update and Apply Changes.
By enabling the User Portal and adding a Portal User and Password, the user will also appear in the Users module under Admin > Admin > Users. They will have the Portal User Profile assigned.
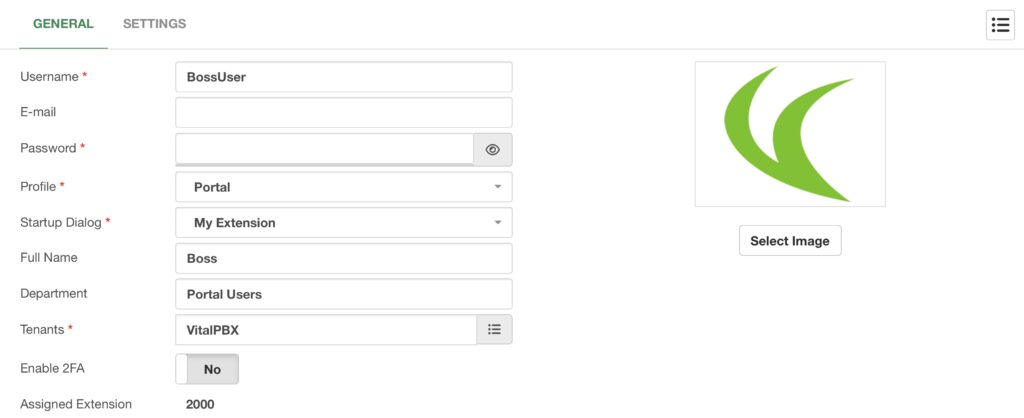
Here, you can add additional features or modifications by making changes to the User Profile and changing the settings of the user if needed.
We can now log out as the Administrator and Log back in using the Portal User and Password we created.
Once you log in with the Portal User and Password, you will be greeted with the My Extension module. This is located under Portal > Configure > My Extension. The My Extension module is where you can perform various actions over your assigned extension as an end-user portal user.
First, you have the General Tab. Here you can change the following options.
- Email Address – This is the email address associated with the portal user’s extension
for the different notifications sent by the system. - Voicemail Password – This is the password used to access the portal user’s
voicemail box using the *97 feature code. - Language – This is the language used for the different voice prompts for the various
features in VitalPBX. - Timezone – This is the time zone associated with the voicemails and CDR call history
for this portal user. - Ring Time – This is the ring time for the portal user’s extension before going to
voicemail or hanging up. - Enable Voicemail – This feature will enable or disable voicemail for this extension.
- Attach Voicemail – This is whether or not the extension will attach the voicemail
recording file with the voicemail to email feature. - Delete Voicemail – This will delete the voicemail recording file after the voicemail is
sent using the voicemail-to-email feature. - Play Envelope – This is whether or not the system will add the voicemail information
at the beginning of the voicemail recording file. - Say CID – This is whether or not the system will add the Caller ID information to the
voicemail recording file.
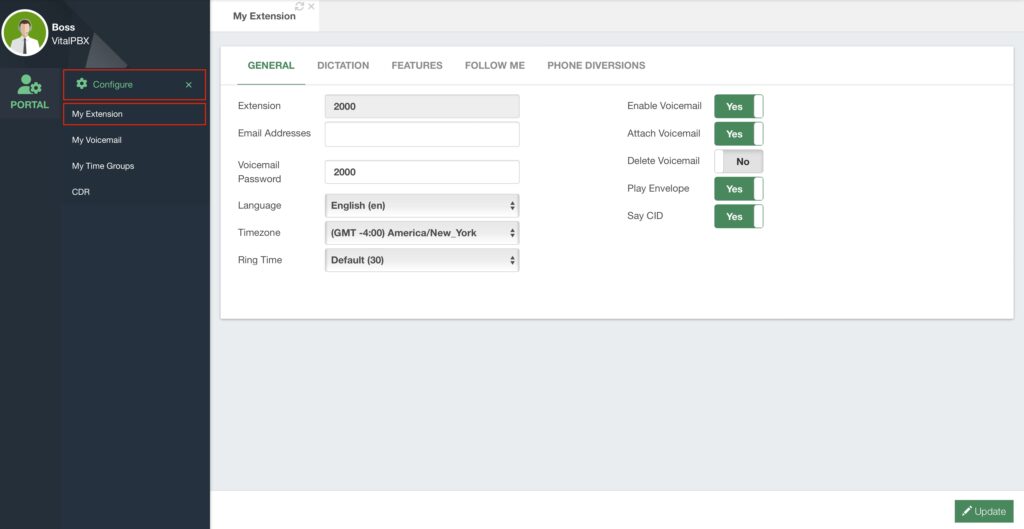
After any changes to these configuration options, you can press the green Update button in the lower right-hand corner.
Next, we have the Dictation Tab. The dictation tab will have a graphical way to view any dictations recorded by the portal user. Remember, for this to work, you need to enable dictation to the portal user’s extension. Then, whenever the portal user records a dictation using the feature code *93 these dictation recordings can be played back from the Dictation Tab.
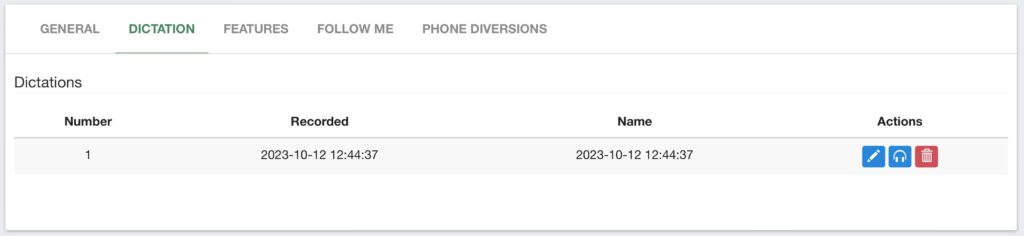
The Dictations table will show you the dictation’s number, the date when it was recorded, and the dictation name. In the Actions column, you can edit the file name, playback the dictation, and delete the dictation.
Remember, dictations are voice notes you can record, so you can listen back to them at any time from your User Portal.
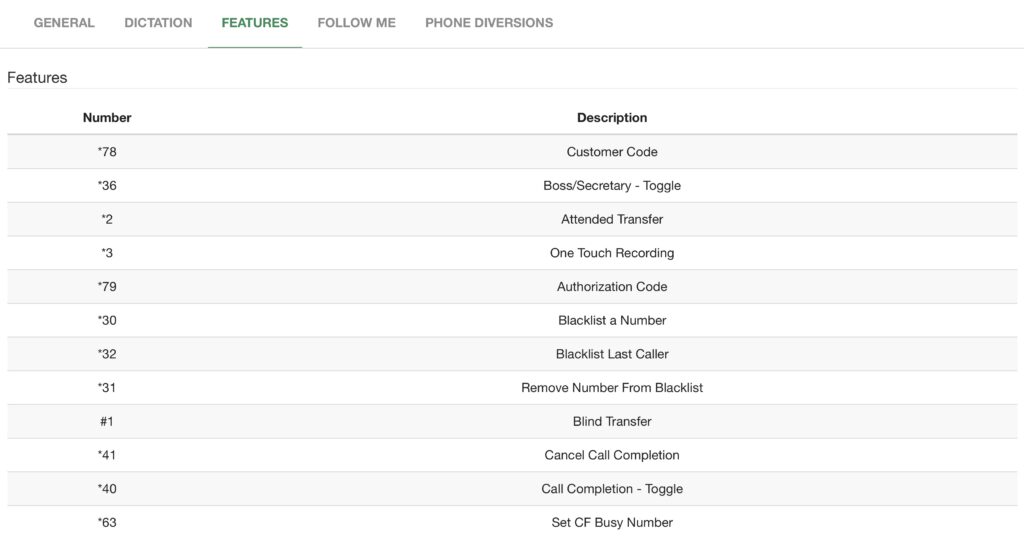
Next, we have the Features Tab. Here portal users can see the different feature codes they can dial from their extensions.
This is a simple cheat sheet they can use to know what a feature code does.
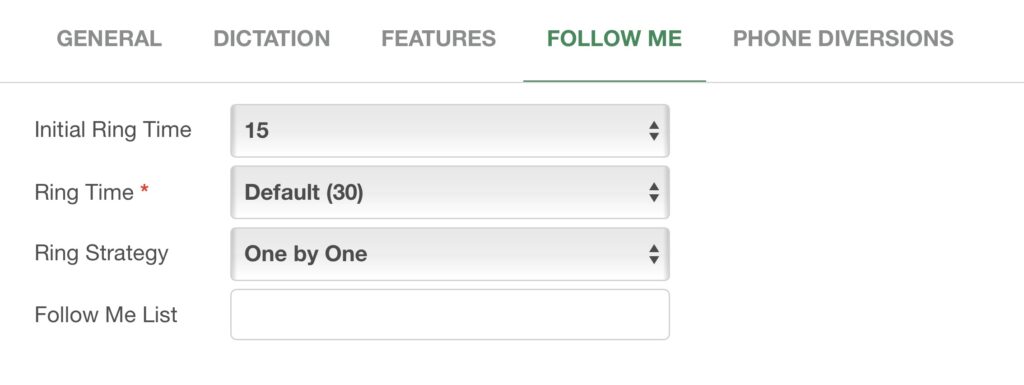
Afterward, we have the Follow Me Tab. Here, the portal user can configure their Follow Me Settings.
The settings include the following options.
- Initial Ring Time – This is the time in seconds the extension devices will ring before
going to the Follow Me List. - Ring Time – This is the time in seconds the module will call the numbers in the Follow
Me List. - Ring Strategy – This is the strategy the module will use to call the numbers in the
Follow Me List. This can be Ring All or One-by-One. - Follow Me List – This is the list of numbers the module will contact if the extension
does not answer within the Initial Ring Time
The end-user is able to enable Follow Me using the feature code *67 afterward.
Finally, there’s the Phone Diversions Tab. Here the portal user is able to manage their phone diversions.
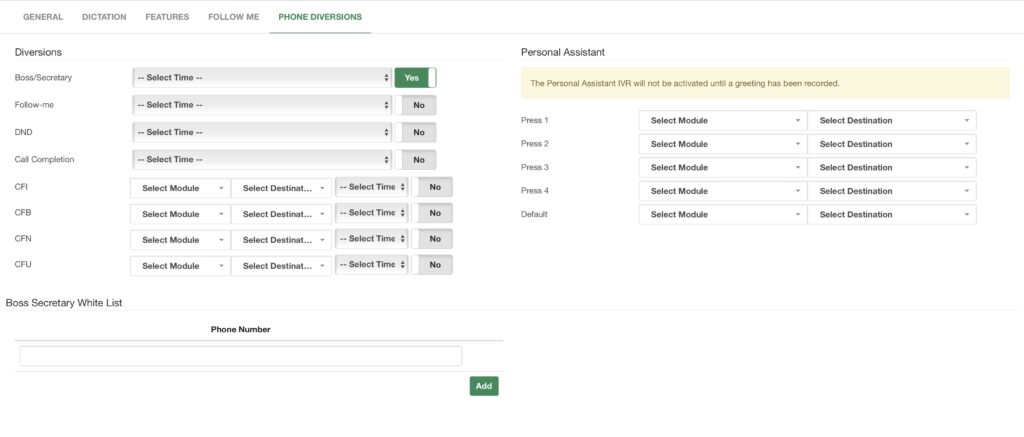
Similar to what we saw in the Extension Status module, here the end-user is able to manage the different diversions. They can Enable and Disable their Boss/Secretary, Follow Me, Do Not Disturb, Call Completion, and Multiple Call Forwards.
Portal users can create their own Time Groups by going to Portal > Configure > My Time Groups. These are created in the same way we did as the super administrator.
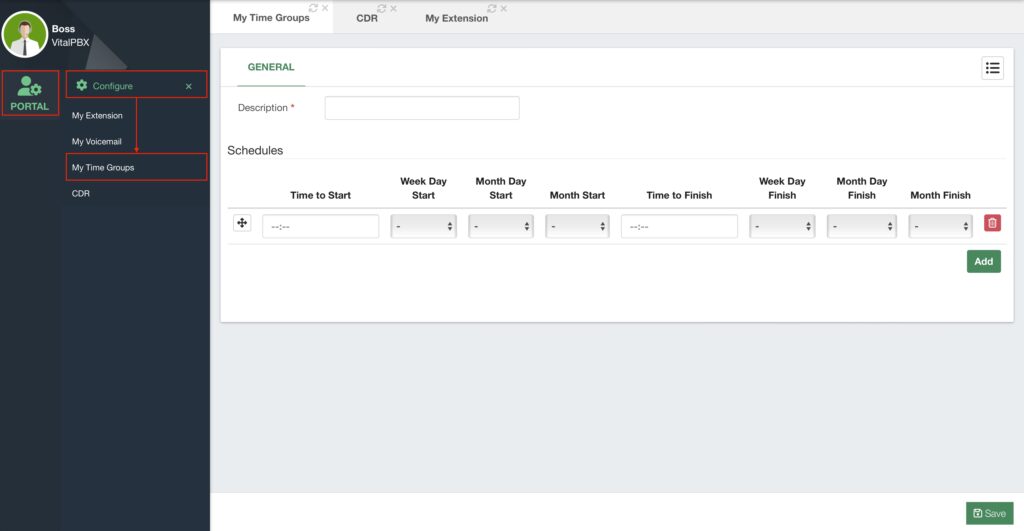
The portal user can then associate their time groups with their diversions to automate their activation.
If the portal user is using the Boss/Secretary feature, they are able to add a white list in the Phone Diversions tab as well. This way, the numbers added to this white list will skip the Boss/Secretary and be able to reach the extension directly. You can add as many numbers as you need by clicking the green Add button.
Lastly, you have the Personal Assistant configurations. We will see this in more detail in the next lesson.
Continuing with the User Portal, the next module is My Voicemail under Portal > Configure > My Voicemail. This is a visual way for the end-user to see their voicemail box.
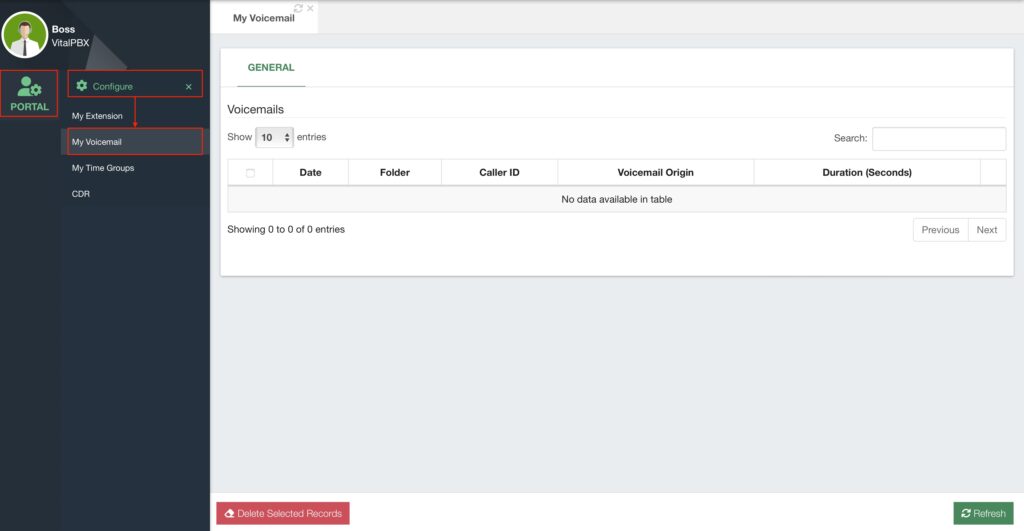
The end-user can see detailed information about the voicemail messages, play them back, and delete multiple records.
Finally, with the User Portal, end-users can see their call history under Portal > Configure > CDR.
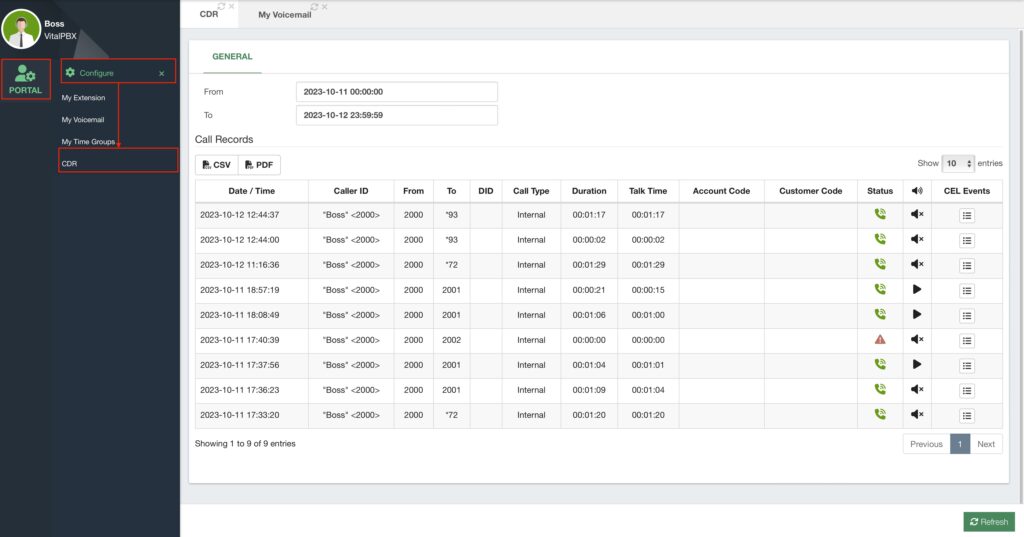
Here, the portal user is able to see their full call history and listen to their call recordings.


