To start creating a Multi-Tenant environment with VitalPBX, you will first need to install the Multi-Tenant module under Admin > Add-Ons > Add-Ons.
Note: The Multi-Tenant module in VitalPBX is a commercial add-on. This means that you need to purchase a license to be able to configure more than one tenant. Licensing for the Multi-Tenant add-on can be purchased for a bundle of tenants through the store on the VitalPBX website, or you can subscribe to the
Carrier Plus Licensing Plan so you can create as many tenants as your system can handle.
If you use the Carrier Plus Licensing Plan, even though software-wise we don’t limit the number of tenants, we recommend up to 100 tenants in a single server.
This is based on our recommended maximum hardware specifications.
- 16-core CPU at 3.2 Ghz
- At least 32 GB of Memory
- At least 4 TB of Storage
This is mostly an Asterisk limitation to the number of tenant configuration files it can handle. If you go above this number of tenants you might start experiencing a decrease in the quality experience for end users and administrators in terms of system slowdowns, especially when applying changes.
Once the add-on is installed, you can refresh your browser, and you will have the Multi-Tenant menu option under Admin > Multi-Tenant.
Now, we must go to Admin > Multi-Tenant > Tenants. Here is where we will configure all of our tenants.
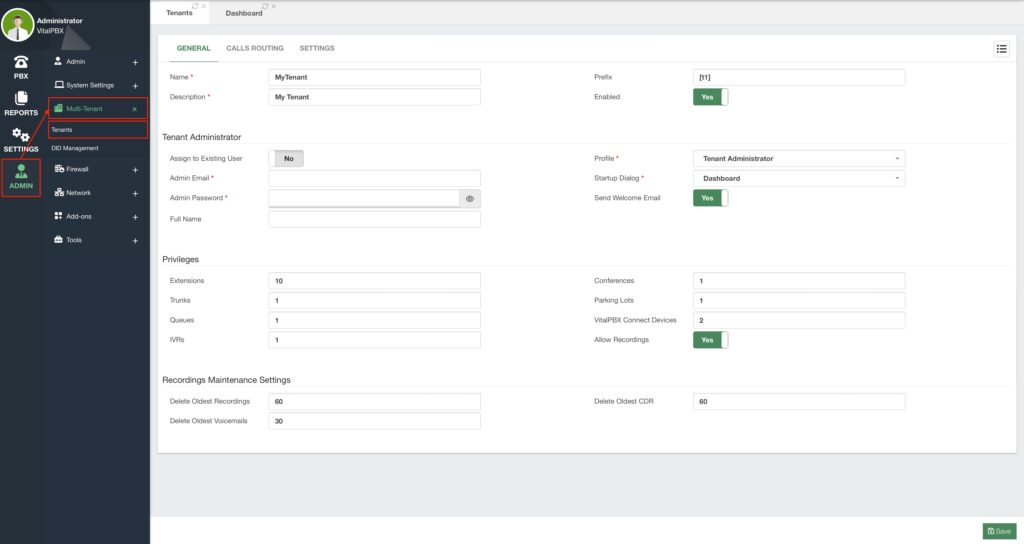
Here you will first see the General Tab. This is where the main configurations of a tenant will go. First, add a Name and a Description to identify this tenant. The name cannot have any spaces or special characters, while the description can.
Next, we have the Prefix, which is a key element to how Multi-Tenancy works with VitalPBX.
The prefix is used throughout the tenant’s configurations to make their devices and trunks unique. With the prefix, you can have the same numbering plan for every tenant without it clashing between tenants. By taking advantage of how VitalPBX separates the extension numbers and devices, you can have extension 1000 in tenant A and extension 1000 in tenant B.
You can enable or disable a tenant at any time.
Next, we have the Tenant Administrator section. Here, you can create a new user that can manage the tenant. This is similar to how you create a user in the Users module under Admin> Admin > Users. You can select a User Profile, which has the Tenant Administrator profile by default. You can make changes to this user profile or make a new one if you want to add or remove access to certain modules in the VitalPBX Web UI. When creating a new Tenant Administrator, you can send the Tenant Welcome Email. This uses the email template found under Admin > Settings > Email Templates. This can be used to notify the Tenant Administrator that a new tenant has been created for them and give them the credentials so
they can manage their new tenant. Optionally, you can change the Startup Dialog screen they will see when they log in.
Next, we have the Privileges section. Here you can establish the number of items the tenant will be able to create. You can set the number of Extensions, Trunks, Queues, IVRs, Conference Bridges, Parking Lots, and VitalPBX Connect Devices (If the module is installed).
Afterward, you can Allow Recordings for the tenant. When allowing recordings on a tenant, you will see the Recording Maintenance Settings. This uses our Maintenance add-o module, which we will see more about later. Here, you can establish how long you are going to keep Call Recordings, Voicemails, and CDR items. The fields accept any number of days you wish to keep these items before they are deleted.
With the general settings set, we can now go to the Calls Routing tab.
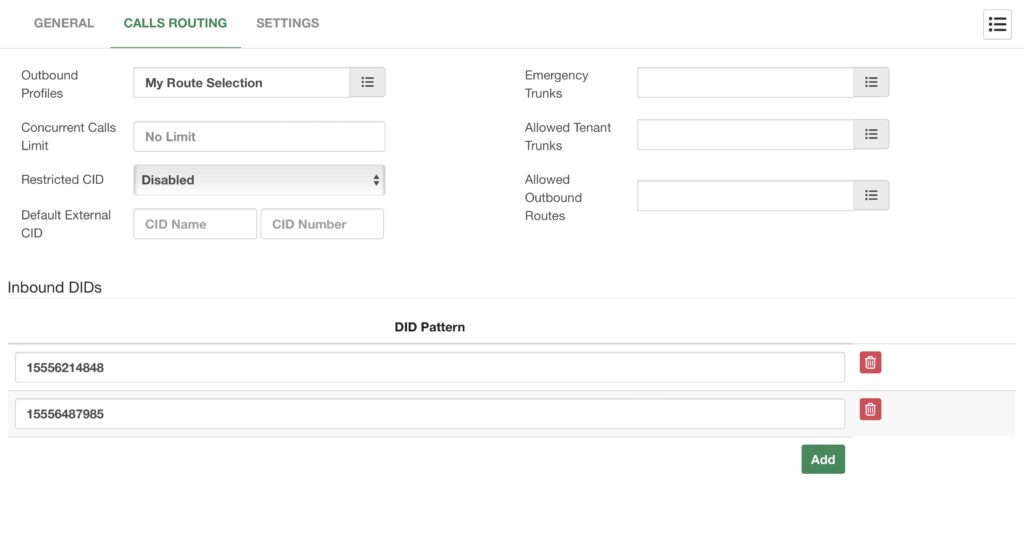
Here is where you are going to manage the incoming and outgoing calls for this tenant.
With VitalPBX you can configure your Trunks and Outbound Routes on the Main Tenant/System and share them with your tenants. This way, if you are managing the DID numbers and trunks for your tenants, you don’t need to configure a trunk for each tenant and create the outbound routes over and over.
For this, once you have your trunk and outbound routes configured on the main tenant, you can use what we call Outbound Profiles to share them with your tenants. Outbound profiles are basically Route Selections that contain the outbound routes you wish to share.
So, go to PBX > Class of Service > Route Selections. Create a Route Selection with your outbound routes, and Save and Apply Changes.
Then, under the Outbound Profiles field, you can select the Route Selection you have created. This way, the Route Selection is applied to the All Permissions Class of Service within the tenant, and the tenant will be able to place outgoing calls.
Extensions within the tenant with this Class of Service, or any Class of Service with this Route Selection will be able to place outgoing calls through the trunk in the main tenant. Any changes you make from the main tenant to these routes or trunks will be automatically applied to all tenants using it.
You can also set a Concurrent Calls Limit, to limit the number of concurrent outgoing calls the tenant can have.
For incoming calls, you can declare the DIDs you want to assign to the tenant under the Inbound DIDs list. Whenever a call comes to the main tenant toward this DID, the call will be automatically routed to the tenant, and within the tenant, you can create an inbound route to route the call to any destination.
Next, you can define how to treat the outgoing CID (Caller ID) information with the Restrict CID option. Here you can choose between the following.
- Disabled – This will allow the tenant to use any CID information they send for
outgoing calls. - Default – This will use the values entered in the Default External CID fields.
- DIDs – This will allow outgoing calls only if the tenant uses any of the numbers
defined under the Inbound DIDs list. This will prevent tenants from using any CID
information that is not an assigned DID number.
Optionally, you can define specific Emergency Trunks, if these differ from the outbound profiles. As well as Allowed Tenant Trunks to give the tenant the ability to create a trunk with other tenants. We will see more about Tenant Trunks in the next lesson. Finally, the Allowed Outbound Routes is an older way of assigning an outbound route from the Main Tenant to the different tenants. This is not used as often anymore.
Finally, we have the Settings tab. Here we can define additional settings like a Time Zone for this tenant, in case it is located in a different time zone to the main system. Select which External add-ons from the Sonata Suite and VitXi you will allow the tenants to have access from the User Menu in the upper right -hand corner.
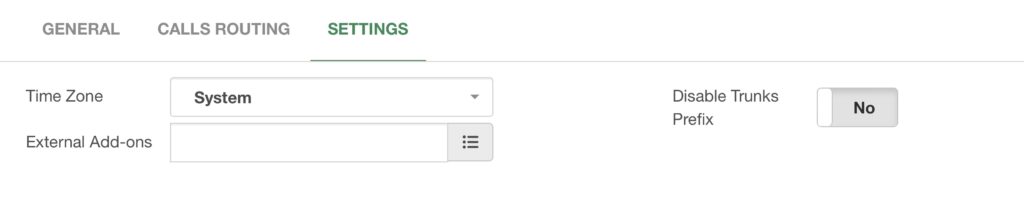
Finally, you can Disable the Trunks Prefix, this will remove the prefix defined in the general tab from the trunks created within the tenant. This can be useful if you need to create more than one trunk in different tenants from the same provider using the Username Authentication method.
Note: Disabling the Trunk Prefix for multiple tenants may lead to device name
duplicity, meaning that there are multiple trunks using the same Local Username.
This will eventually harm the performance of Asterisk, leading to an application
crash.
With all of these configurations set, you can now Save and Apply Changes.
As the Administrator of the Main Tenant, you can navigate between tenants easily. Refresh your browser and in the upper left-hand corner under your user’s name, you will see that you now have a drop-down menu.
Here, you will find the list of the different tenants. You can also search for a specific tenant.
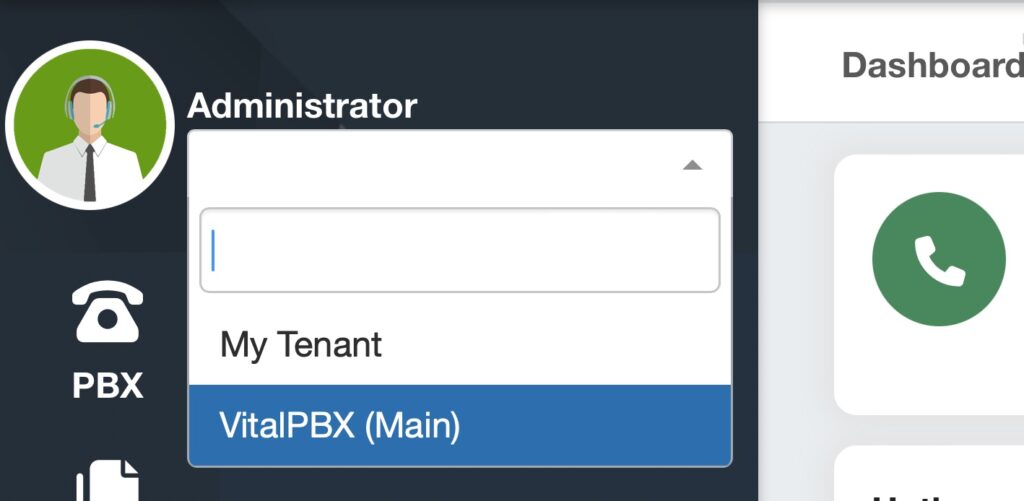
From here, if you click on the tenant, you will enter the tenant and be able to manage it.
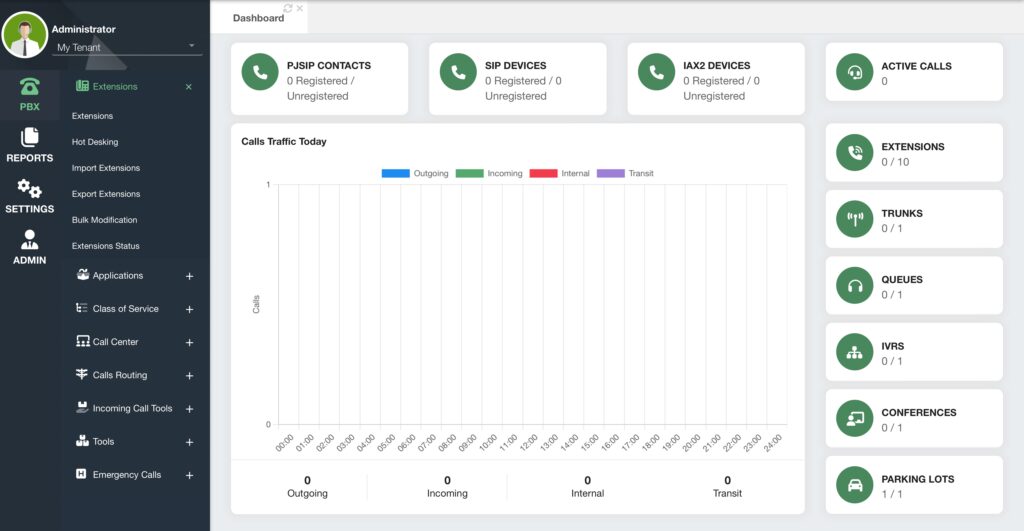
As you can see, the dashboard is a little bit different from the Main Tenant’s dashboard, as it contains information relevant to this tenant only. Otherwise, the modules and navigation are the same as any other VitalPBX installation. Here, tenant administrators can start to configure their extensions, IVRs, Queues, and more. Just as if they had their own VitalPBX installation.
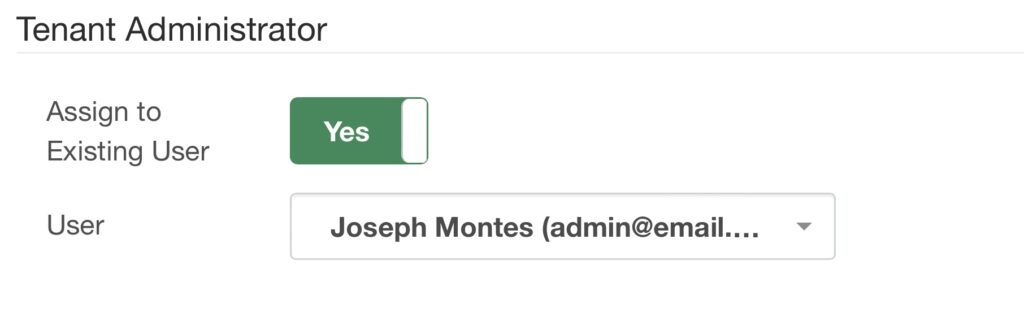
If you log out and use the credentials for the Tenant Administrator you created, you will see this same tenant dashboard and configurations, without the ability to access the Main Tenant. You can assign multiple tenants to the same Tenant Administrator user account. When creating a tenant, you can select Assign to Existing User, which will show you a list of available users.
Additionally, you can go to Admin > Admin > Users, and when creating a user this way, you can select which tenants this user has access to.

When a user has access to multiple tenants they will also have the tenant selection drop-down menu to navigate between tenants.
Having the ability to assign multiple tenants to a single user gives you the ability to create a Reseller Environment, where these Tenant Administrators can manage their tenants and sell the PBX service to their customers. With all of this covered, you now have a full Multi-Tenant environment with VitalPBX!


