With VitalPBX you can configure end-client devices from the Web UI by using the Phone Provisioning module. This add-on module supports most of the most popular brands and their supported models. Once you have the Phone Provisioning add-on module installed, we will begin by going to PBX > Provisioning > HTTP Settings. Here, you can assign an Auth User and Password that is used by the devices to have access to the provisioning files. This is optional, so this setting can be skipped. You can also select the tenant this Auth User and Password works for. We will see more about Multi-Tenancy later. With the Auth User and Password set, you can press the Save button in the bottom right-hand corner.

Next, we will go to PBX > Provisioning > Server Settings. Here, you will enter the Server and
Port Information to be used by multiple devices during provisioning.
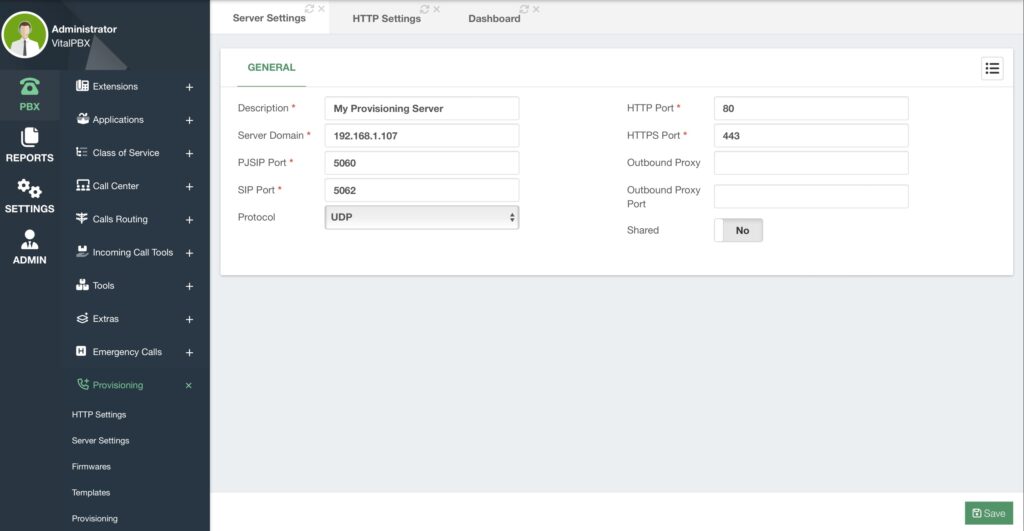
The Shared option allows you to share these server settings with other tenants. For the time being, we will leave everything by default, and simply add a Description and the Server Domain, which can be the VitalPBX server’s IP address or a valid FQDN ( Fully-Qualified Domain Name), and then click on the Save button in the bottom-right corner.
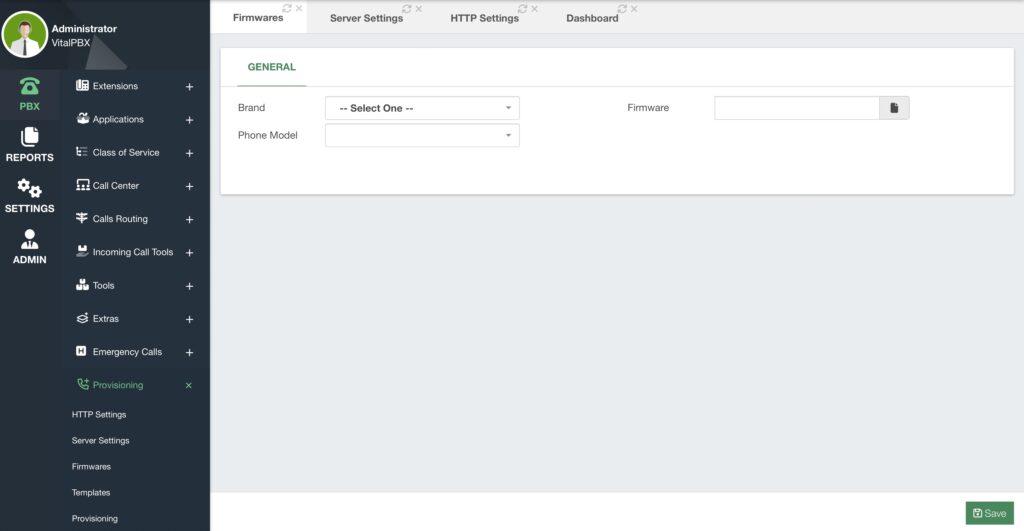
Next, we can go to PBX > Provisioning > Firmwares. Here, you can upload any firmware binaries for different phone models. You can choose the Brand and Phone Model and upload the Firmware binaries. You can then click on the Save button in the bottom right-hand corner. For now, we are not going to upload any binaries.
We can now start creating templates that we can use with multiple devices. For this, we will go to PBX > Provisioning > Templates.
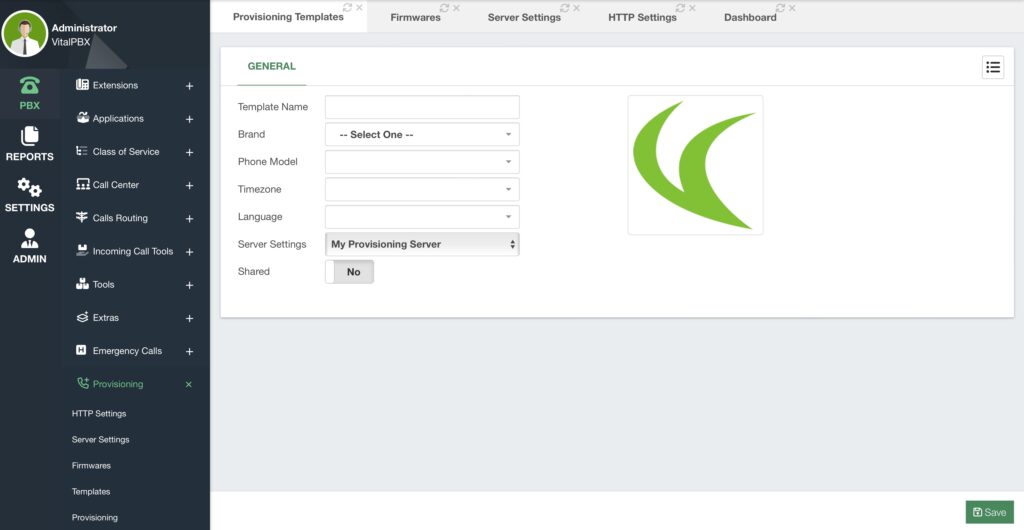
Here, you will create the templates for the global configurations to be used by the different devices. To create a template, you will need to add a Template Name, and then select the Brand and Phone Model. For this example, we will be creating a template for a Yealink T58V.
With the brand and phone model selected, you will be presented with an image of the device you are creating a template for. Then, if possible, you can choose the Timezone and Interface Language information.
Next, you can select the Server Settings we have created previously. Since we only have one, then this is the default server settings that are used. Then, you can click on Share toggle, to share the template with other tenants.
Now, below these settings, you will find additional options you can configure for devices.
These options will vary based on the phone model.
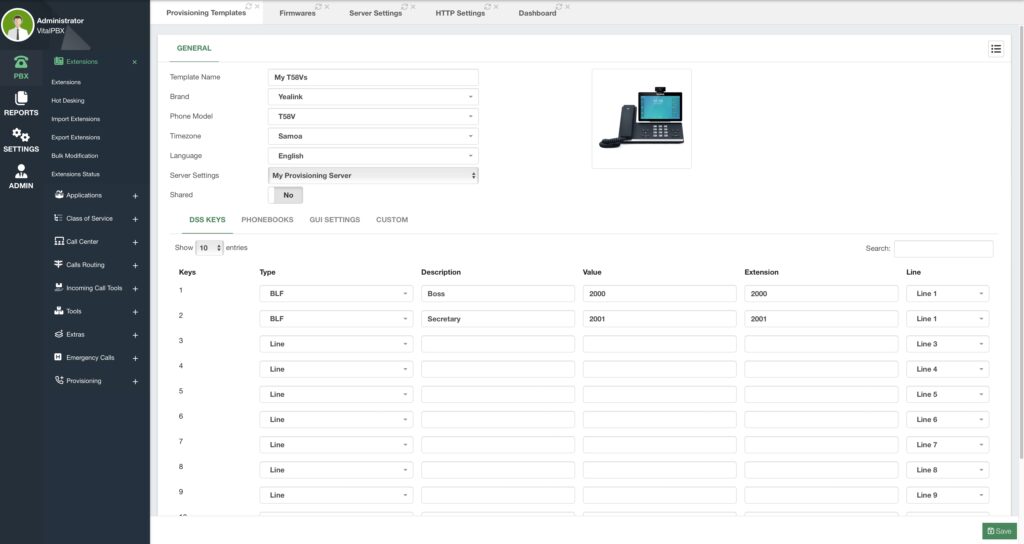
The DSS Keys page will have the number of DSS keys the phone models support. The options available will vary to match the options the phone model supports through the provisioning file.
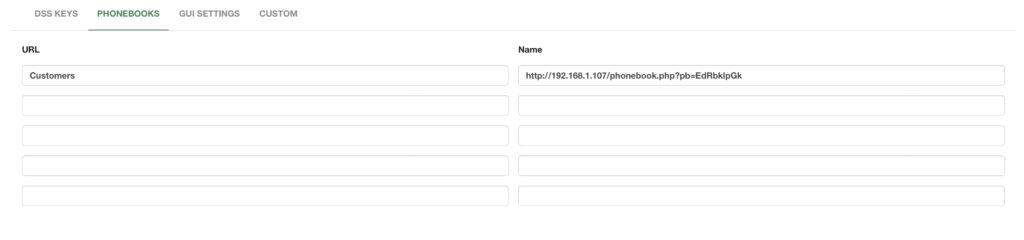
If the device supports it, you can add Phonebook URLs for remote directories.
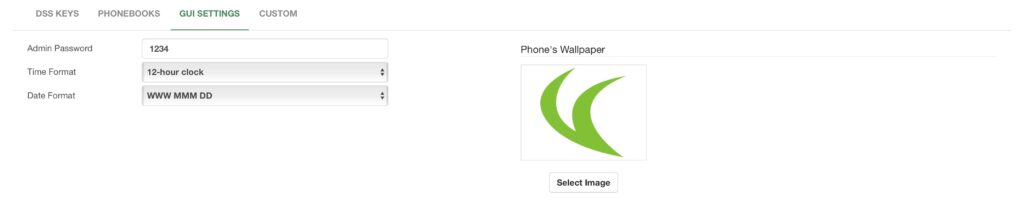
In the GUI Settings page, if the device supports it, you can change the Admin Password, Time, and Date Format. Additionally, you can upload a Wallpaper Image if the device allows it. Just make sure that you upload an image in the format supported by the device. To know the format, please refer to the device’s documentation.
Finally, you have the Custom page. The custom page is available for every phone model. This is the full configuration file displayed in case you want to enter any custom configuration that is not presented in the module’s UI.

With the template set up, you can go ahead and click the Save button in the bottom right-hand corner.
Now, we can go to the final section for the Phone Provisioning module, the provisioning itself. For this, we go to PBX > Provisioning > Provisioning.
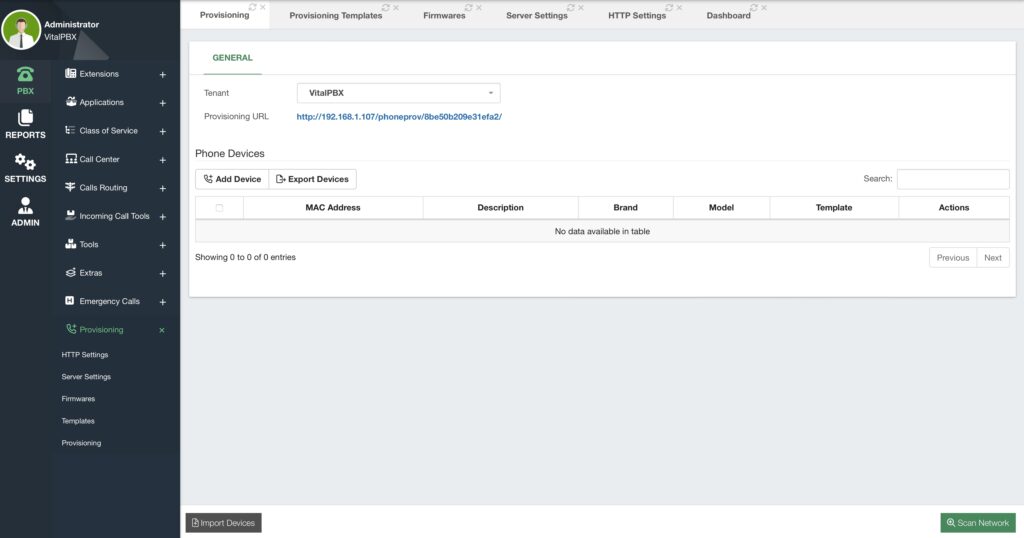
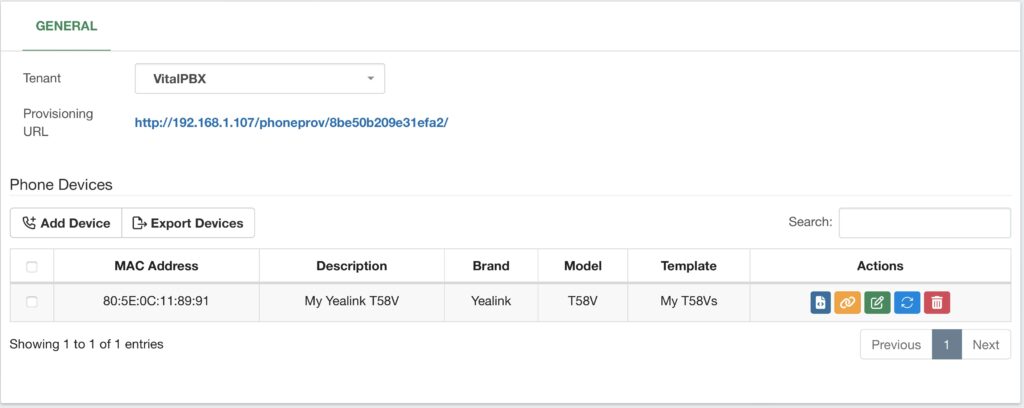
Here is where you will add the information for the devices to be provisioned. You will see at the top where you can select the Tenant to view their devices, as well as the Provisioning URL. We will talk more about this URL in just a moment. To add a device you can click the Add Device button.
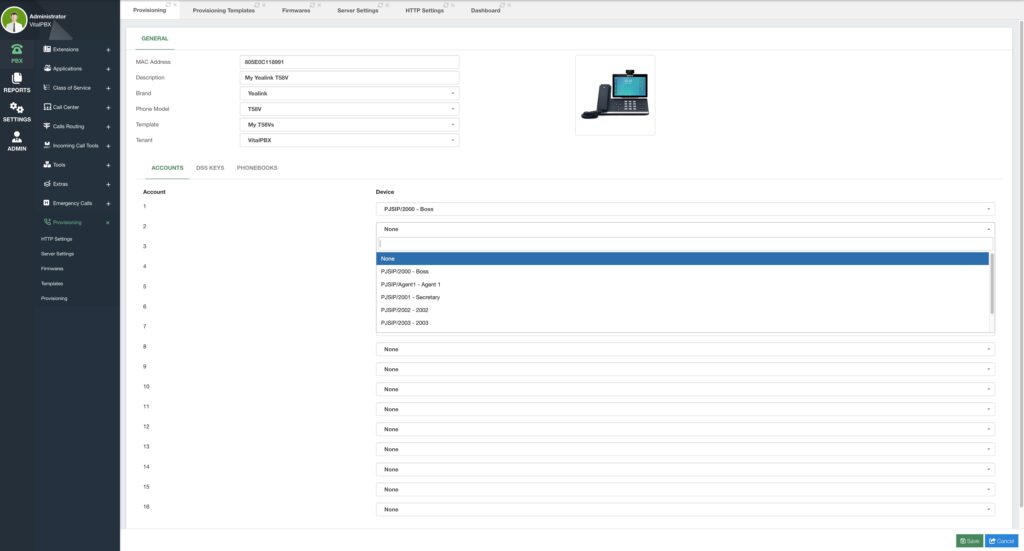
When adding a device, you will need to enter its MAC address and a Description. The MAC address can have not the colons. Then, select the Brand and Phone Model. This will show you the list of templates available for this phone model. In this case, I chose the Yealink T58V and the template we created previously. You can then select the Tenant to which this device belongs.
Beneath these options and the image of the device, you will see three pages. The first one pertains to the Accounts to add to the device. The number of accounts will vary depending on the phone model.
The Devices listed for the accounts will depend on the selected tenant. What you will see are devices rather than extension numbers only, as you can have multiple devices for the same extension number with VitalPBX.
Next in the DSS Keys page, you can add custom DSS keys for this device in specific. You can see the option to Overwrite the Template’s DSS Key configuration and configure a custom option for this device.
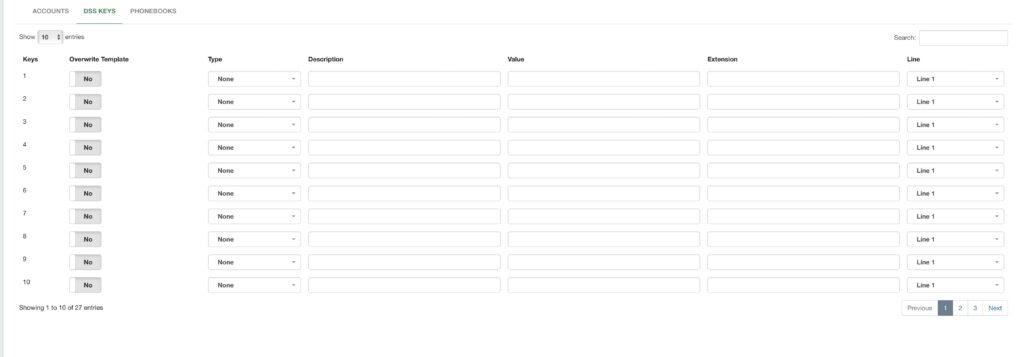
If you leave this blank, only the template’s configurations will be applied to the device. Finally, we have the Phonebooks page. Similarly to the DSS keys page, this will add remote directories to this device specifically if you toggle the Overwrite Template option.

In this case, we will leave these pages blank to use the template’s configuration, and then we will click on the Save button in the lower right-hand corner. This will add the device to the Phone Devices list, showing us some basic information and a couple of actions we can do from the Actions column.
From the Actions column, we can perform the following actions.
- View the Provisioning File – This allows you to view the final provisioning file so you
can check that everything is correct. - Copy the Provisioning URL – This allows you to copy the provisioning URL so you
can apply it to the device or the network using Option 66. - Edit – This lets you edit the configurations for this device.
- Reboot – This sends a reboot request to the extension numbers associated with this
device. Keep in mind that if multiple devices have the same extension number, they
will be rebooted as well. - Delete – This deletes the device from the provisioning list.
Additionally, you can import and export multiple devices from the provisioning list. To import them click on the Import Devices button in the bottom left-hand corner. This will show you a screen where you can upload a CSV file with the configuration for multiple devices. A template is available with the Download CSV Template button.
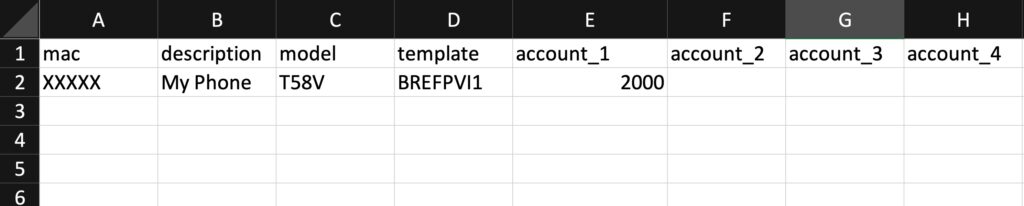
The CSV file is simple with a field for the MAC addresses, Description, Model, Template, and 20 Accounts.
The Model and Template nomenclature can be retrieved from the template itself. Go to PBX > Provisioning > Templates, and select a template from the list in the upper right-hand corner of the module.
You will see that a Unique Name has been created for this specific template. You can also see
what is the nomenclature used for the Phone Model itself. This needs to match exactly in the
CSV file so the devices are added correctly.
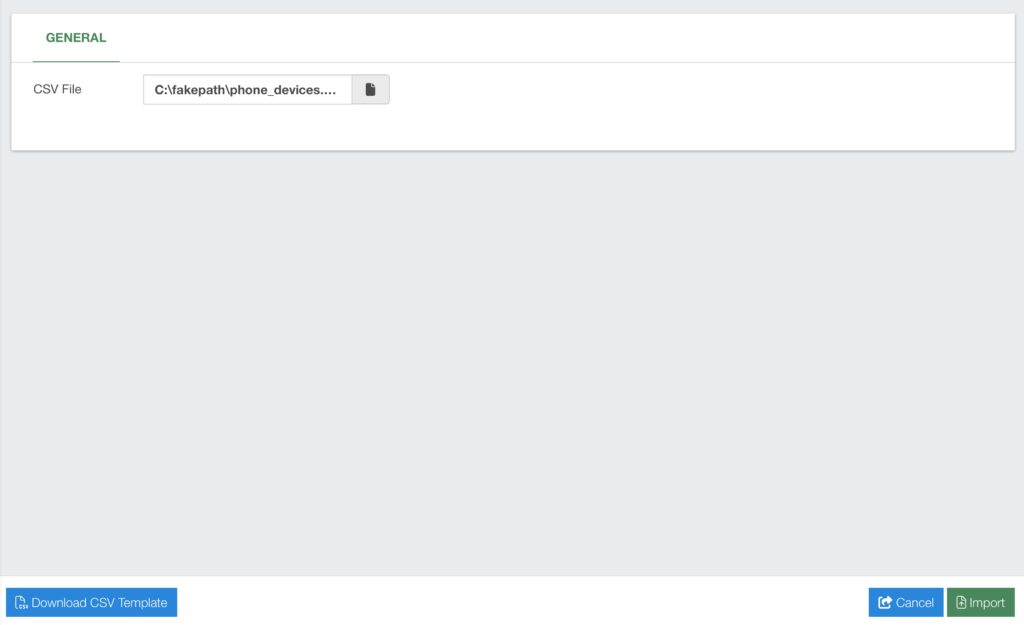
With the CSV file saved, you can upload the file to the module and click the Import button in the lower right-hand corner. Similarly, you can export the devices by clicking the Export Devices button. This will generate a CSV file you can use to import in another VitalPBX installation or use as a backup to import later.
One last way to create devices is by scanning the network. To do this, click on the Scan Network button in the lower right-hand corner. You will need to specify the reachable networks, and then click the Scan Now button in the lower right-hand corner. This will scan the local network in search of devices available. Keep in mind that you need to specify the network mask for it to scan a network. Also, this feature will only work in LAN environments, where the server is located in the same network as the devices. This will not work in VPS environments.
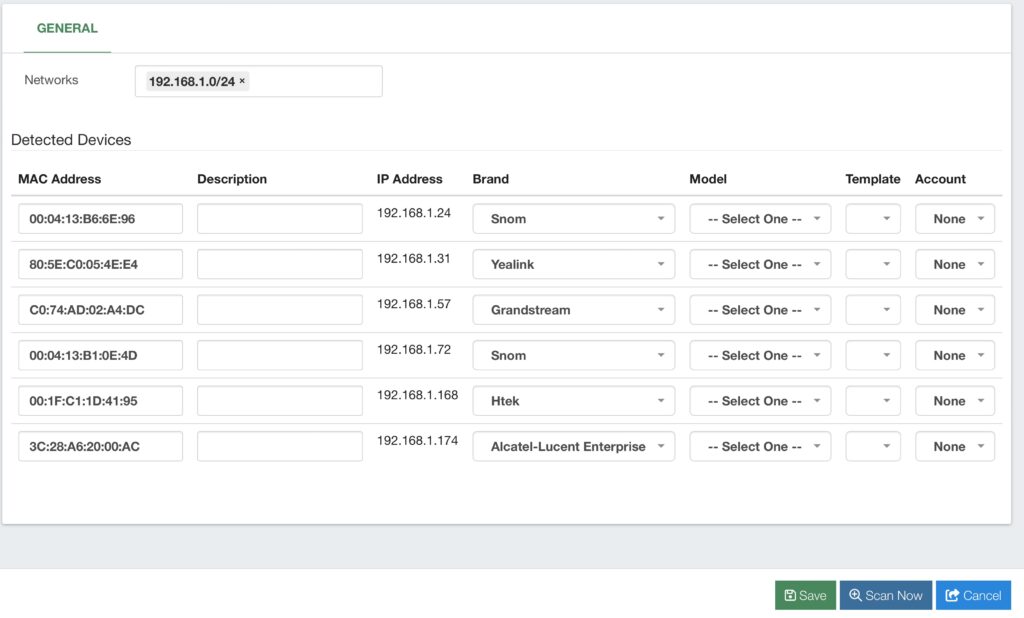
Once the network is scanned, you can quickly add a description to the devices, and one account for fast configuration.
After adding the configurations you can click on the Save button in the lower right-hand corner.
With the devices added by any of the means mentioned. You will now be able to provision these devices. To do so, you will use the Provisioning URL that was created for the tenant.
This provisioning URL can be added directly to the devices. The location of the URL will vary based on the device model.
Note that if you used an Auth Username and Password, this needs to be added to the device.
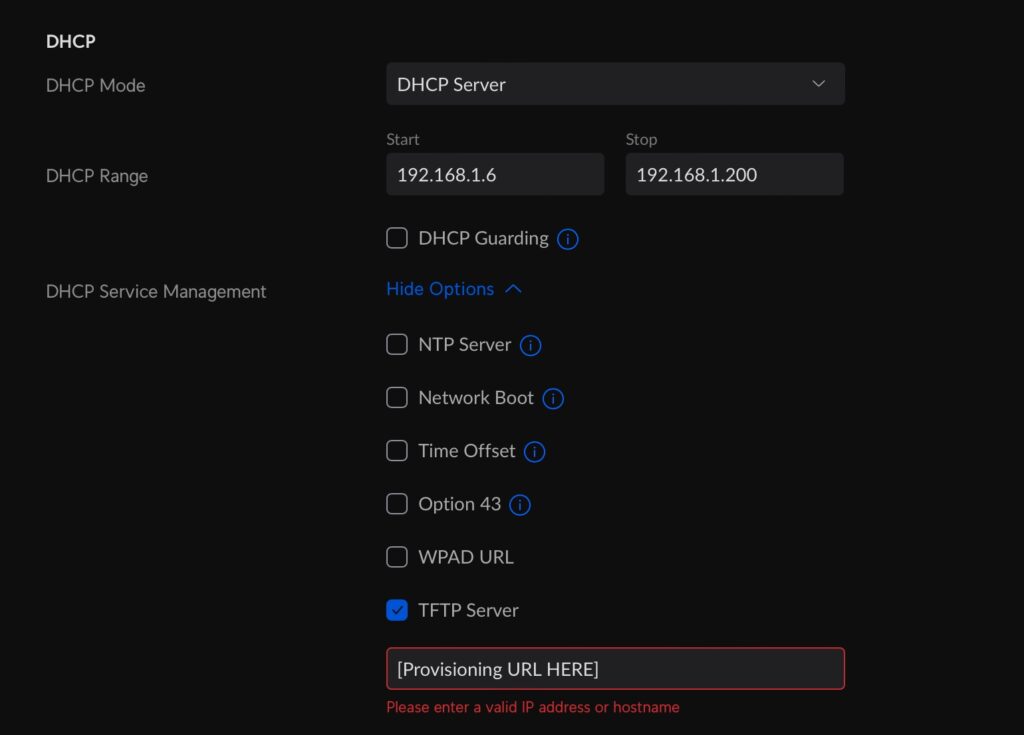
Optionally, you can add the Provisioning URL to the DHCP options in your network configuration. The option used is Option 66. This will push the Provisioning URL to the devices at boot when obtaining an IP address from the DHCP pool. The location of this option will vary based on your Network configurations.
Now, you can power cycle the devices and they will retrieve their configurations from the Phone Provisioning module in VitalPBX. You can continue to make changes to these configurations and reboot the devices from your VitalPBX installation.


