Let’s say you have a case where a customer has multiple branches and wants to have a tenant for each branch, but also they want extensions from Branch A to be able to call extensions on Branch B.
For this, we have the ability to create Tenant Trunks. Tenant Trunks allow us to create a direct connection between tenants without having to go through the network under a traditional PJSIP Trunk. Since both tenants are inside the same server, they can communicate directly within the server. To use Tenant Trunks, you must have at least two tenants who need to communicate with each other. Next, go to each tenant’s Calls Routing Tab and click on the Allowed Tenant Trunks tab.
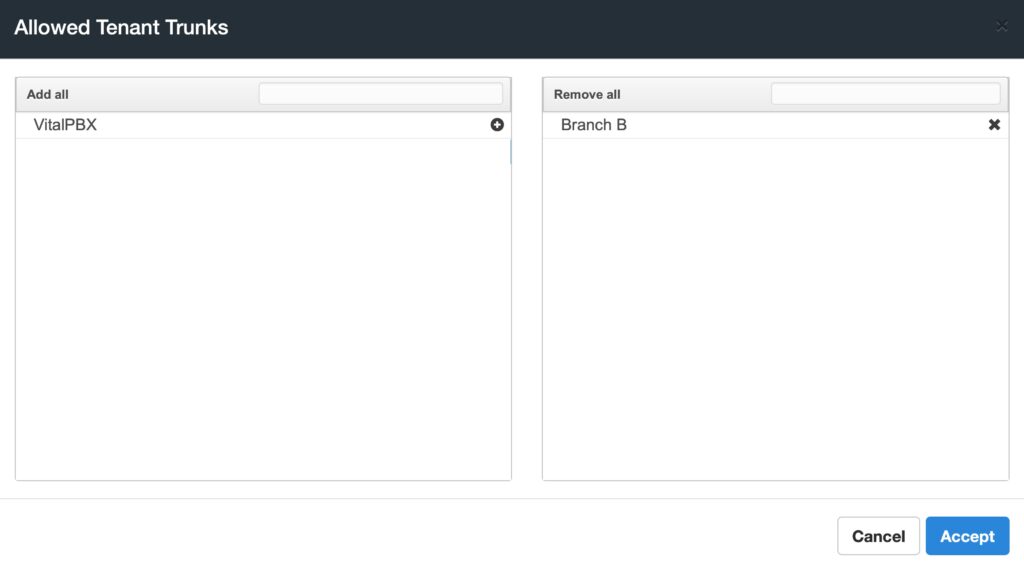
On each tenant, you must select the tenants with which they can have a tenant trunk. So, based on our example, in Branch A add Branch B as an allowed tenant trunk, and in Branch B, add Branch A as an Allowed Tenant Trunk.
Once you have configured the Allowed Tenant Trunk, Save and Apply Changes.
Now, navigate to each tenant and go to PBX > Calls Routing > Trunks.
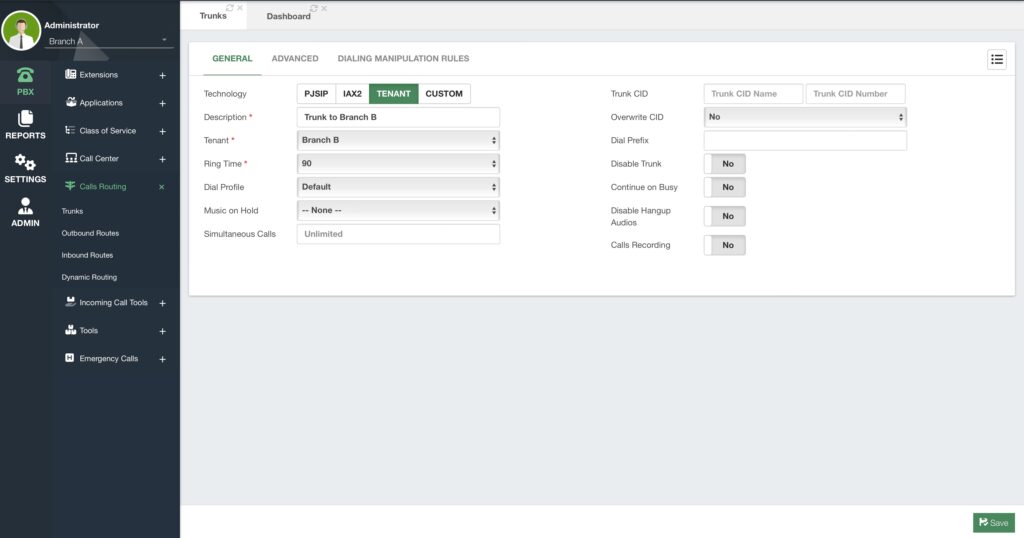
Here, you will see that an additional technology is now available with the option for Tenant.
When you select Tenant, an abridged selection of options will be available. We can leave most of them by default. We add a Description to identify the Tenant Trunk, and we select the Tenant with whom we will connect.
Then, we Save and Apply Changes.
Now we can head over to PBX > Calls Routing > Outbound Routes.
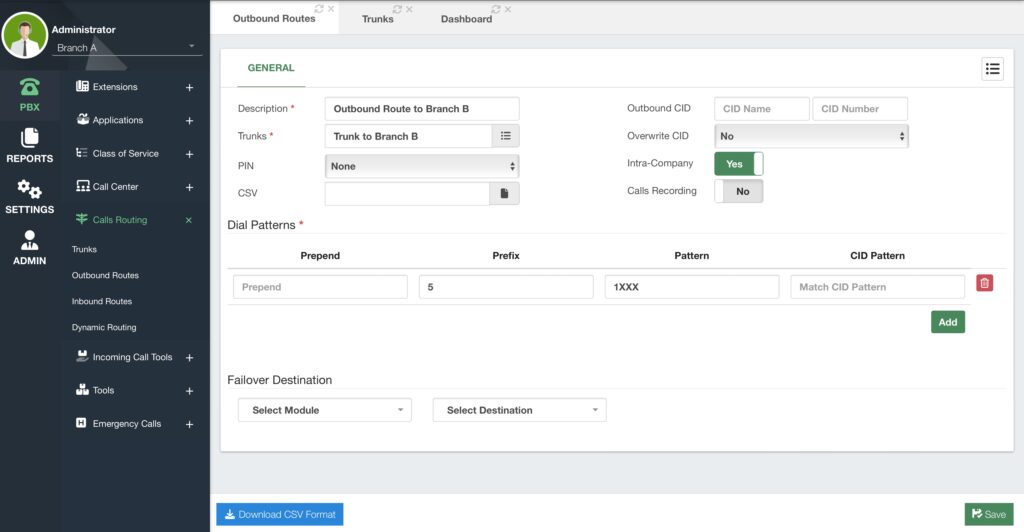
Here we are going to create an outbound route using the Tenant Trunk we have created.
It is possible to have the same numbering plan for both tenants. Meaning, that you can have extensions 1000-1100 in the tenant for Branch A, and extensions 1000-1100 in the tenant for Branch B. So to be able to specify that you are calling Branch B from Branch A, we will use a Prefix. In this example, we are using 5 as a prefix for calls going to the other branch’s tenant, but you can use any other number you like.
For the Pattern, we will use the following value.
1XXXWith this, we can dial any number from 1000 to 1999. So to dial to the other branch’s tenant, we dial something like this.
51000The 5 is then dropped when calling the other tenant, and extension 1000 is reached. This way, extension 1000 on Branch A can call extension 1000 on Branch B.
Additionally, we recommend you enable the Intra Company option, as this will use the Internal Caller ID information, instead of the External Caller ID.
Remember, you need to create the Tenant Trunk and Outbound Route within each tenant. Once you have configured both tenants, you are now able to place calls between each tenant using the Tenant Trunks and dial using the prefix and pattern from the Outbound Routes.


