When you are planning on accessing VitalPBX from remote locations, and your server is located in a LAN Network you must configure your router to forward the necessary ports for registration and voice traffic. This means that you will need to be able to translate incoming data from your Public network with a Public IP address to the VitalPBX LAN IP address. For this, you can configure the NAT Settings for PJSIP so VitalPBX can translate that communication. To do this, we will need to go to Settings > Technology Settings > PJSIP Settings.
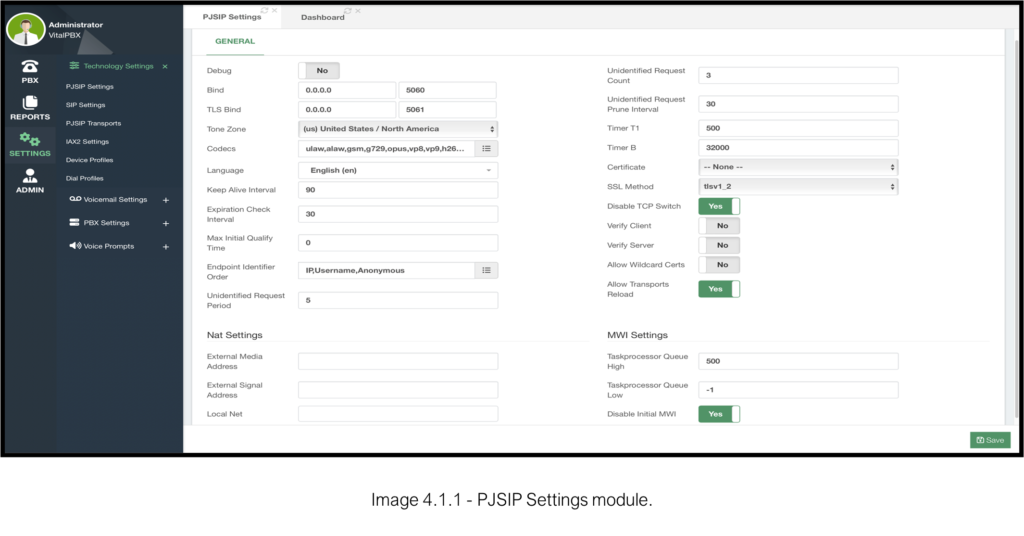
Here, you will see general configurations for PJSIP. Explaining all the features here is out of the scope of the VitalPBX guide, but we are interested in the bottom section called NAT Settings.
The only two fields we need to configure are External Media Address, External Signal Address, and Local Net. Both External Media and External Signal Addresses will need your Public IP Address. The Local Net field will require the Local Network where your VitalPBX installation is located.
The format for the Local Net field uses the dot cero for the whole network followed by a slash and the Netmask in CIDR or dotted format. E.g. 192.168.0.0/24 or 192.168.168.0.0/255.255.255.0.
With this, you can place calls normally when registered remotely.
As mentioned previously, NAT configurations are mostly necessary when you have your VitalPBX in a local environment and want to publish it with a Public IP Address/FQDN. And as we said, you will need to port forward ports on your router to be able to do this.
The necessary ports are as follows.
- 5060,5061 – These are used for PJSIP registration.
- 10,000-20,000 – These are ports used for RTP traffic (Voice).
Additional ports can be forwarded depending on your use. You can see a full list of ports used under Admin > Firewall > Services.
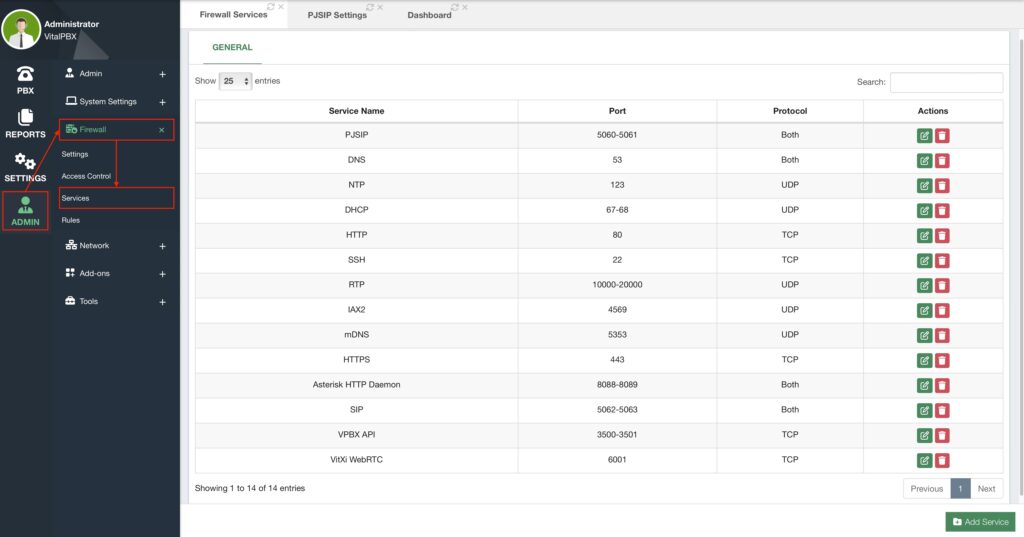
By default, these are ports used.
| Service Name | Port | Protocol |
| PJSIP | 5060 – 5061 | UDP, TCP |
| DNS | 53 | UDP, TCP |
| NTP | 123 | UDP |
| DHCP | 67-68 | UDP |
| HTTP | 80 | TCP |
| SSH | 22 | TCP |
| RTP | 10000-20000 | UDP |
| IAX2 | 4569 | UDP |
| mDNS | 5353 | UDP |
| HTTPS | 443 | TCP |
| Asterisk HTTP Daemon | 8088-8089 | UDP, TCP |
| VPBX API | 3500-3501 | TCP |
| VitXi WebRTC | 6001 | TCP |
All of these ports can be modified with the green Edit button under the Actions column. You can also control how you treat these ports in VitalPBX under Admin > Firewall > Rules.
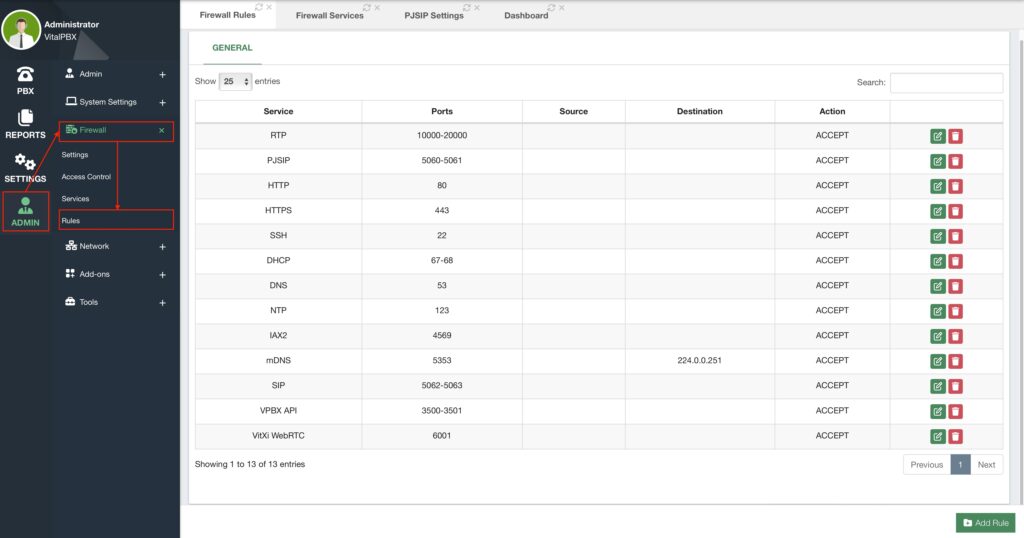
Here, you can choose if you are going to ACCEPT, DROP, or REJECT incoming packets through these ports. We will see in the VitXi Guide, how we manage the configuration of these ports for additional configurations.
Being able to modify and configure these ports and firewall rules is another way to secure your VitalPBX installation.


