Next, we will look into how you can create new VitalPBX users and limit which modules they can access. This way, other users can log into VitalPBX, but you can restrict which options they can or can’t configure.
Let’s begin by creating a new User Profile. For example, let’s create a profile that can only see the CDR (Call Detail Reporting). To do this, we will go to Admin > Admin > User Profiles.
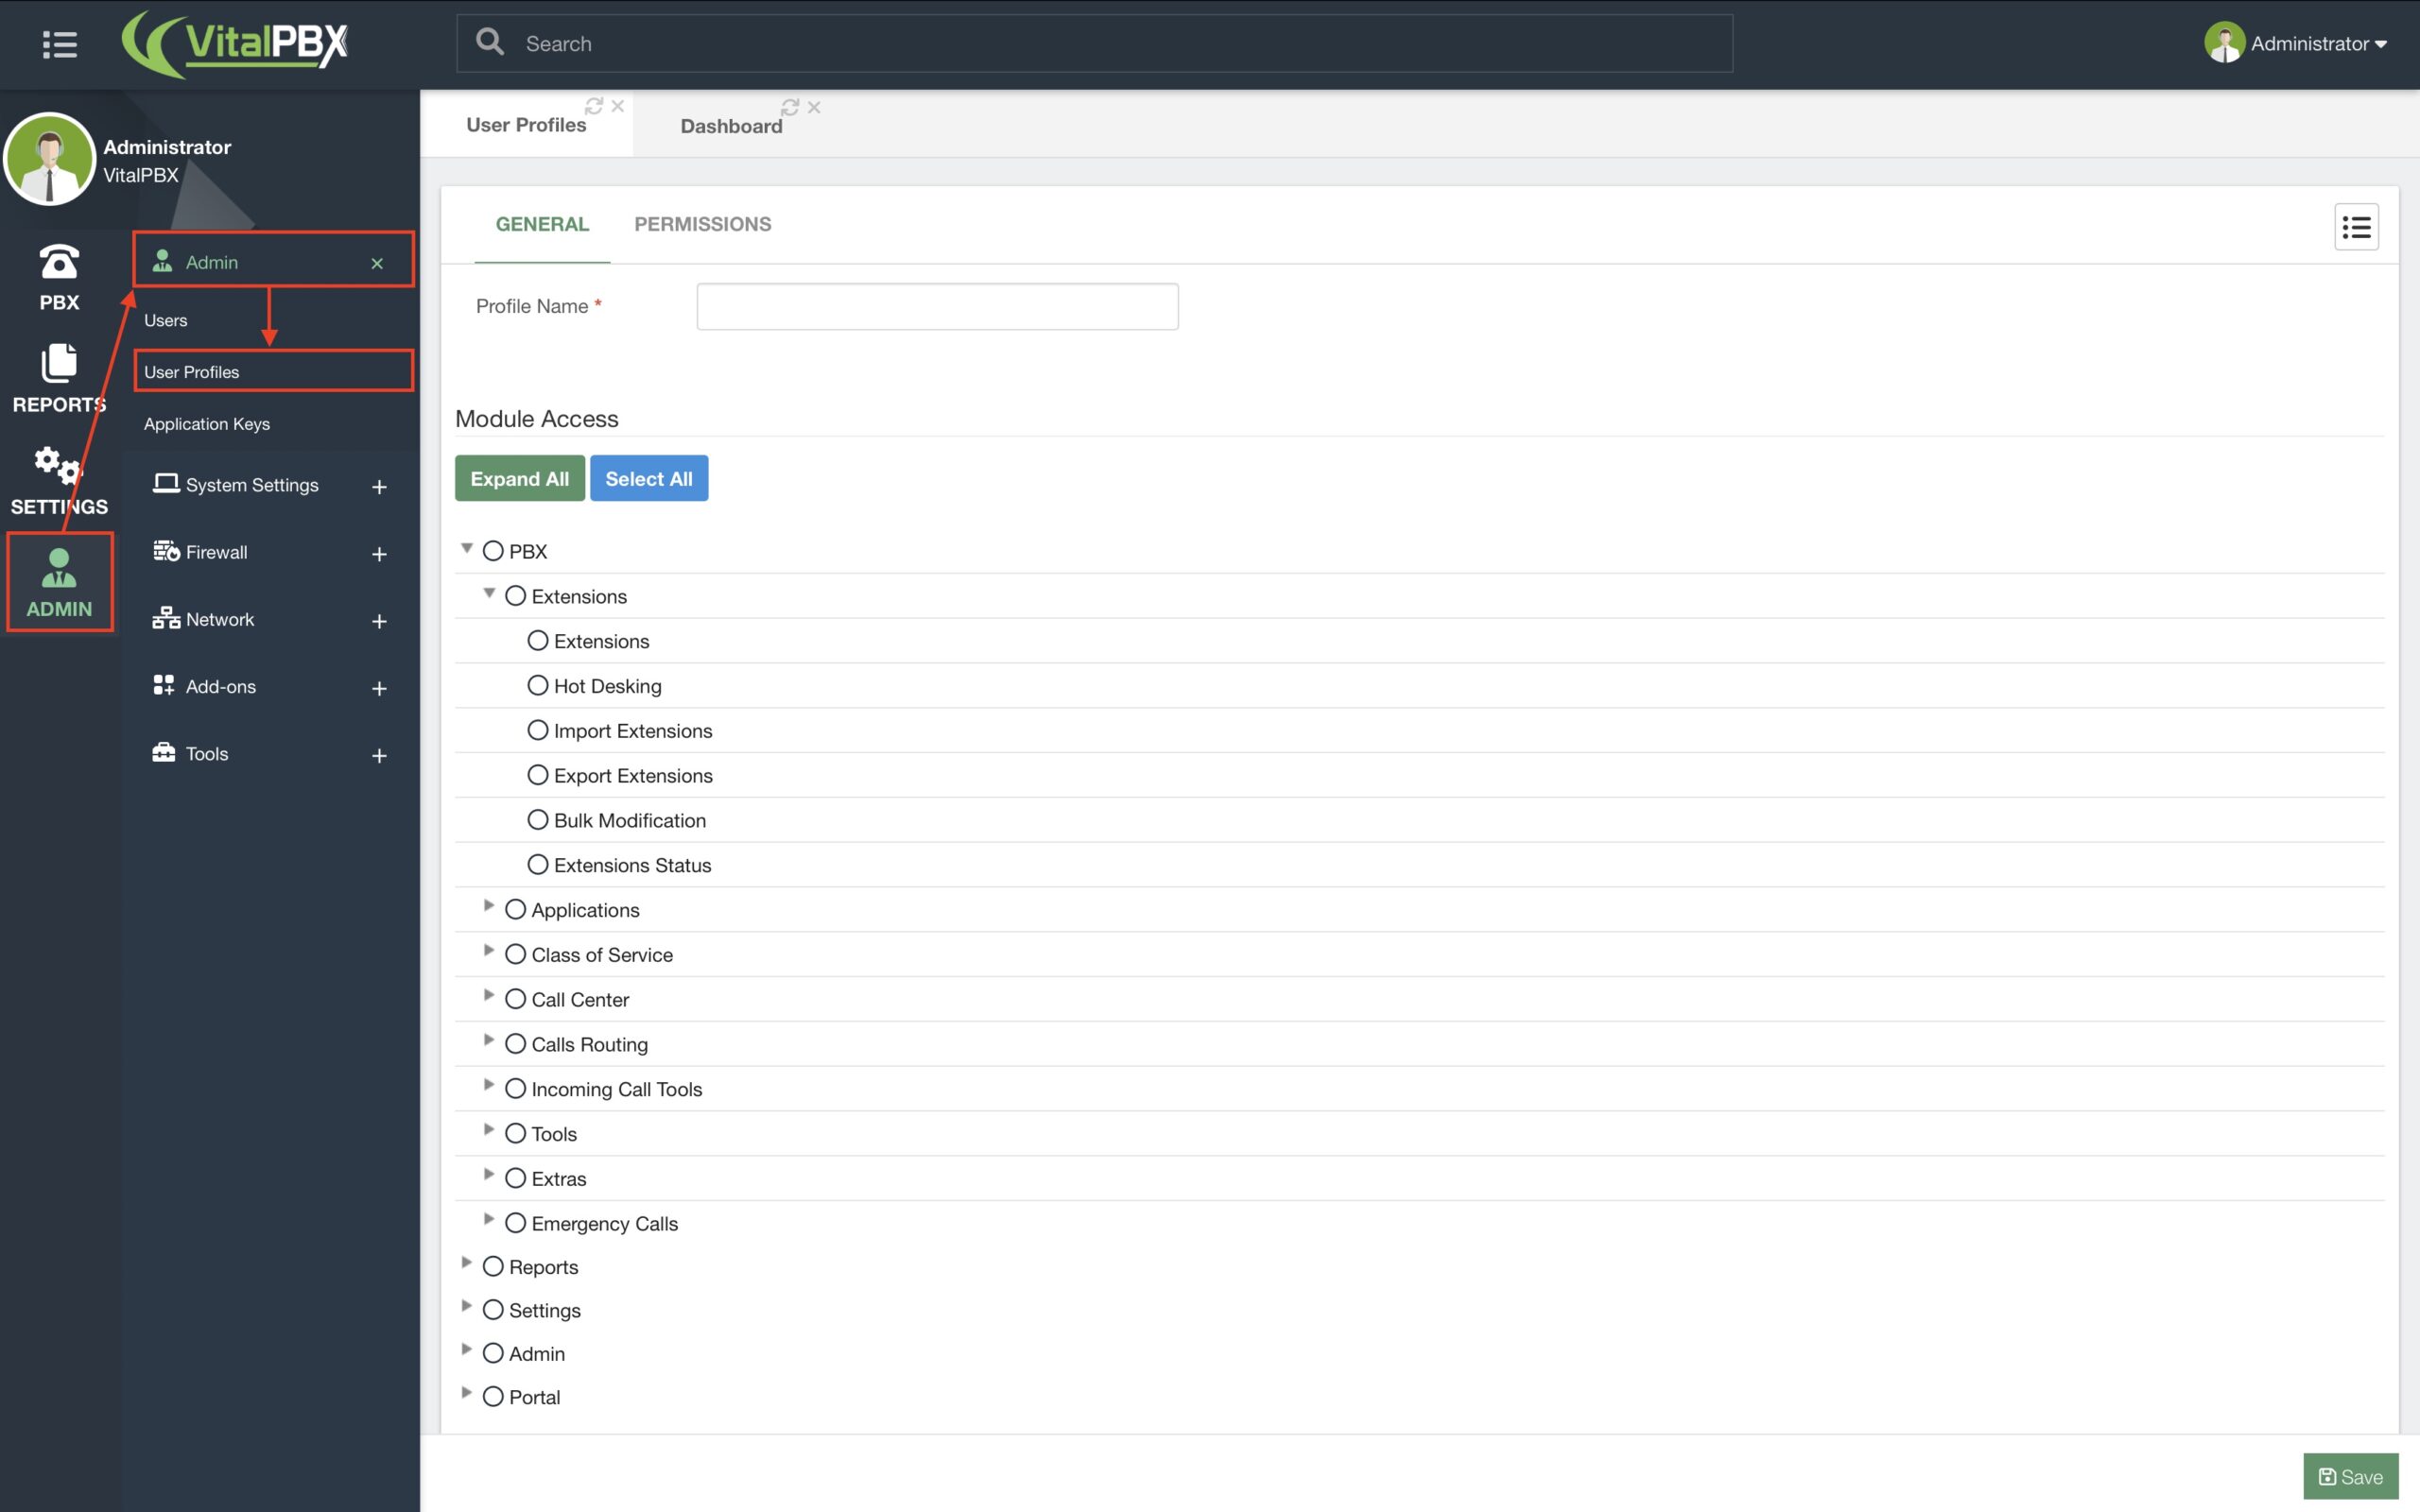
You can create a new User Profile by entering any name you desire under Profile Name. For this example, we can name it “CDR.”
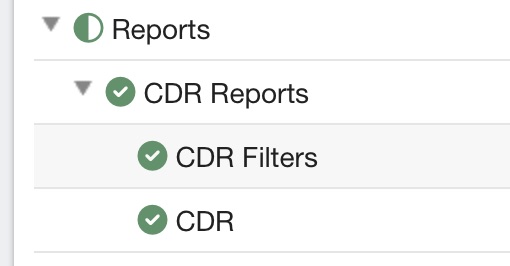
Then, on the lower part under Module Access, you can select the modules you wish to have access to with this User Profile. You can expand and select/deselect all the items with the buttons on top of this section. Here we can choose only the CDR modules for our sample profile.
You can then head to the Permissions tab. Here, you can choose whether or not a user can
update their profile, change their web UI language, or be able to update the system.

We will leave this with the default values for this example. Click Save.
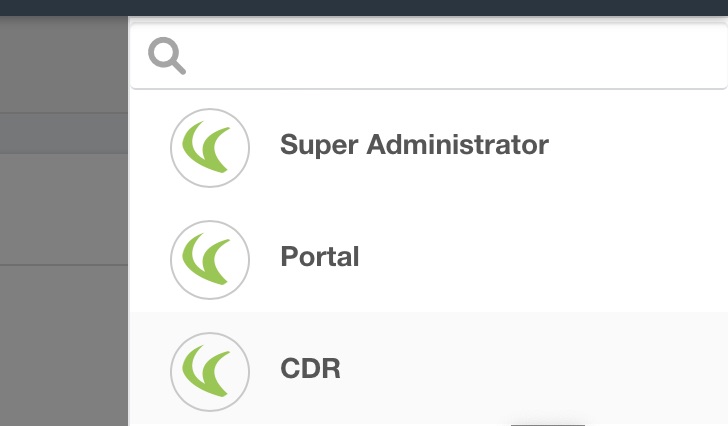
You will see your newly created profile listed with the default user profiles: Administrator,
Portal, and if you use our Multi-Tenant add-on, Tenant Administrator.
With the User Profile created, we can create a new user. For this, we will go to Admin > Admin> Users.
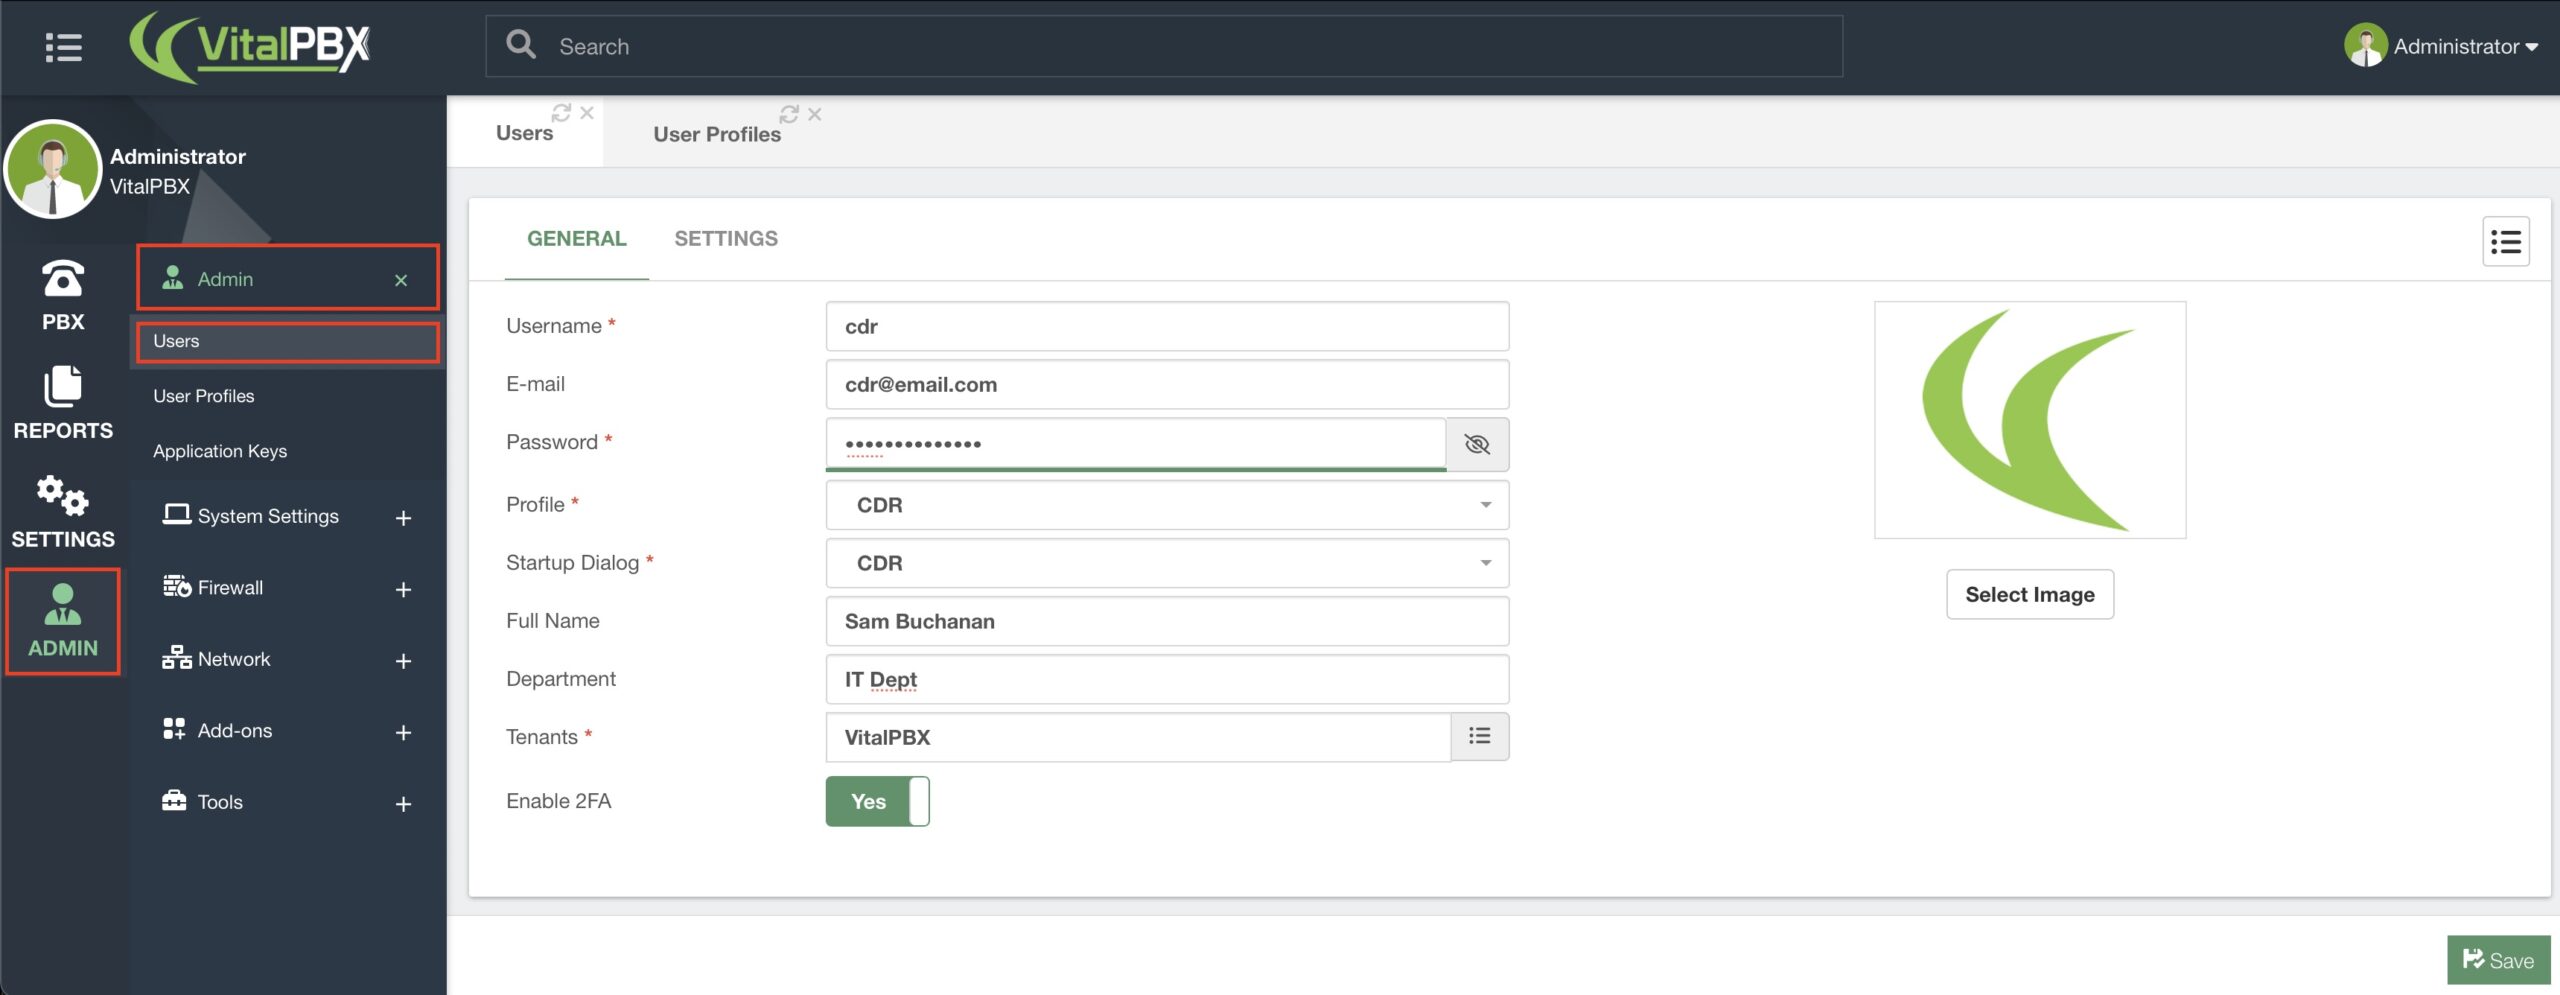
To make our user, we can configure the following.
- Username – This must not contain spaces or special characters.
- Email – This is an email address to identify this user.
- Password – The user’s password to log in.
- Profile – We can select any User Profile we have created.
- Startup Dialog – This is the first screen the user sees when logging in.
- Department – This is used to identify the user further and is optional.
- Tenants – The tenant this user belongs to.
- Enable 2FA – This allows you to add Two-Factor Authentication to this user.
- Profile Picture – This is used to identify the user further with an image
You can then click on Save.
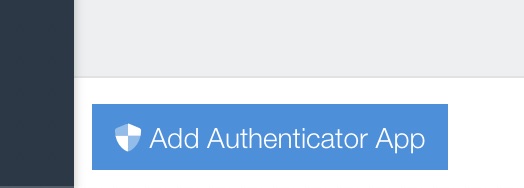
Afterward, we go back to the user we just created, and in the bottom left-hand corner, we can see the option to add a 2FA (Two-Factor Authentication) application. We recommend Google Authenticator.
When you click on it, you can scan a QR code or use a Setup Key to configure the 2FA with your authenticator application.
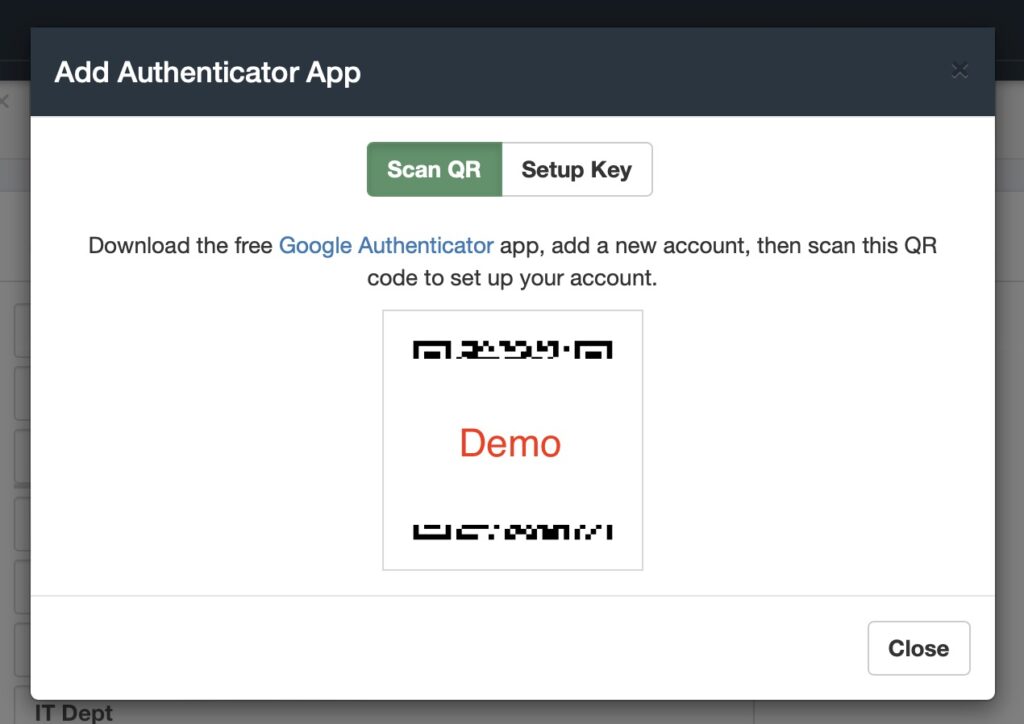
Once you have processed the QR code with your authenticator app, you can close the prompt, and when logging in with the user, you will be asked for a 2FA code to enter.
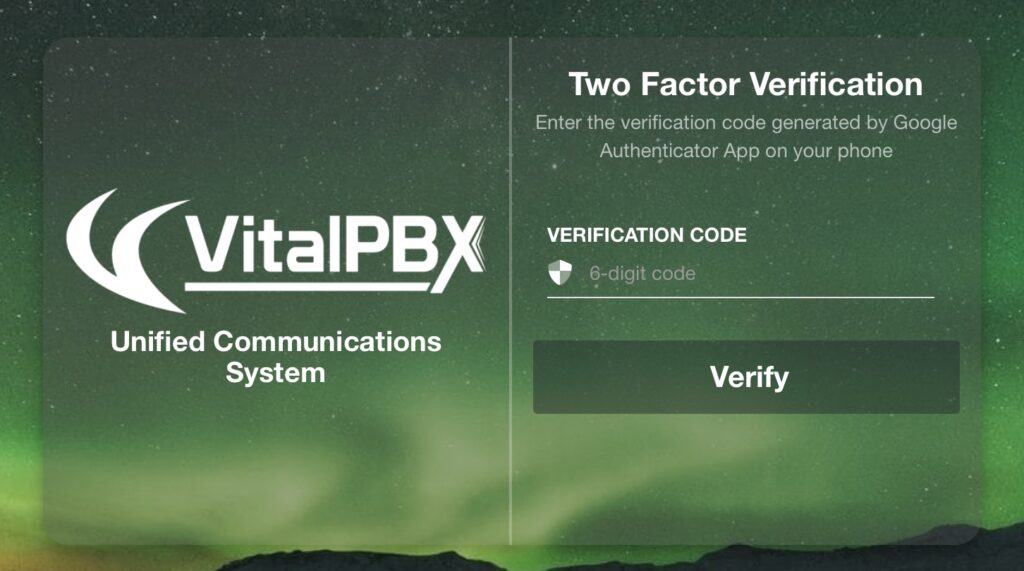
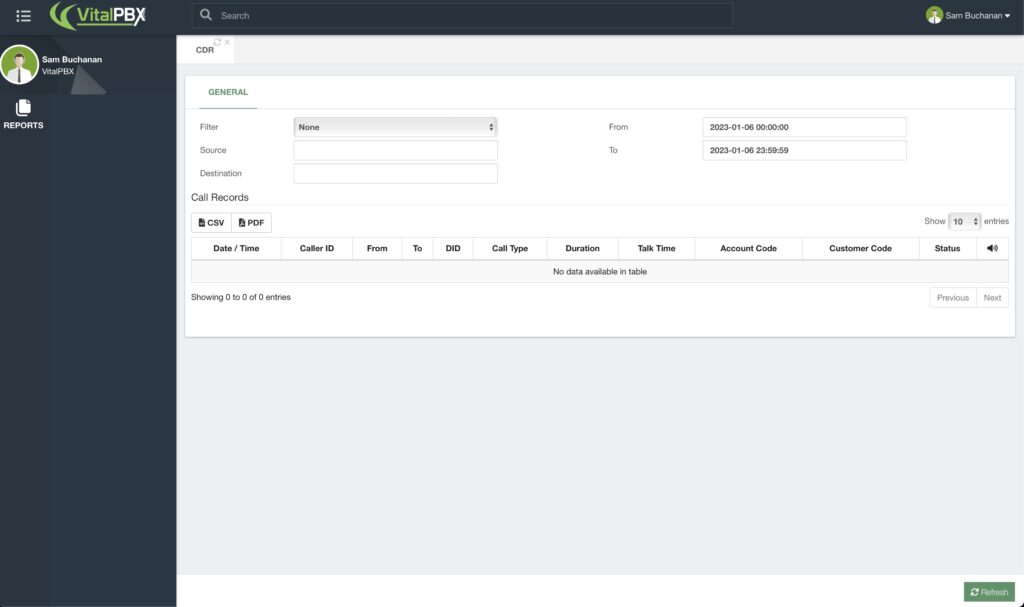
After you enter the code, you will successfully log in with the user. And you can see the effect
of the User Profile you assigned to the user. In the case of this example, the user only has
access to the CDR features.