With all of the configurations you have made to your VitalPBX, we must be able to save them in case we want to migrate to another server or restore our current server to an older set of configurations. For this, we have a Backup and Restore module in VitalPBX. Go to Admin >Tools > Backup and Restore.
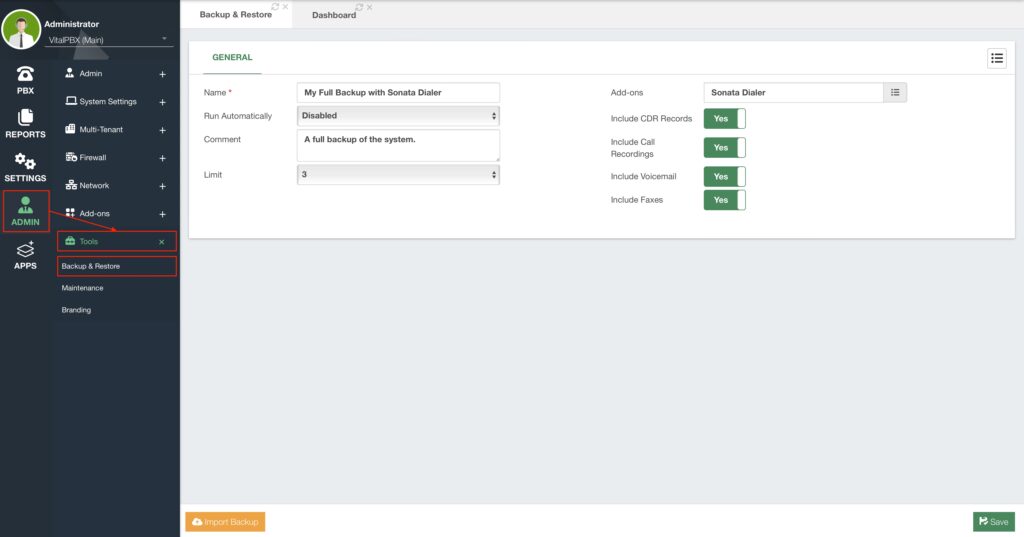
Here, you can create multiple Backup Profiles, that will generate backup files you can export and use on your VitalPBX installation. For this, enter a Name to identify the Backup Profile. You can add a brief comment to describe what the backup includes. You can select if you want to back up the configurations for any Sonata Suite and VitXi add-on application. Then, you can select to include the CDR Records, Call Recordings, Voicemails, and/or Faxes. Since this is a profile you can run multiple times, you can set a limit on how many backups you wish to keep stored on your server at any time. You can automate the backup creation process by setting a Cron Profile on the Run Automatically option. With your settings configured, click on Save.
You will now find the Backup Profile on the list in the upper right-hand corner. If you enter your Backup Profile again, you can edit what the profile contains, and run the backup manually by clicking on Run Backup Now! in the lower left-hand corner.
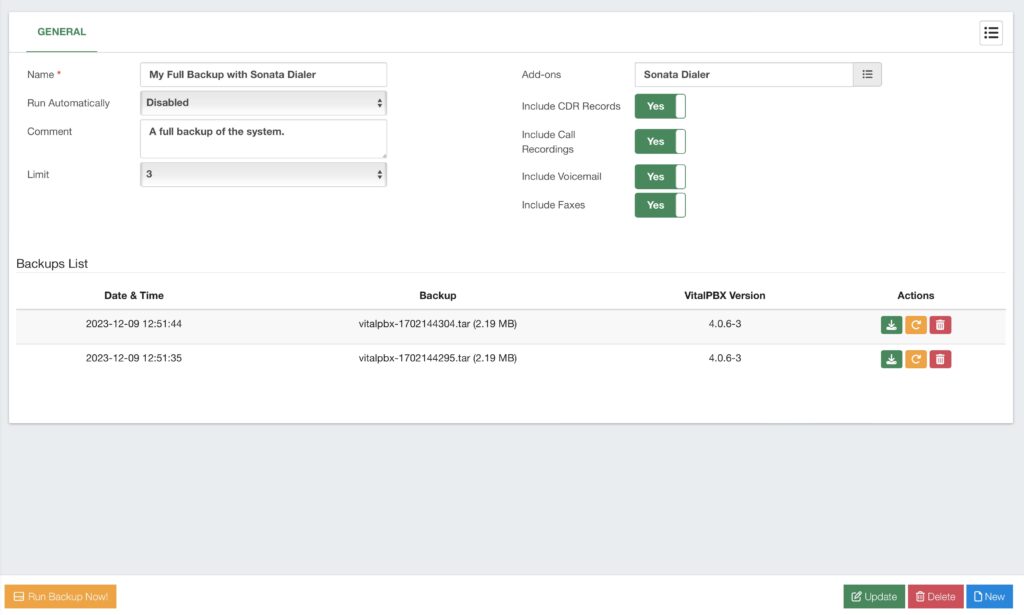
Whenever you run a backup, you will see the backup files listed on the Backups List. Here, you will see information on when the backup was created, the backup file name, the VitalPBX version of the backup, and some actions. From the actions column, you can download the backup, delete it, or restore from the backup.
Note: You must make sure your server has enough storage to store the backup files. Especially, if you are backing up your call recordings. As call recordings can take a lot of space, we recommend you back them up in a separate server, by either mounting a NAS or SAN server to the call recording directory at /var/spool/asterisk/monitor or using an SCP or SFTP application to download the call recordings directly. You can then upload them to the VitalPBX server after you restore from your backup.
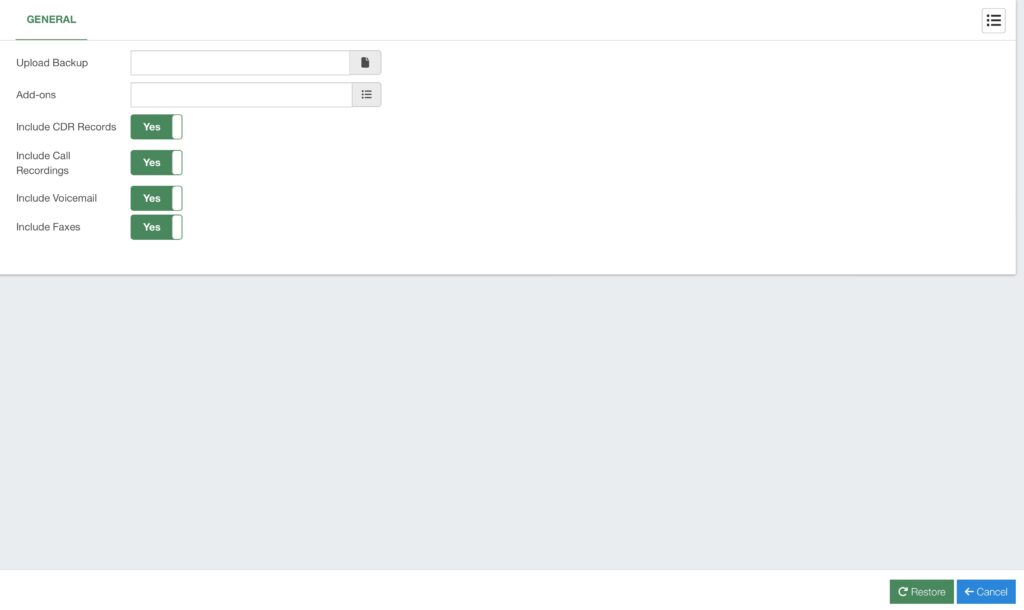
To restore from a backup that you created in a separate server, you must go back to Admin > Tools > Backup and Restore, and click on Import Backup in the lower left-hand corner. This will allow you to select a backup file you have on your system, and select what you want to import from the backup file.
Once you have selected the backup file, and what you wish to import from the backup file, click on the Restore button in the lower right-hand corner.
With this, you are now able to backup and restore your VitalPBX configurations.


