Another way to have a high-availability environment we have studied is using Proxmox™ VE. Proxmox VE is a complete open-source server management platform for enterprise virtualization. It tightly integrates the KVM hypervisor and Linux Containers (LXC), software-defined storage, and networking functionality, into a single platform. With the built-in web-based user interface, you can manage virtual machines and containers, high availability for clusters, or the built-in disaster recovery tools with ease. You can explore Proxmox as an option to create your VitalPBX instances in your local data center infrastructure.
To start using Proxmox VE for an HA environment, there are some prerequisites that need to be fulfilled.
- System Requirements
- For production servers, high-quality server equipment is needed. Proxmox VE supports clustering, which means that multiple installations of Proxmox VE can be centrally managed thanks to the built-in cluster functionality. Proxmox VE can use local storage such as (DAS), SAN, and NAS, as well as shared and distributed storage (Ceph).
- Recommended Hardware
- CPU – Intel EMT64 or AMD64 with Intel VT/AMD-V CPUs running at 3.5 GHz.
- Memory – At least 4 GB for OS services and Proxmox VE. More memory needs to be designated for guests. For Ceph or ZFS additional memory is required, approximately 1GB of memory for every TB of storage used.
- Fast and redundant storage – Better results with SSD drives.
- OS storage – Hardware RAID with battery-protected write cache (“BBU”) or non-RAID with ZFS cache and SSD.
- VM storage – For local storage, use hardware RAID with battery-backed write cache (BBU) or no RAID for ZFS. Neither ZFS nor Ceph supports a hardware RAID controller. Shared and distributed storage is also possible.
- Redundant Gigabit NICs – Additional NICs depending on preferred storage technology and cluster configuration: 10 Gbit and higher are also supported.
- For PCI(e) pass-through – a CPU with CPU flag VT-d/AMD-d is required.
- For Testing (Minimal Hardware for Testing Only)
- CPU – 64-bit (Intel EMT64 or AMD64)
- Motherboard – Intel VT/AMD-V compatible CPU/motherboard (for full KVM virtualization support)
- Memory – Minimum 2 GB of RAM
- Storage – 500GB HDD
- Network – One Gigabit NIC
Additionally, we are going to need an NFS Storage system. For this, in this example, we are going to be using another server to work as a NAS server.
With these prerequisites fulfilled, we can proceed to install Proxmox VE.
Proxmox needs a clean hard drive because it will remove all partitions and data from the hard drive during installation.
First, download Proxmox VE’s ISO image from Proxmox’s official website, https://proxmox.com/en/downloads/category/iso-images-pve.
If you are going to install it on physical hardware, you must flash the ISO image on a USB drive of at least 8GB. We recommend the Balena Etcher software, https://www.balena.io/etcher/.
Afterward, we can install Proxmox VE on dedicated hardware using the USB drive. Once we boot into the image we will be greeted with the following screen.
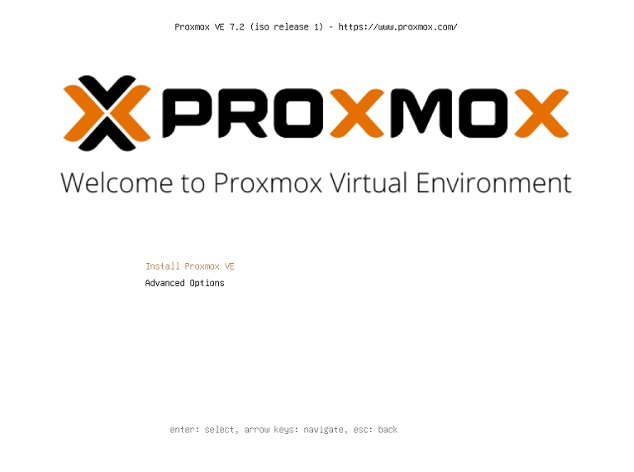
Select the Install Proxmox VE option, and press Enter. After a few seconds, the EULA will appear. Click on the I agree button.

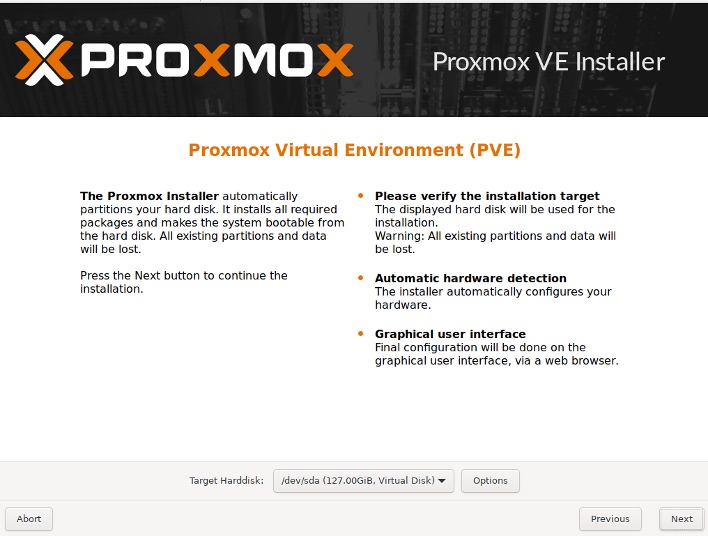
Afterward, you must select the hard disk where you want to install Proxmox. Once selected,
click on Next.
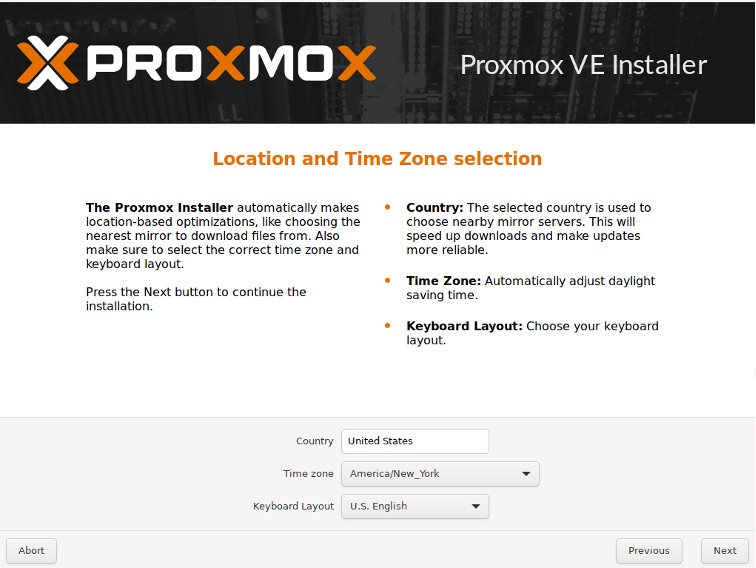
On the next screen, enter your location, time zone, and language. Then click on Next.
Now you must enter the password for the root user which is used both in the Proxmox web interface and in the server console via SSH. Since this is a very sensitive user, we recommend a fairly complex password.
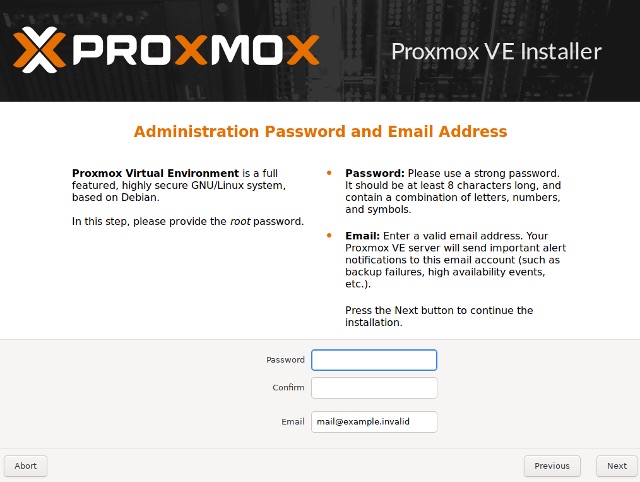
For the Email address, you can use any email address of your liking. Click on Next.
Afterward, we must enter our Networking configurations.
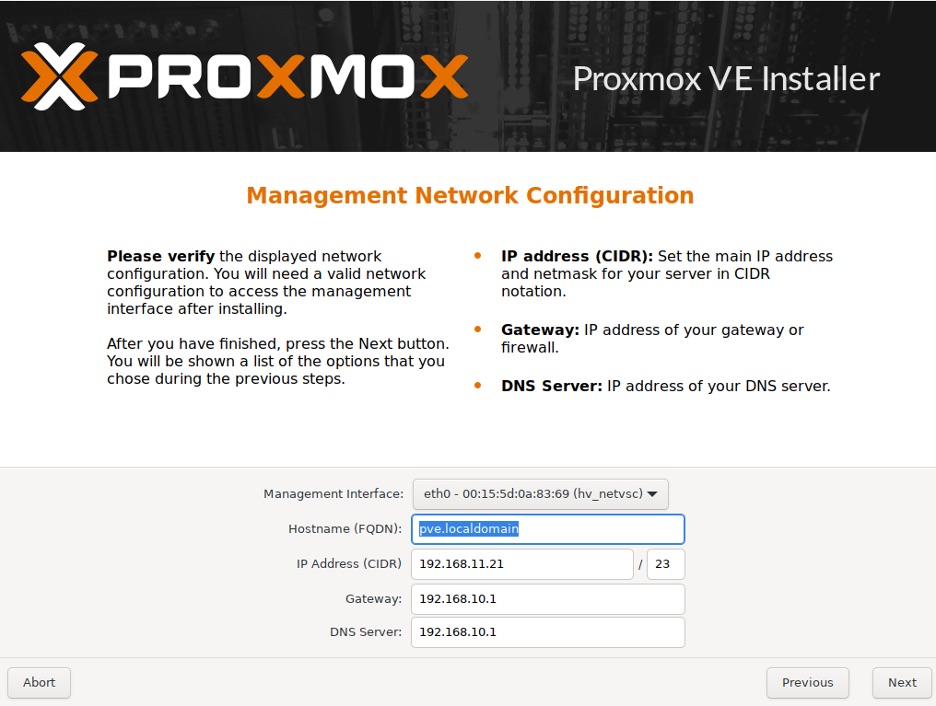
- Management Interface – Select the interface through which we will manage
Proxmox. - Hostname (FQDN) – A valid FQDN is recommended. For local testing, we will use
a .local domain. - IP Address (CIDR) – Enter the IP address for the Proxmox server, using the CIDR
format for the netmask. - Gateway – Enter the default gateway for the Proxmox server.
- DNS Server – Enter the IP address for a DNS server to solve for server names. i.e.
8.8.8.8
Once the network has been configured, click on Next.
Finally, you will be presented with a summary of your installation configurations. Verify the information and click on Install.
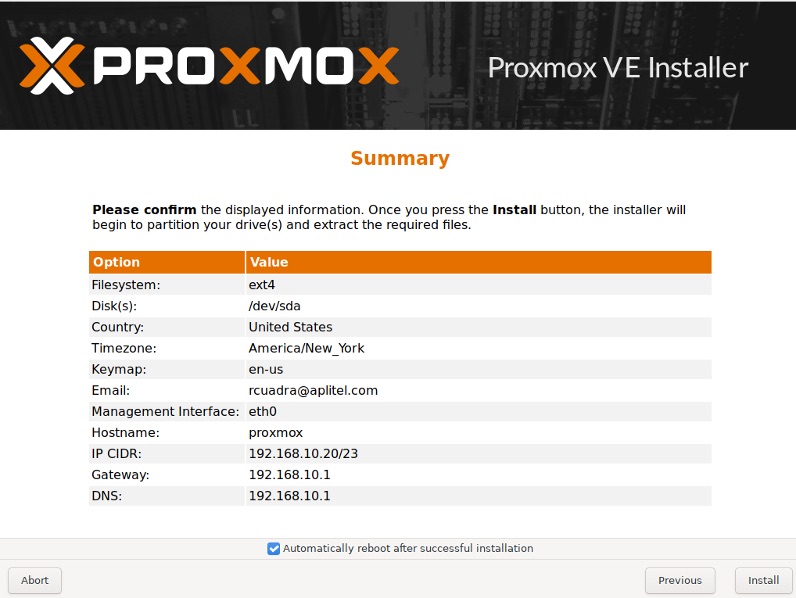
The installation will proceed and may take a few minutes depending on your hardware.
Once the installation is done, enter the IP Address plus the port 8006 on your browser, i.e. 192.168.20.220:8006.
Another option to install Proxmox is by installing a minimal installation of Debian. For this, you can follow the Debian installation instructions in Section 1, Lesson 1. During the installation, set the hostname for your Proxmox installation. Later we will show you the scheme we used for our example.
Once you have Debian installed, make sure you have SSH and WGET installed.
root@debian:~# apt-install -y ssh wgetThen, make the root user available to log in via SSH, using nano.
root@debian:~# nano /etc/ssh/sshd_configGo to the following line.
#PermitRootLogin prohibit-passwordChange it to
PermitRootLogin yesSave and Exit nano.
Next, we must set the static IP address for this server using nano.
root@debian:~# nano /etc/network/interfacesGo to the following line.
iface eth0 inet dhcp
Change it to the following content.
iface eth0 inet static
address 192.168.20.220
netmask 255.255.255.0
gateway 192.168.20.1
dns-nameservers 8.8.8.8 8.8.4.4 1.1.1.1 1.1.0.0
Save and Exit nano.
Note: Your interface name and IP Address will vary from these instructions. This information is based on the scheme we present later. Make sure that you are using the interface name and appropriate IP Address for your environment.
Now, we must make changes to the hosts file so the hostname resolves the server IP Address. Use nano to modify the hosts file.
root@debian:~# nano /etc/hostsGo to the following line.
127.0.1.1 prox1.vitalpbx.local prox1Change it to the following.
192.168.20.220 prox1.vitalpbx.local prox1Save and Exit nano. You can check your configurations with the following command.
root@debian:~# hostname --ip-addressWith this setup, we must add the Proxmox VE repositories. Run the following command.
root@debian:~# echo "deb [arch=amd64] http://download.proxmox.com/debian/pve bullseye pve-no-subscription" > /etc/apt/sources.list.d/pve-install-repo.listNext, add the Proxmox repository key as root.
For Debian 11.
root@debian:~# wget https://enterprise.proxmox.com/debian/proxmox-release-bullseye.gpg -O /etc/apt/trusted.gpg.d/proxmox-release-bullseye.gpg
# verify
sha512sum /etc/apt/trusted.gpg.d/proxmox-release-bullseye.gpg
7fb03ec8a1675723d2853b84aa4fdb49a46a3bb72b9951361488bfd19b29aab0a789a4f8c7406e71a69aabbc727c936d3549731c4659ffa1a08f44db8fdcebfa  /etc/apt/trusted.gpg.d/proxmox-release-bullseye.gpg
For Debian 12.
root@debian:~# wget https://enterprise.proxmox.com/debian/proxmox-release-bookworm.gpg -O /
etc/apt/trusted.gpg.d/proxmox-release-bookworm.gpg
# verify
sha512sum /etc/apt/trusted.gpg.d/proxmox-release-bookworm.gpg
7da6fe34168adc6e479327ba517796d4702fa2f8b4f0a9833f5ea6e6b48f6507a6da403a274fe201595edc86a8446
3d50383d07f64bdde2e3658108db7d6dc87 /etc/apt/trusted.gpg.d/proxmox-release-bookworm.gpg
Afterward, update the repository and system by running the following command.
root@debian:~# apt update && apt full-upgradeThen, install the Proxmox kernel.
For Debian 11.
root@debian:~# apt install pve-kernel-5.15For Debian 12.
root@debian:~# apt install pve-kernel-6.2Reboot the system.
root@debian:~# systemctl rebootOnce the system has rebooted, install the Proxmox packages using the following command.
For Debian 11.
root@debian:~# apt install proxmox-ve postfix open-iscsiFor Debian 12.
root@debian:~# apt install proxmox-ve postfix open-iscsi chronyThen, remove the original Linux Kernel.
For Debian 11.
root@debian:~# apt remove linux-image-amd64 ‘linux-image-5.10*'For Debian 12.
root@debian:~# apt remove linux-image-amd64 ‘linux-image-6.1*'Afterward, update the GRUB.
root@debian:~# update-grubThe os-prober package will scan all the partitions to create dual-boot GRUB entries. This can include the ones assigned to virtual machines, which we don’t want to add a boot entry. If you didn’t install Proxmox as a dual-boot with another OS, it is recommended to remove the os-prober package using the following command.
root@debian:~# apt remove os-proberFinally, reboot the system using the following command.
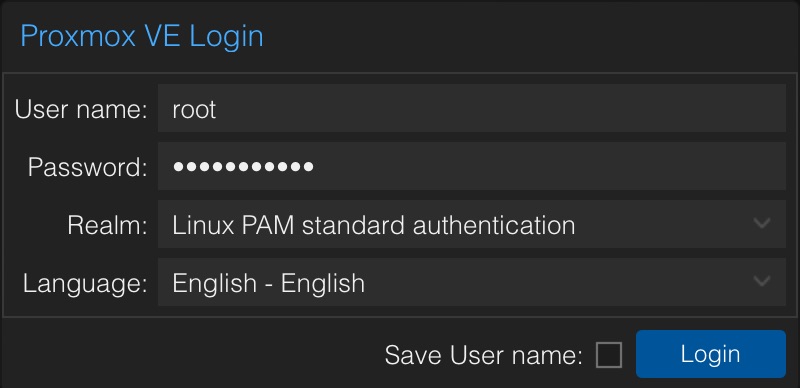
root@debian:~# rebootOnce the system reboots, go to the Proxmox IP Address using port 8006 on your browser, i.e. 192.168.20.220:8006. Here, login using the root user and password.
Go to Datacenter > Your Proxmox node > System > Network, and click Create. Here, create a Linux Bridge and call it vmbr0. Add the IP Address of your server with the netmask in CIDR format, the gateway, and enter the network interface name under the Bridge port. Then click OK.
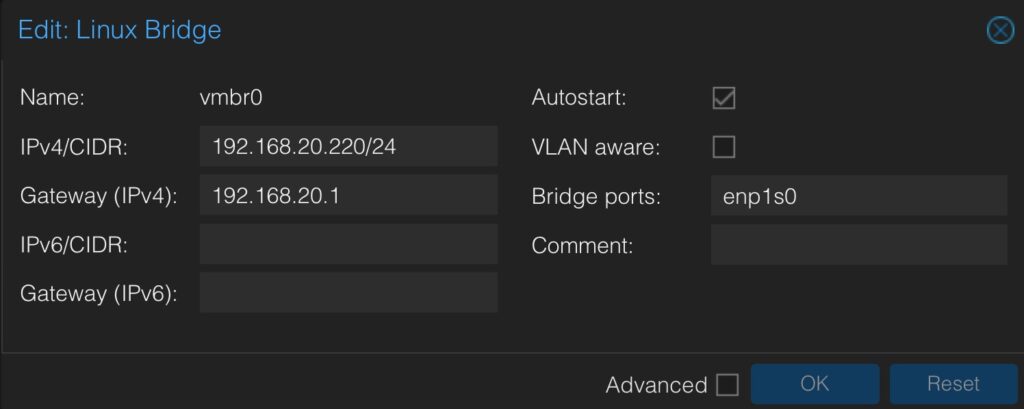
Note: During this step, you may have to remove the IP address from the Network interface listed here as well. For this, you must click the interface, and then click on Edit. There, you can remove the IP Address and Gateway. Then, click OK.
After the installation, you will see a message saying “You do not have a valid subscription for this server.” To remove this message, you will need to purchase a valid subscription. For this, you can go to the following link, https://www.proxmox.com/en/proxmox-ve/pricing.
For High Availability, you must complete this process three times on three separate servers. Ideally with similar hardware specifications. This is due to us needing what is called a quorum. The cluster of Proxmox servers will vote on which server the virtual machines will be transferred to.
For the latest instructions on how to install Proxmox in Debian, you can check the Proxmox wiki at https://pve.proxmox.com/wiki/Category:Installation.
For this example, we will be creating and using the following.
- 3 Physical Servers with similar hardware specifications.
- 16GB of Memory
- 256GB of Storage
- 4-Core CPU
- A NAS Server with enough capacity to store all the Virtual Machines we are going to create.
We will be using the following scheme.
- Server 1
- Name: prox1.vitalpbx.local
- IP Address: 192.168.20.220
- Server 2
- Name: prox2.vitalpbx.local
- IP Address: 192.168.20.221
- Server 3
- Name: prox3.vitalpbx.local
- IP Address: 192.168.20.222
- NFS Server
- Name: truenas.vitalpbx.local
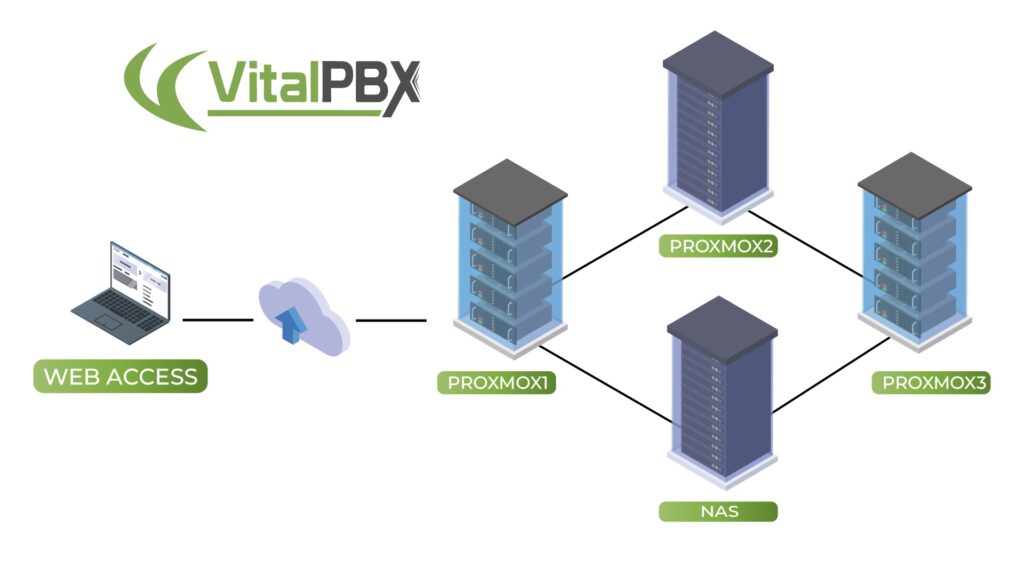
This diagram shows the infrastructure we are going to be building. We have the three Proxmox servers and an NFS server where we are going to be storing our Virtual Machines.
The next step is to configure our NFS storage. For this example, we will be using a TrueNAS server to create our NFS shares. You can use any NAS server that allows you to create an NFS share.
Since this part will vary based on the NAS or Storage Server you choose to use, we will go briefly on what needs to be configured.
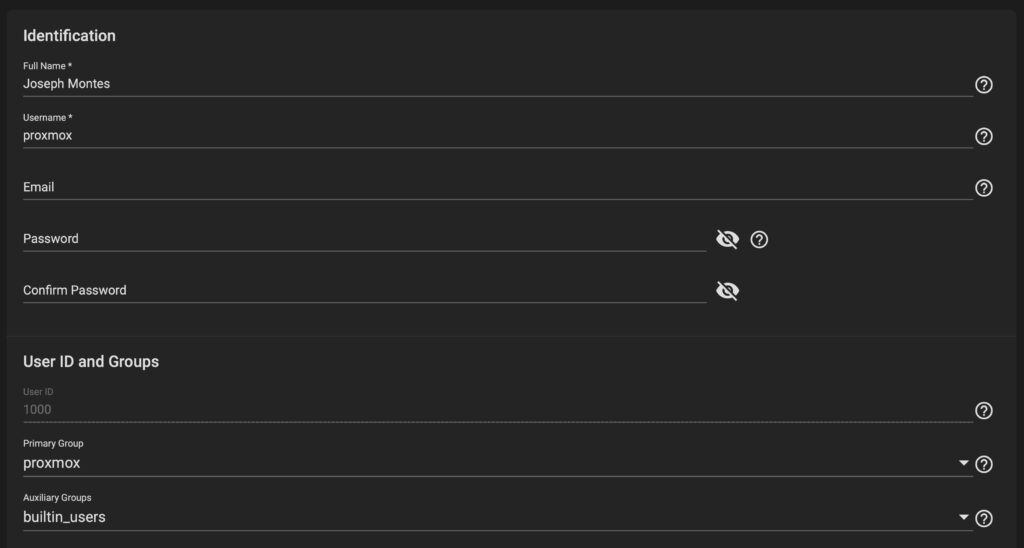
On our TrueNAS installation, we will first create a new user and password that we are going to use to log into our NFS share. We go to Accounts > Users.
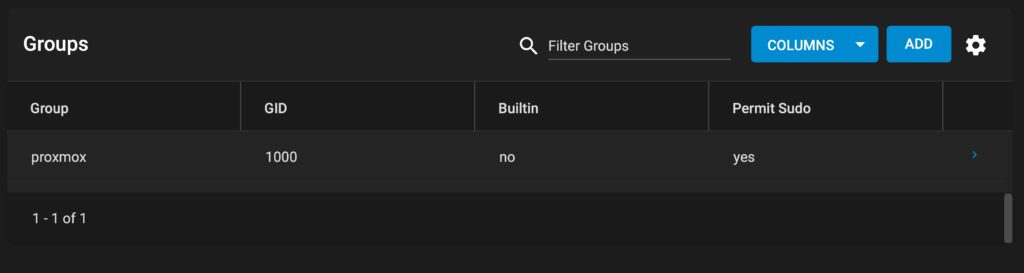
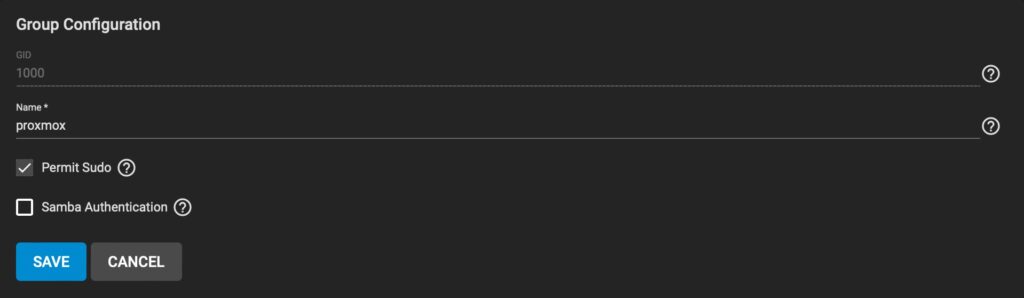
Here, a new group has been created as well that we have named proxmox. You can verify this under Accounts > Groups.
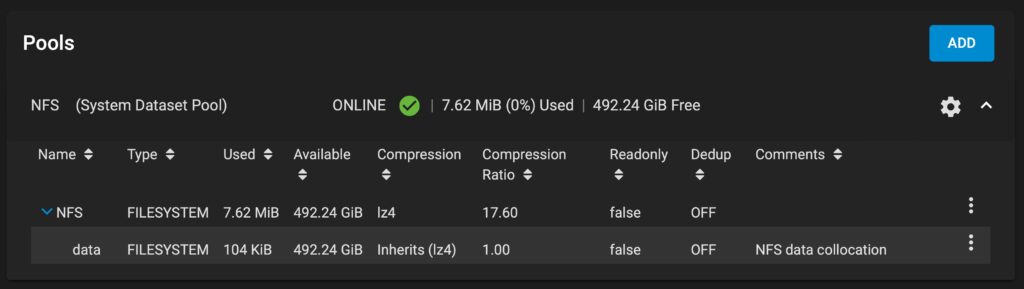
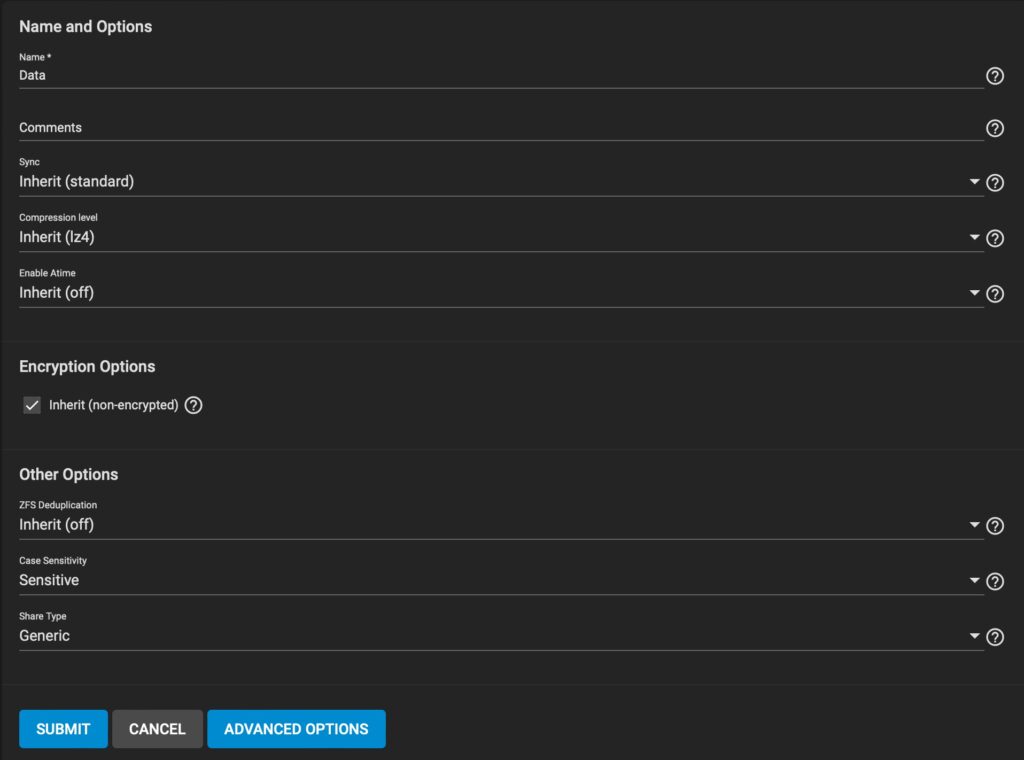
With the user and group created, we then created a new Pool with a Dataset where we are going to be storing our Virtual Machines. For this, we go to Storage > Pools.
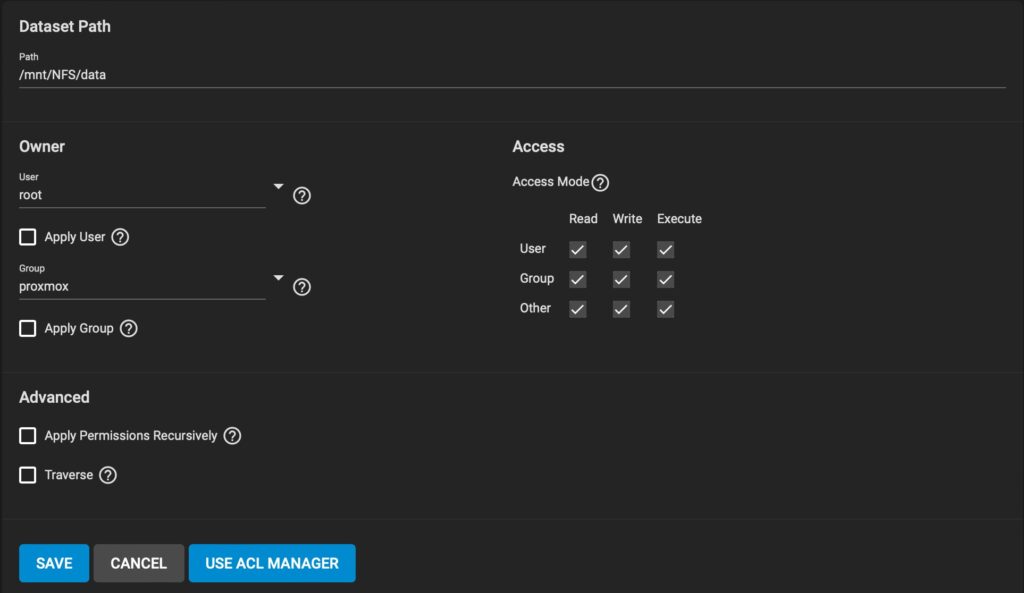
Then, we edit the permissions for the dataset we named data, add our group, and modify the Access Mode to allow us to read and write data to the dataset. Remember to check the Apply Group box before clicking on Save.
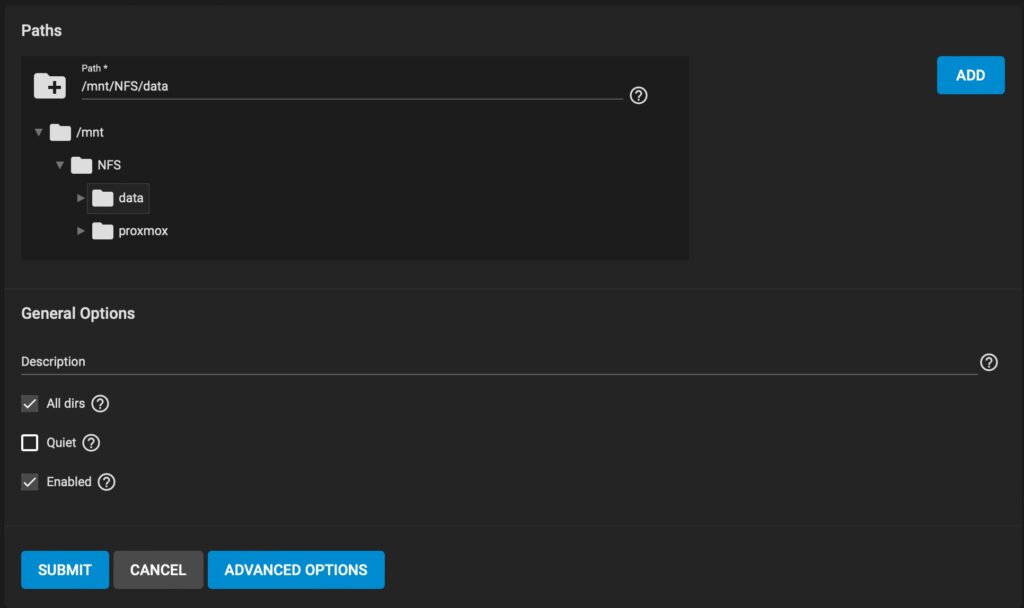
Next, we go to Sharing > Unix Shares (NFS) to create our NFS share. We point this share to the dataset we created previously.

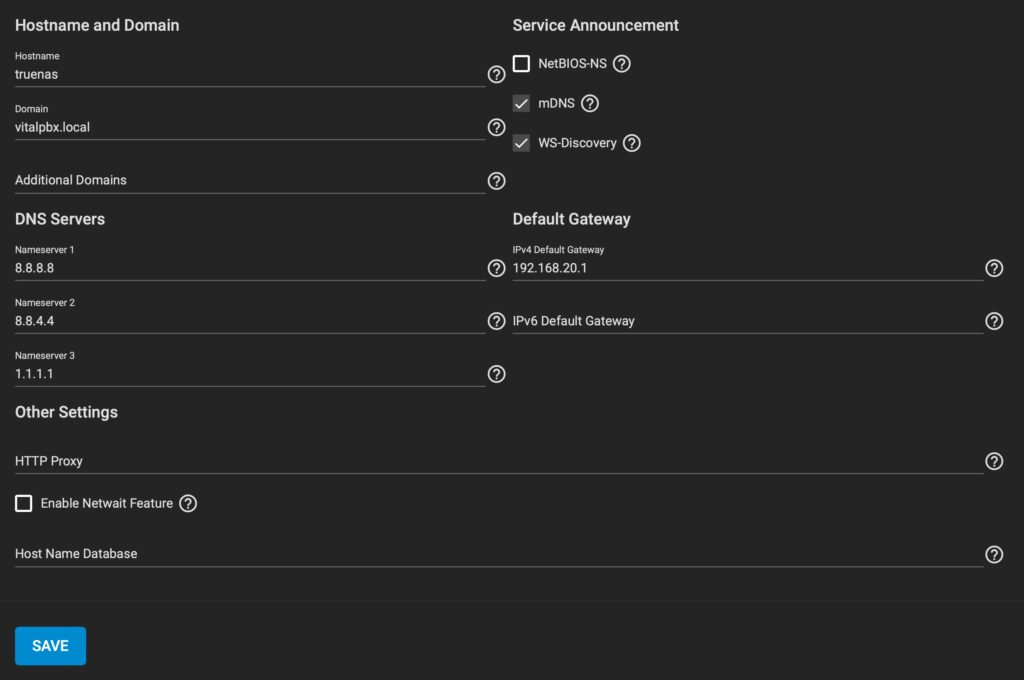
Finally, remember to have the networking configured so you can reach this server from our Proxmox nodes. Under Network > Global Configurations, we configure our DNS servers, hostname, and Default Gateway.
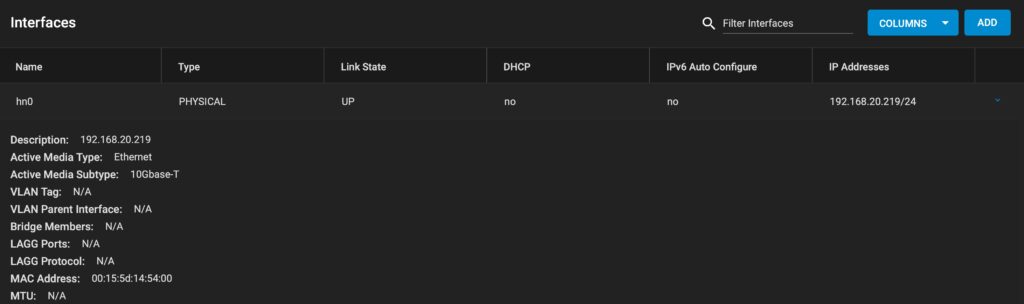
And under Network > Interfaces, we configure the static IP Address for our server.
With this, you now have an NFS share available to store your Virtual Machines in Proxmox.
Now that we have three Proxmox servers and our NAS server with the NFS shares configured, we can configure our connection to the NAS server and create our cluster for High Availability using Proxmox.
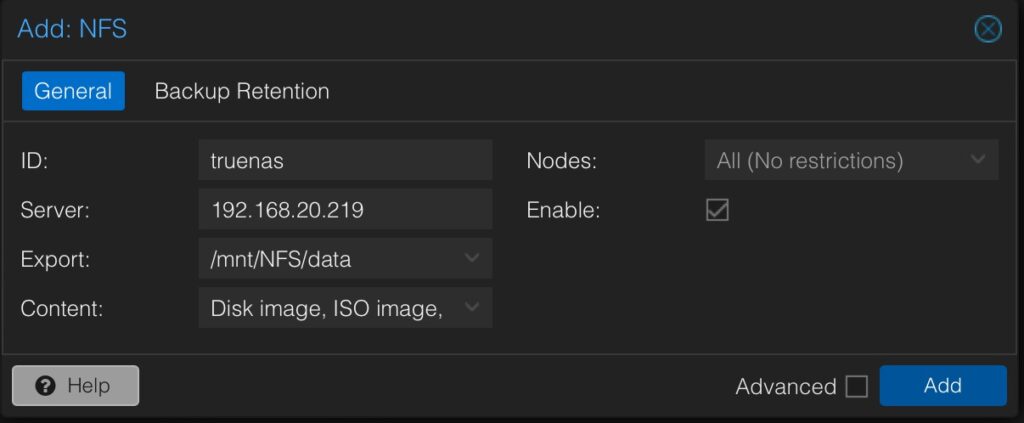
Go to the first Proxmox node and go to Datacenter > Storage. Click Add and select NFS. Here, we configure the ID to identify this NFS share, add the server IP address, set the path for our data set under Export, and select the content we want to include in this storage.
Under node, you will only see the current proxmox node available. You can go to every node and add the NFS share using the same ID. You can also come back to this Share on the first node after we create the cluster, and add the other two nodes afterward.
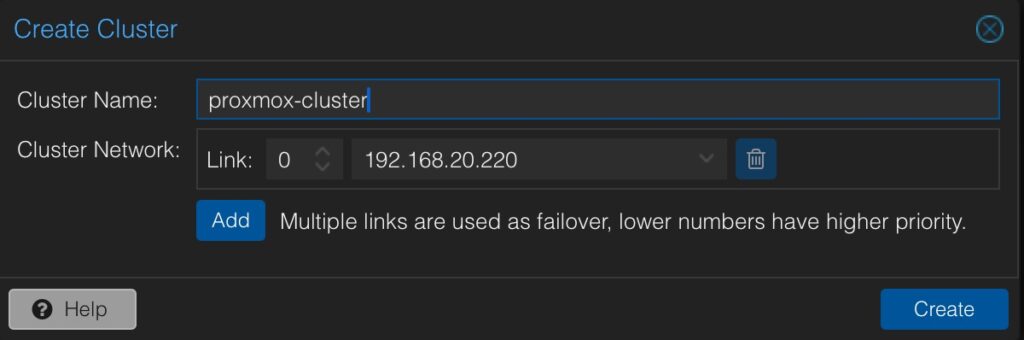
Next, we configure our Cluster. On the first node, go to Datacenter > Cluster and click on Create Cluster. Once you enter the Cluster Name, click on Create.
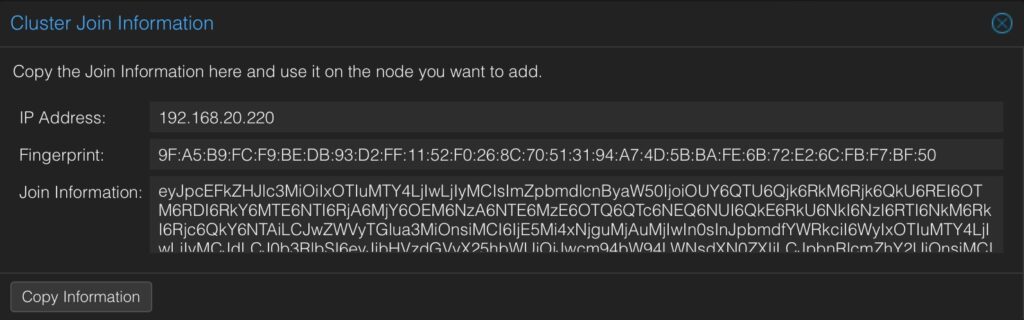
Go back to Datacenter > Cluster, and click on Join Information. This will show you the information we need to add to the other two nodes. Click on Copy Information.
Go to the second Proxmox node go to Datacenter > Cluster and click Join Cluster. Here, you will need to enter the Join Information for the first node.
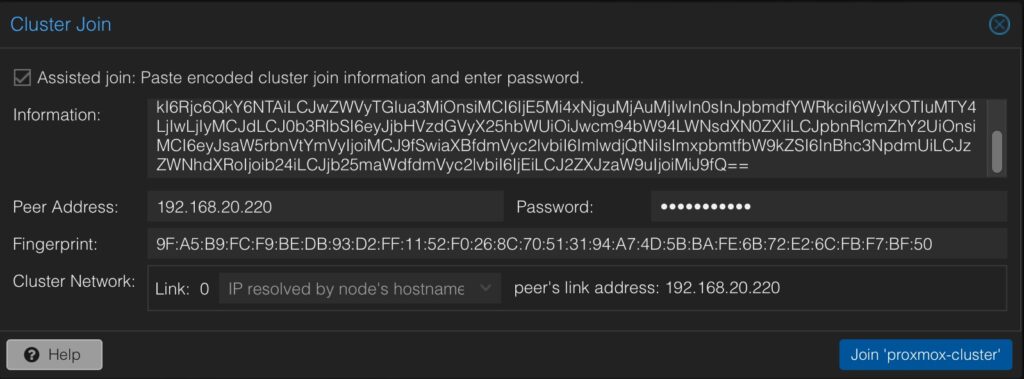
You will need to enter the root password for the first Proxmox node here. Click on Join ‘proxmox-cluster’. After a few minutes, the second node is added to the cluster.
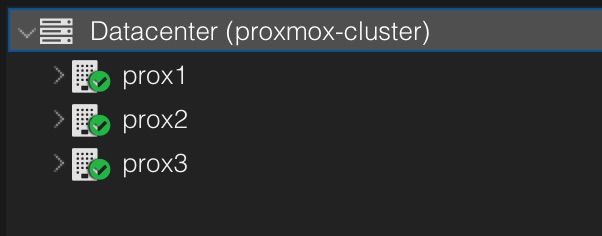
Repeat these two steps on the third Proxmox node, by adding the Join Information and root password from the first node. Then click on Join ‘proxmox-cluster’ and wait a few minutes.
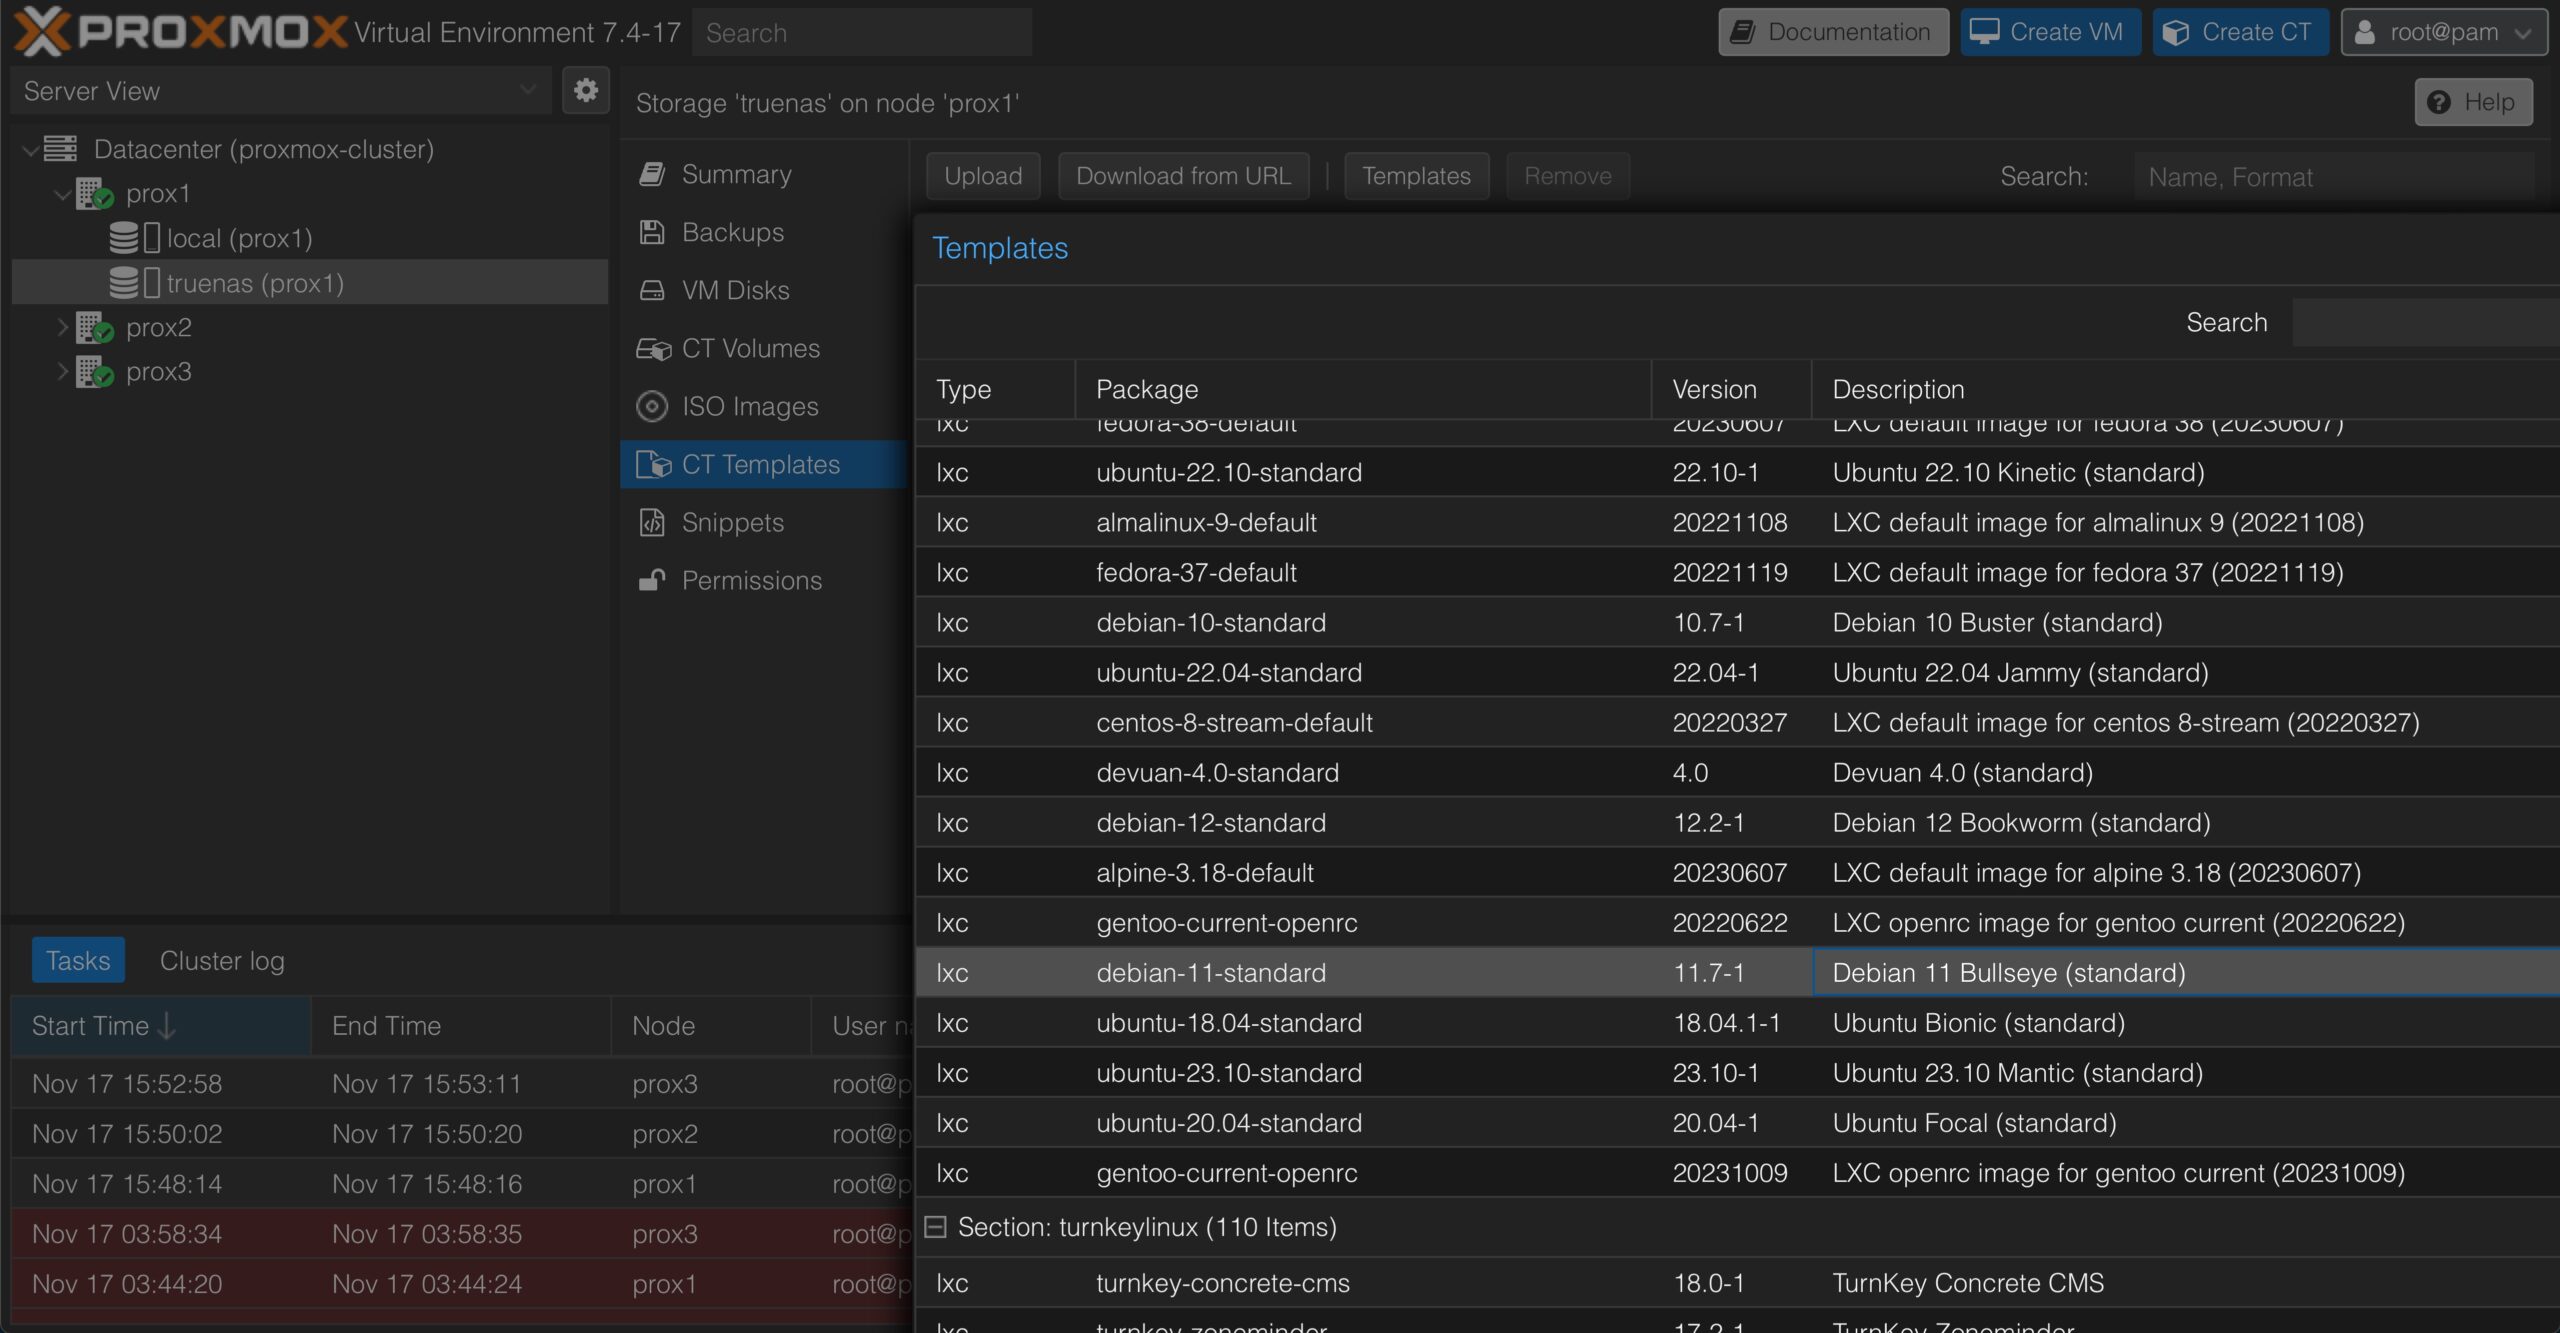
Now, we will create a VitalPBX instance. On the first Proxmox node, go to Datacenter > prox1 > truenas (prox1). Here, click on CT Templates and then click on debian-11-standard. Then, click on Download.
With this, we can now create a container where we are going to install VitalPBX 4. Go back to Datacenter > prox1 > truenas (prox1) and click on Create CT in the upper right-hand corner.
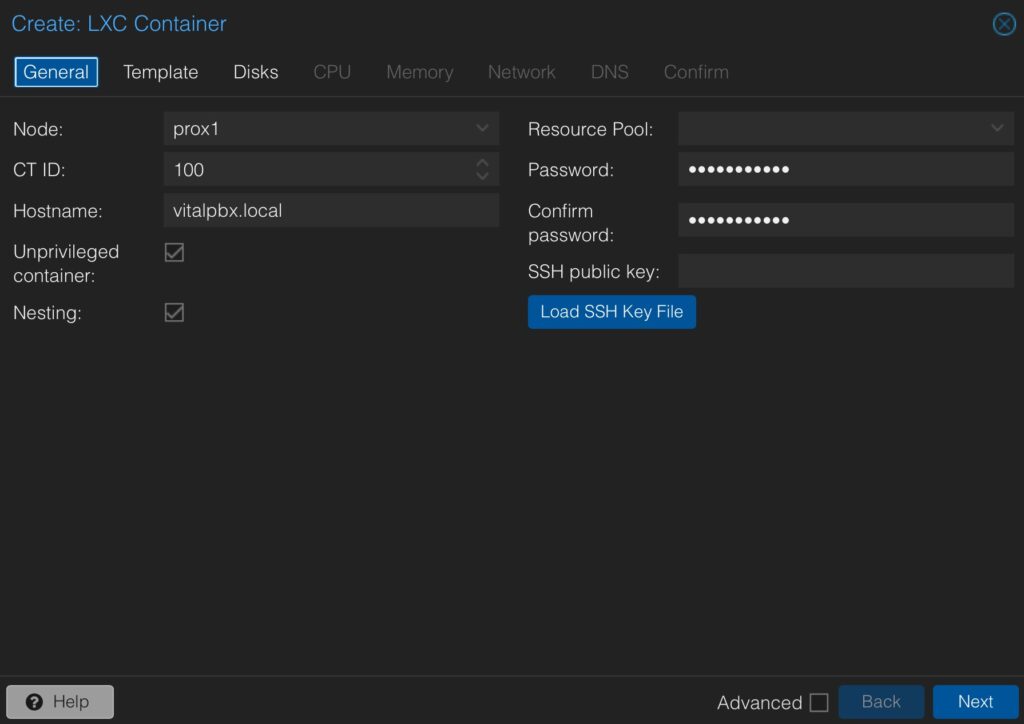
First, in the General tab, we are going to add the Hostname and root Password.
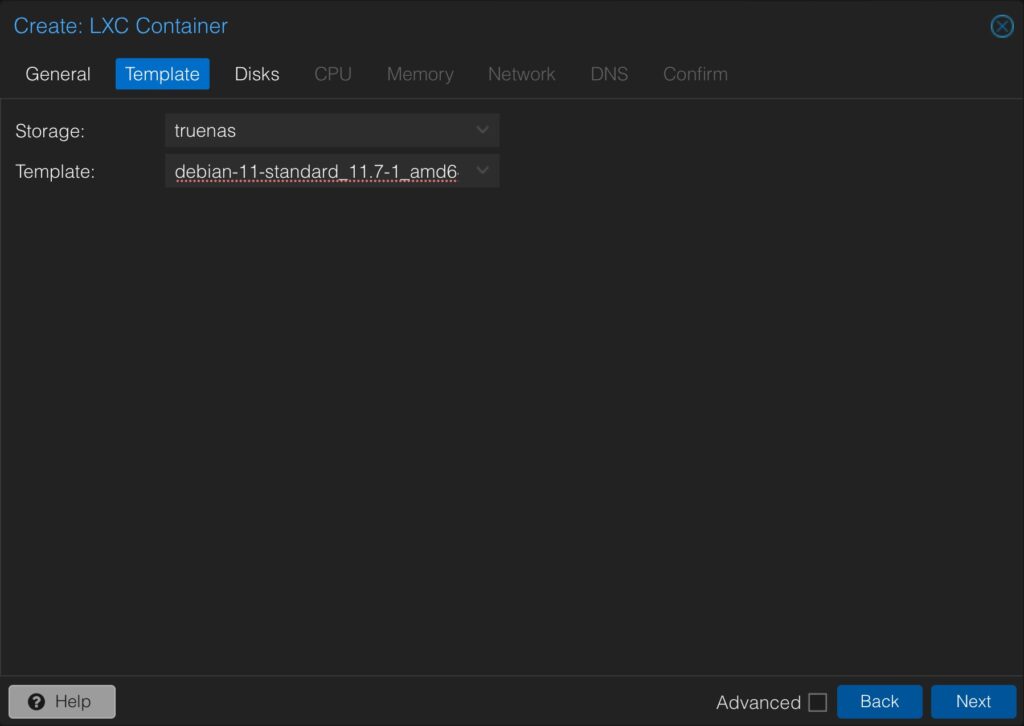
Next, on the Template tab, select the NFS Storage we created and the Template we downloaded.
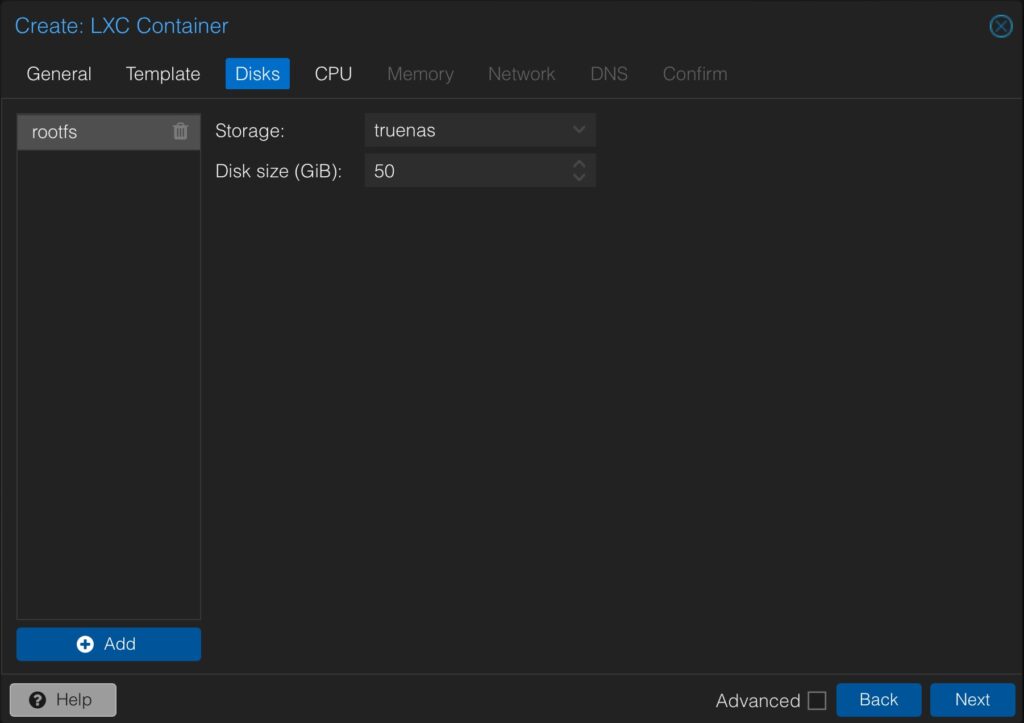
Then, on the Disks tab, select the NFS Storage and enter the Disk size in GiB for the Virtual Machine.
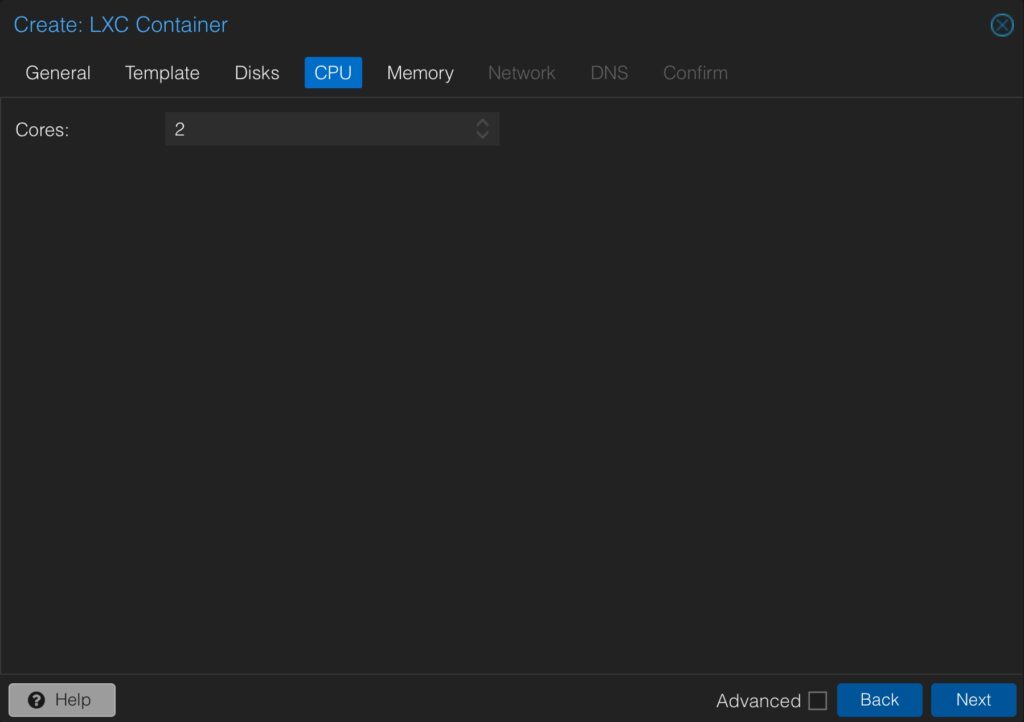
Afterward, on the CPU tab, enter the number of cores you want to give to this Virtual Machine.
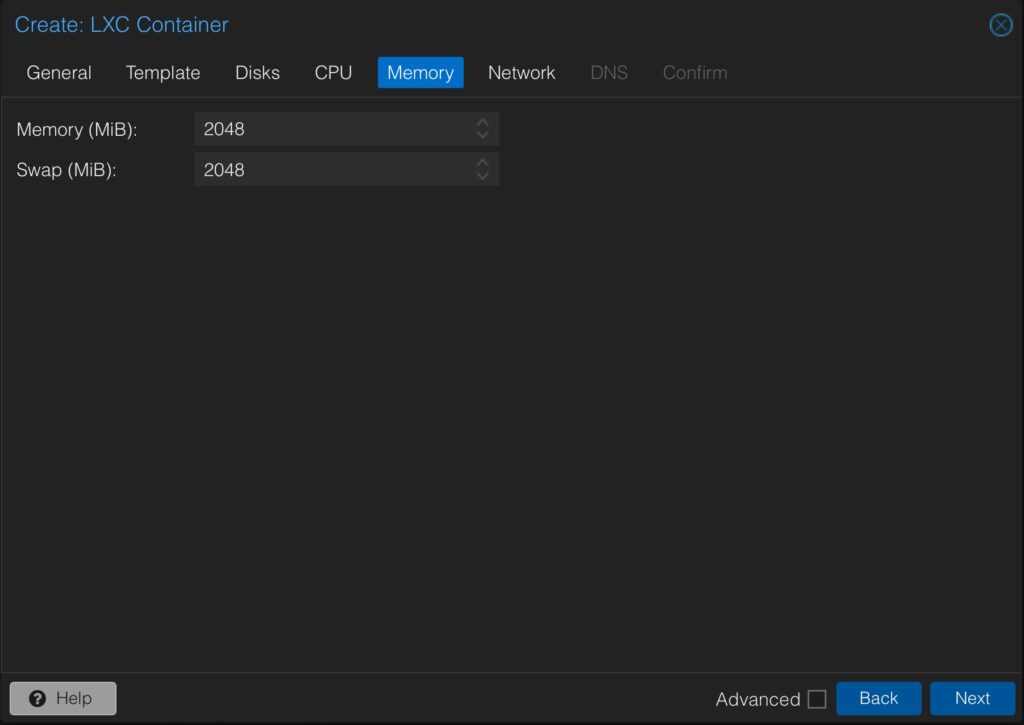
Under the Memory tab, enter the amount of Memory and Swap in MiB you wish to give to this Virtual Machine.
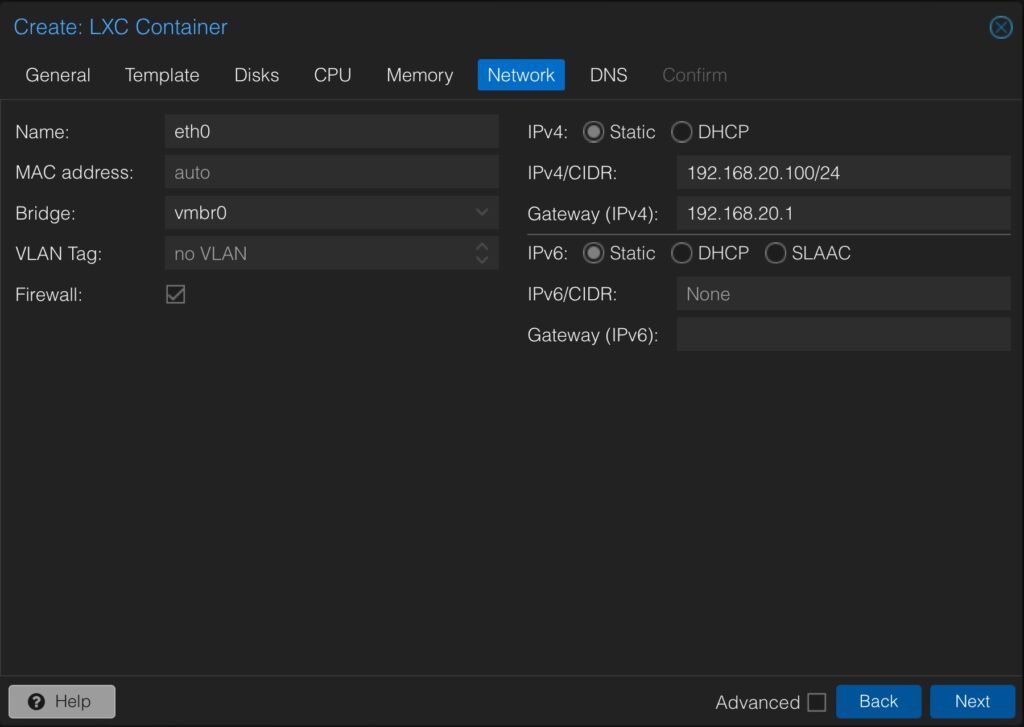
Then, on the Network tab, enter a static IP address and Gateway for the Virtual Machine.
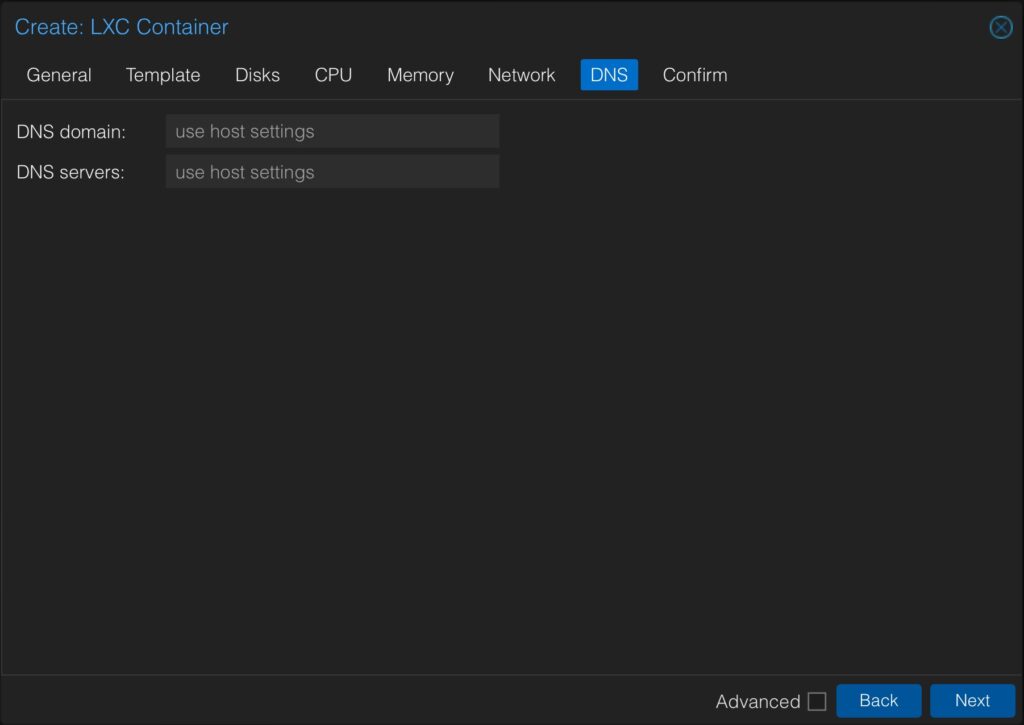
Under the DNS tab, you can configure the DNS servers the Virtual Machine will use. You can leave these fields blank to use the host settings.
Finally, you can verify the configurations under the Confirm tab.
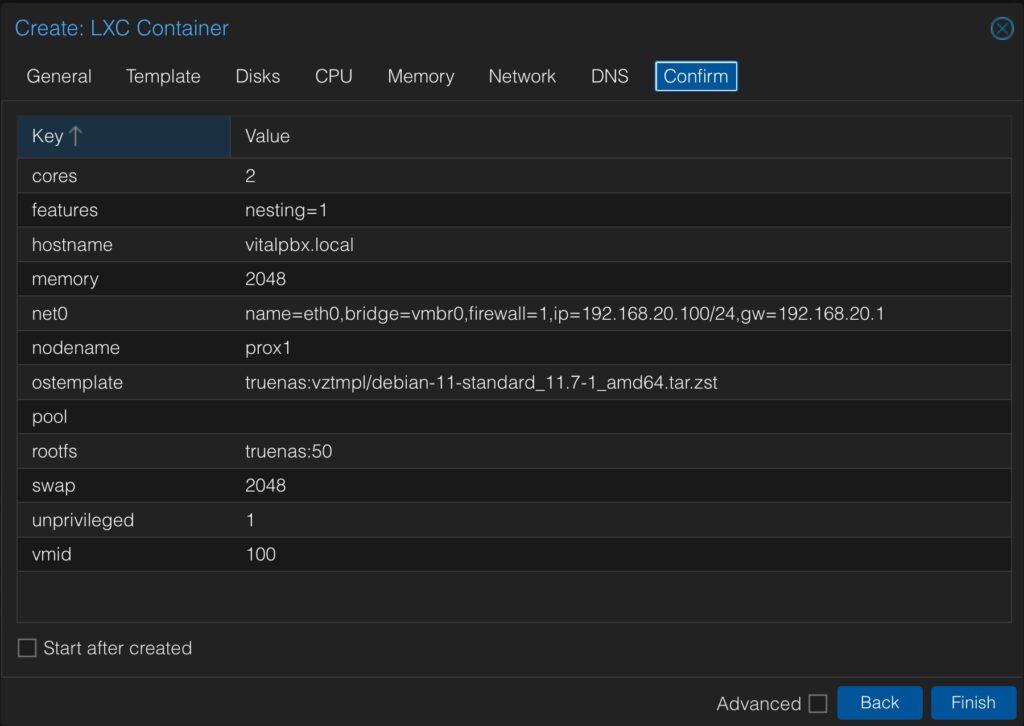
Click on Finish, and wait a few minutes. The instance with Debian 11 is now ready.
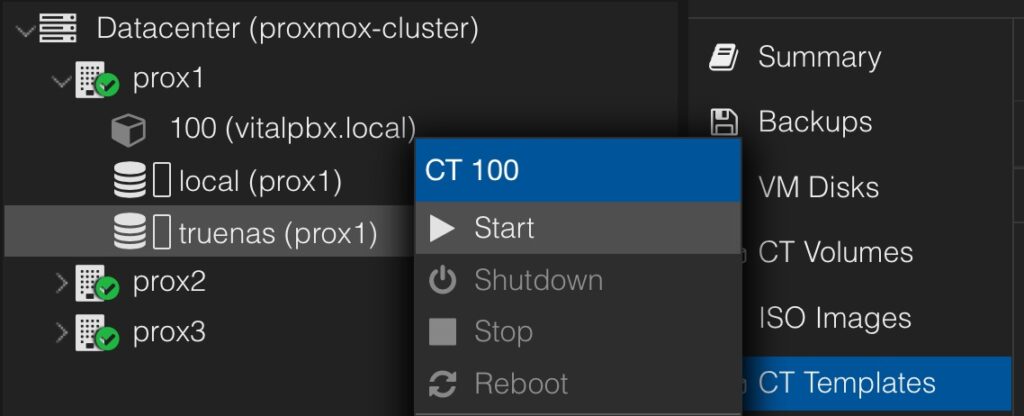
With the Debian 11 instance created, we can install VitalPBX 4 on it. On the left navigation menu, you will now see the instance listed. Right-click the instance, and click on Start.

Once started, a console window will pop up. Run the following commands to install VitalPBX.
root@debian:~# apt update
root@debian:~# apt -y upgrade
root@debian:~# wget https://repo.vitalpbx.com/vitalpbx/v4/apt/install_vpbx4.sh
root@debian:~# chmod +x install_vpbx4.sh
root@debian:~# ./install_vpbx4.sh
After a few minutes, VitalPBX will have been installed and the Virtual Machine will reboot. You now have a VitalPBX instance on your Proxmox server!
With the instance created, you can now migrate it around the cluster between nodes. You can do this Hot (With the server ON) or Cold (With the server OFF).
To perform a Cold Migration, turn off the VitalPBX instance, by running a poweroff command from the console.
Right-click the instance, and click Migrate. You will be presented with a prompt selecting where you want to migrate the instance.
Once the migration is complete, you will see the following message.
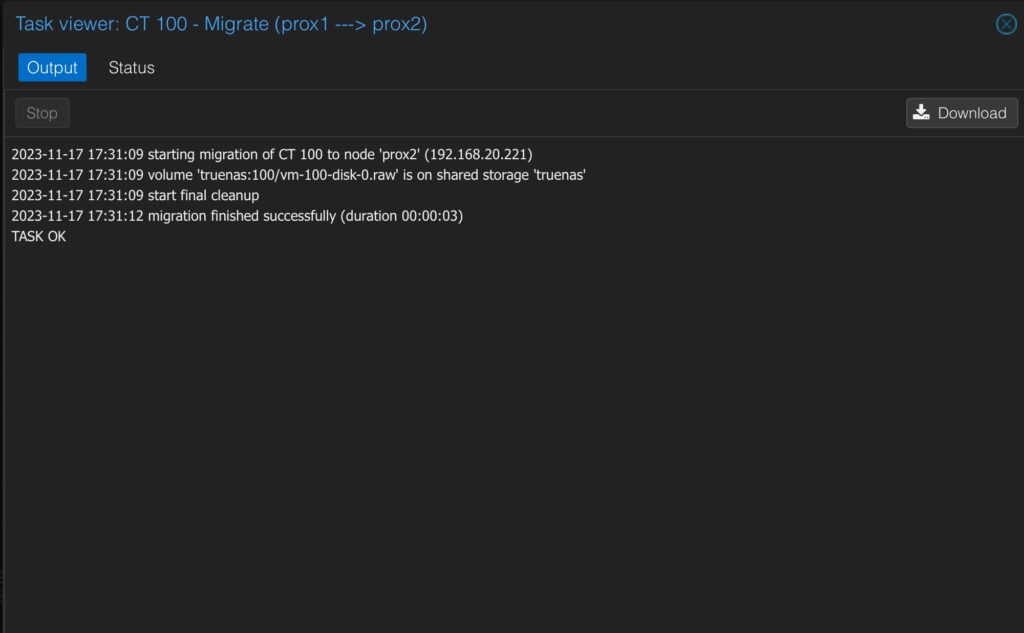
The instance will now be in the second Proxmox node.
For a Hot Migration, while the VitalPBX instance is turned on in the first Proxmox node, rightclick on it and click Migrate.
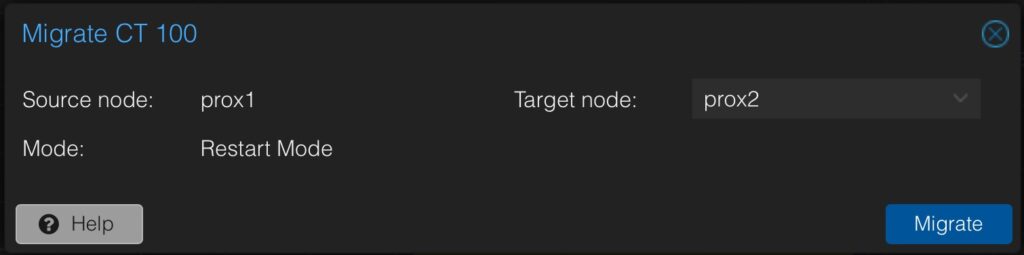
You will see that the mode now says Restart Mode. This means that the server will be restarted once it has migrated.
After the migration, you will see the following message.
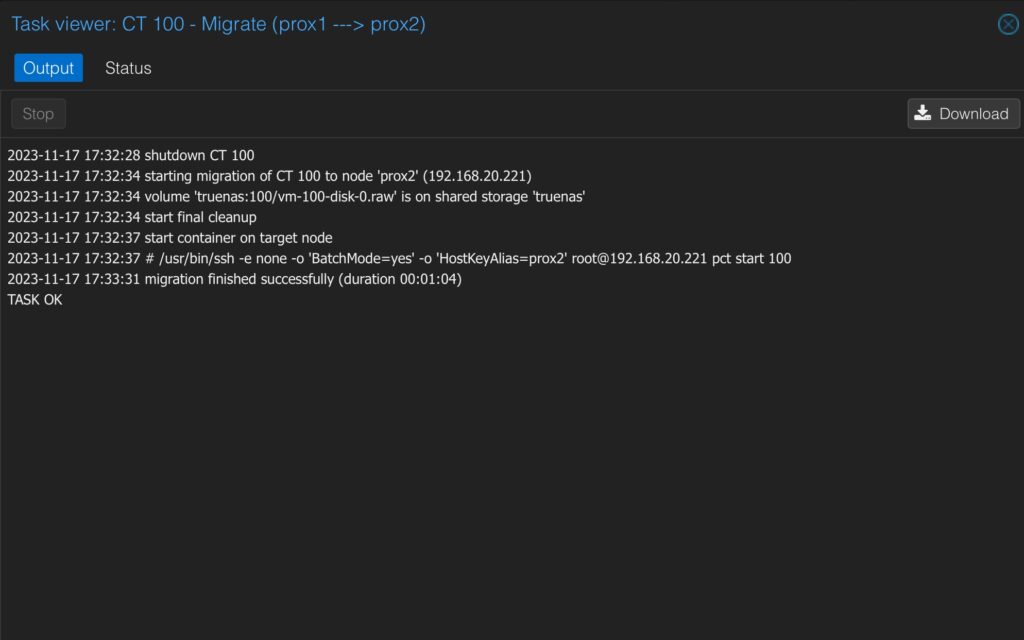
With the migration done, the instance is now on the second Proxmox node already started.
Now that we have a VitalPBX instance that we can migrate between nodes, we can set up our cluster to work in High Availability in Proxmox.
Go to Datacenter > HA > Resources and click Add. Here, enter the VitalPBX instance’s ID number and click Add.
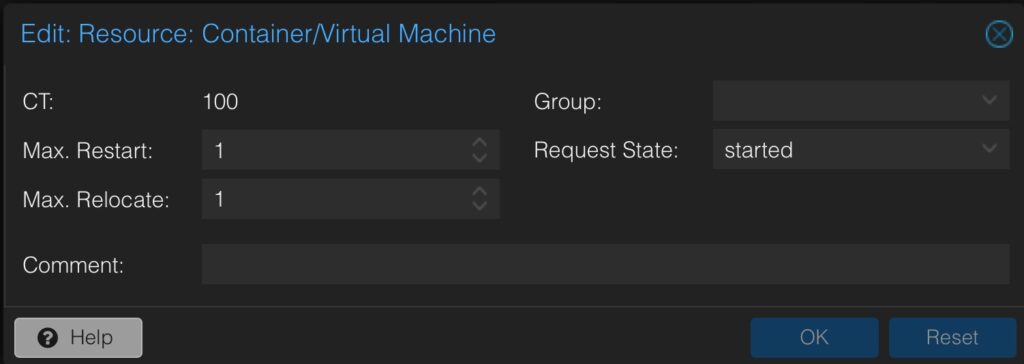
You will see that the cluster has the quorum OK and that the VitalPBX instance is now a resource for High Availability.
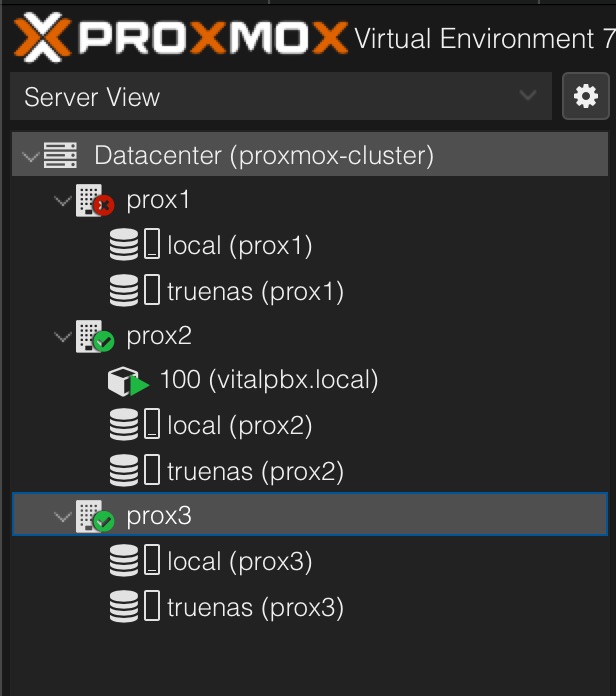
To test the High Availability, you can turn off the first Proxmox node and after some time the VitalPBX instance will automatically move from the first node to another one.
The time it takes to move the instance will depend on your server hardware and network speed.
When turning the first Proxmox node off, you will need to access the cluster from the second or third node to manage the cluster.
With this done, you now have a full High Availability Environment using Proxmox!
One thing that differs between HA with Proxmox and using DRBD is that with Proxmox, there is no need to have multiple VitalPBX licenses. Since in this case, it is the same machine that is migrated over multiple Proxmox nodes, the licensing is moved alongside the virtual machine.


