With VitalPBX 4 we have introduced the CRM Connector add-on. This allows you to integrate VitalPBX with a CRM application. As there is a growing list of CRM applications that we are integrating with this add-on, you can see specific guides for the CRM applications through this link, https://vitalpbx.com/?s=CRM.
The CRM Connector add-on is a commercial add-on module available with any of our licensing plans. You will need to have a Licensing Plan subscription to be able to use this commercial add-on. To start using the CRM Connector add-on, you will need to install it through the add-ons module at Admin > Add-Ons > Add-Ons. Once the add-on is installed, refresh your browser. You will now see a new section in the navigation menu to the left called Apps. Go to Apps > CRM >Integrations.
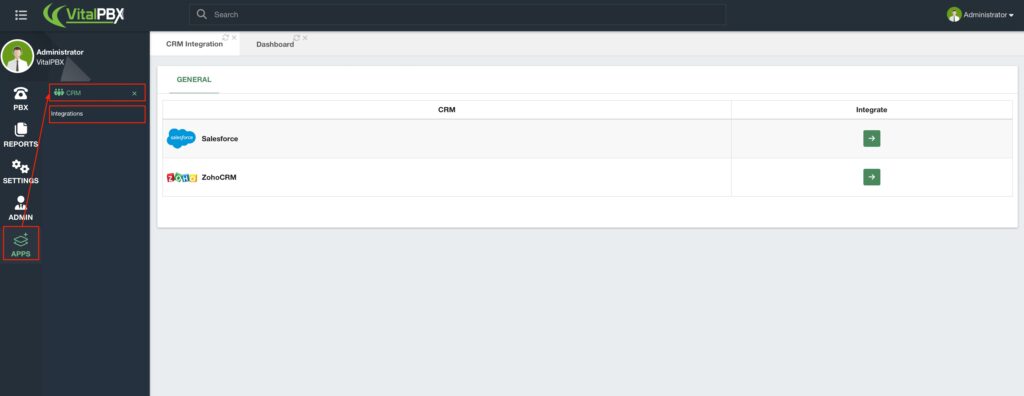
At the moment of writing, only Zoho and Salesforce CRM integration is available. Once again, 0you can go to the following link to find articles with more recent CRM integration guides,
https://vitalpbx.com/?s=CRM. Depending on the CRM you choose to use, the connection instructions may vary, follow the instructions from the guides for your specific CRM to continue.
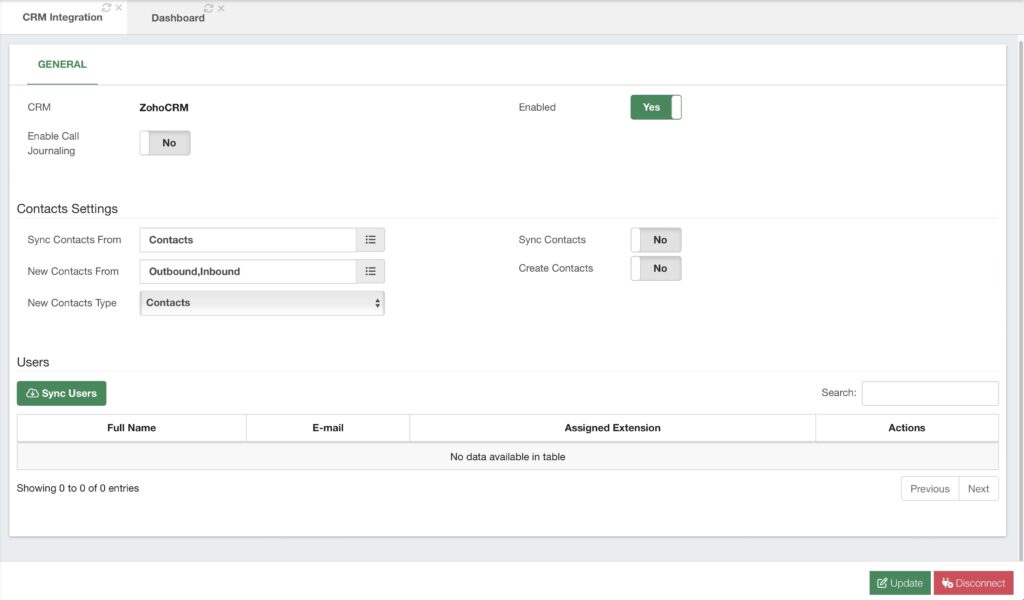
With the CRM Connector now connected you can now Enable or Disable the connection. You will also have the ability to Enable Call Journaling. With this, calls will start to get logged in your CRM.
Under the Contacts Settings, we define how the calls get logged in your CRM. You can choose whether toSync your Contacts from your CRM Contacts, Leads, or Accounts. And whether or not you wish to enable this feature. This will create a Phonebook with our Phonebooks add-on module that will contain your contacts. This can later be used with our CID Lookup feature to apply the CID Name to incoming calls and be able to identify the callers.
Next, you can select whether you create New Contacts From Inbound or Outboundcalls. This feature can also be Enabled or Disabled. With this, whenever your synced users place or receive a call, a new contact will be created. Finally, you can select whether this new contact is created as a Contact, Lead, or Account. In this case, we will leave the default options on, so new calls are created as contacts.
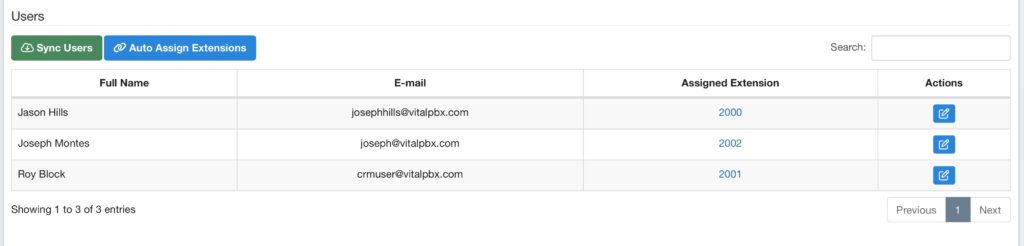
Lastly, you will have the Users section. Here you will be able to synchronize the different usersthat you have created in your CRM. To synchronize them, click on the green Sync Users button.

With the users synchronized, you will now have a button to Auto Assign Extensions. For this option to work, you must make sure that the extensions have the same email addresses assigned to your CRM users. Click on this button to assign the extensions. Otherwise, you can always edit the user by clicking the blue Edit button next to them.
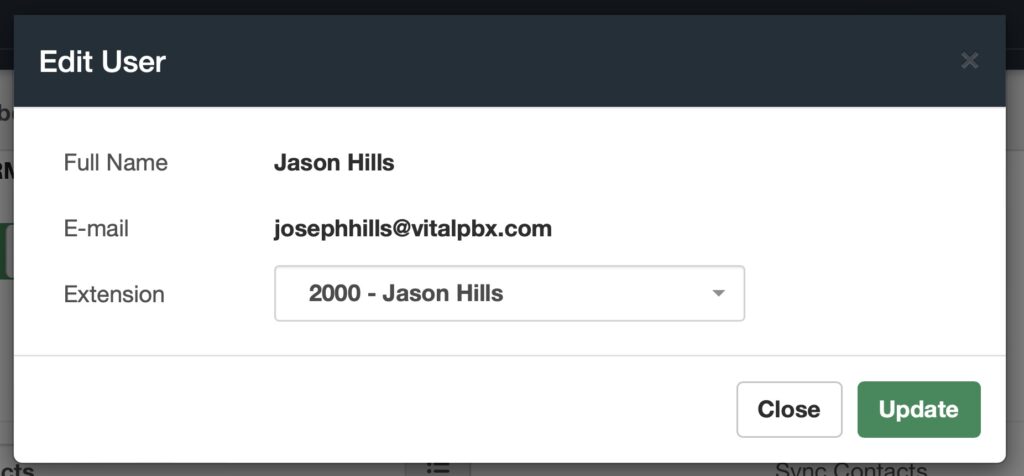
Here you can assign the Extension number that belongs to the user. Afterward, you can click on Update.
With your users and their extensions assigned, you can start placing or receiving calls. These will now appear in your CRM. For this article, since our contacts are created and synced as Contacts, you will find the activities inside the contacts.
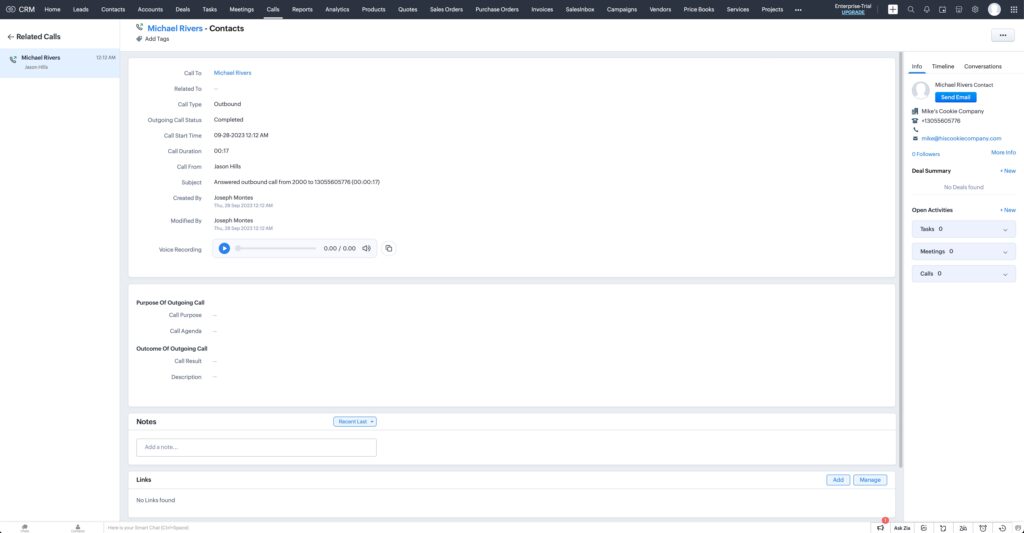
Here, you can see information on the call itself. When it was created, its duration, the user that is involved in this call, as well as the Call Recording. It is important to note that the call recording option is only available with ZOHO CRM at the moment.
For this feature to work, your VitalPBX installation needs to be accessible via the internet with either a Public IP Address or ideally an FQDN. This will allow ZOHO CRM with your permission to point toward the URL of the call recording.
And with this, you now have a full connection between your VitalPBX installation and ZOHO CRM. The process was straightforward, and you can now log your calls with your Contacts, Leads, or Accounts.
This makes the tracking of the activity with your customers easier and more manageable. Resulting in a better management experience and customer relationships.


