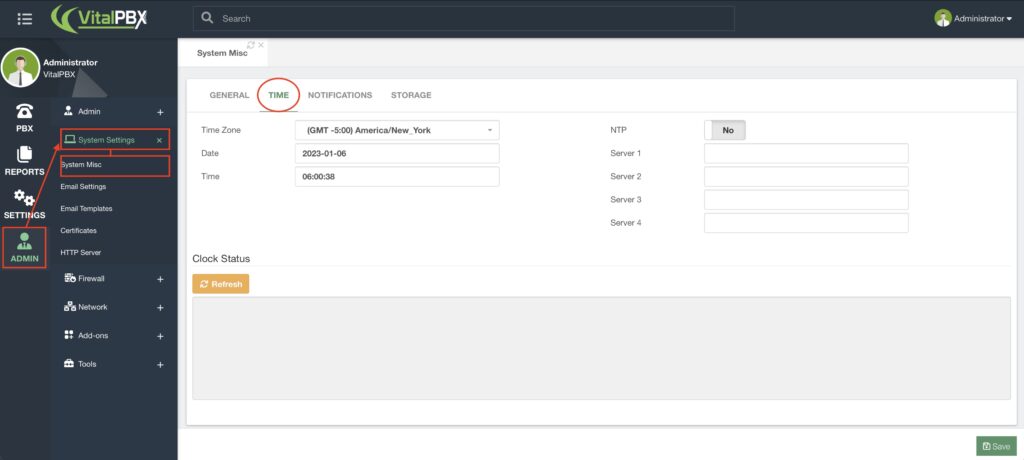
Now, we will look into configuring the Time Zone for our system. This will be the base clock the system will use for any time-sensitive information like call dates and times in the CDR.
If you installed VitalPBX from the ISO on our website or made a Debian installation from scratch, the timezone was set at installation. However, you might need to change your timezone if you have used a VPS system that uses images to create your systems.
We will go to Admin > System Settings > System Misc to do this. From here, we will go to the Time tab. We will look into the other Tabs later.

Here, you can change the time and date to your liking. You can also add NTP servers if you want specific servers for your system clock. In the bottom section, you can check the system’s Clock Status. This will tell you the exact time for your system.
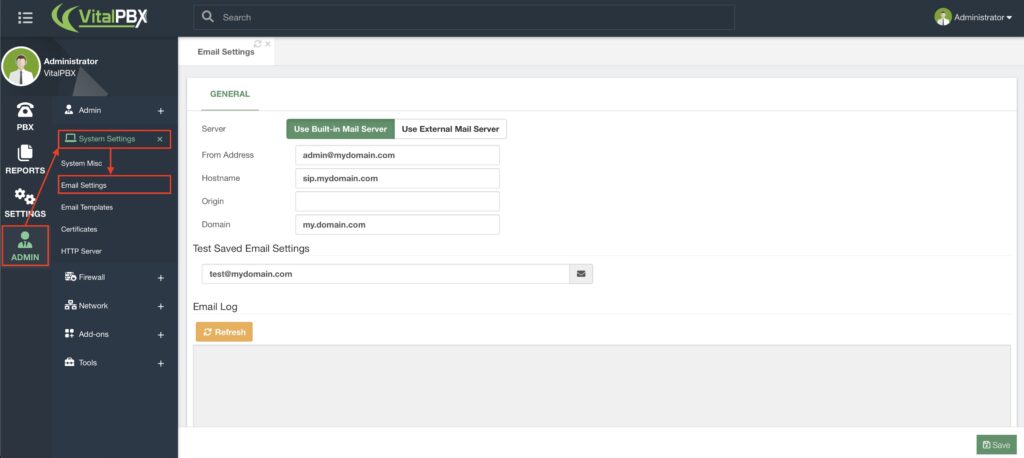
Next, let’s look into configuring the email client for VitalPBX. We will go to Admin > System Settings> Email Settings.

In this module, you can configure the external email client or built-in server to send email messages from your VitalPBX installation. This is important so you can send notifications and emails concerning various configurations from your PBX.
This will be useful for sending welcome emails from templates we will look into later. This can also help with Voicemail to Email, Fax to Email, System Notifications, and more.
You can pick between using the built-in server or an external mail server. Additionally, you can use a Gmail account with the External Mail Server option. If you go with this option, make sure you create an application password for your Gmail account, or else email sending might fail.
Once you have entered your configurations, click Save.
You can test your configurations by entering an email address in the Test Saved Email Settings field and clicking the envelope button to its right.
In the Email Log section, if you click on Refresh, you will see the email log output, and you can use this to troubleshoot if there is an issue with receiving the test email.


