Another part of allowing you to monitor your VitalPBX is to be able to see the log files for different aspects of your system. For this, we have the Log Files and Log File Viewer modules in VitalPBX.

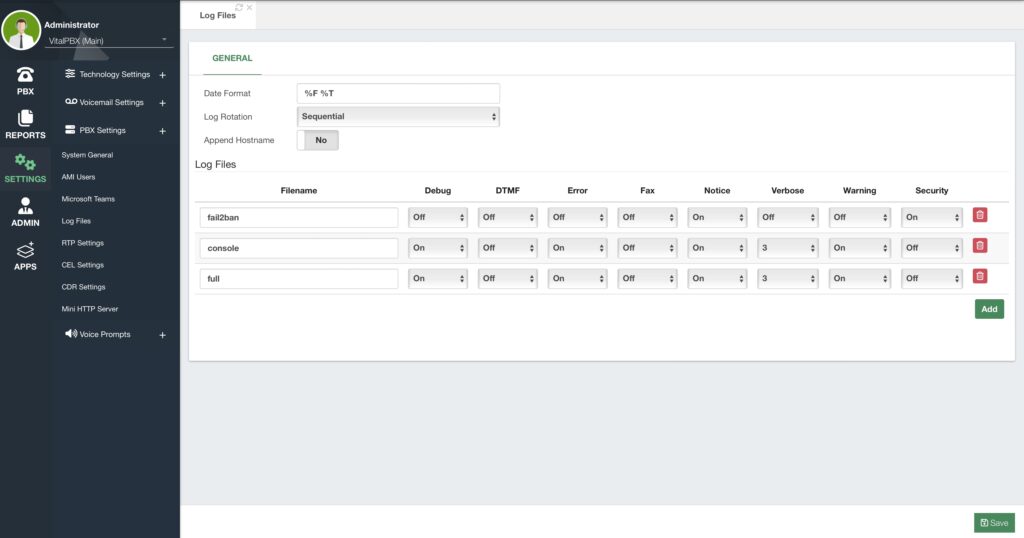
First, let’s take a look at the Log Files module. Go to Settings > PBX Settings > Log Files.
Here, you can define the log files that can be viewed from the Log File Viewer. You can change the Date Format using the standard strftime format string. On Log Rotation you can choose between the following.
• Sequential – Renames the log files in order. This means that the file that has the highest number is the most recent one.
• Timestamp – This uses a timestamp rather than a sequential number when the logger rotate task is executed.
• Rotate – This rotates all the log files. This means that the log file with the lowest number is the most recent one. This is the expected behavior for Unix users.
You can choose to append the hostname as well. This will append the hostname to the log files. Below, you will see the list of Log Files and the type of events you want to include. You can add additional log files by specifying the path and log file name. Once done, you can click on Save.

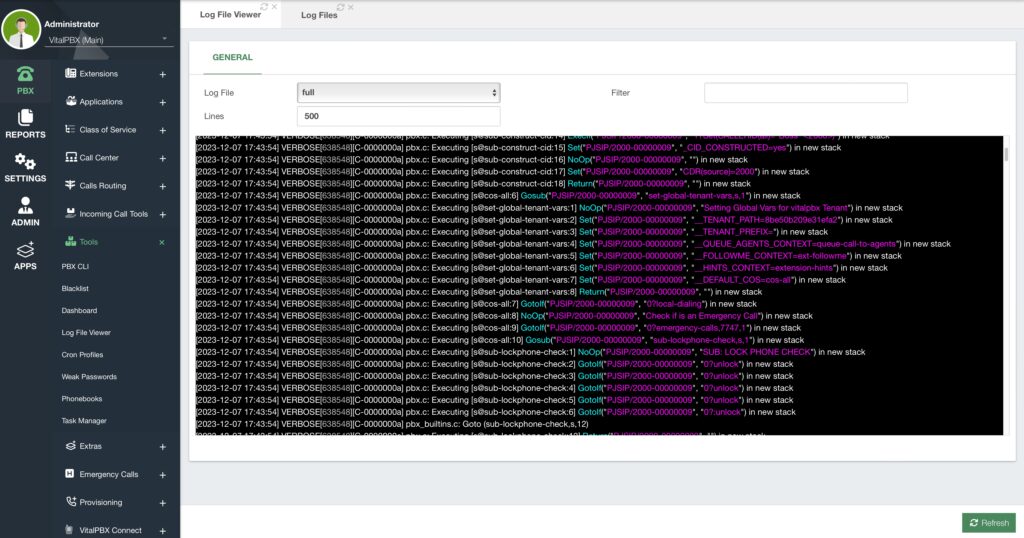
Here, you can select the Log File from the ones we have available, enter the number of lines you want to see, and you can filter for a specific keyword or phrase.
The File will be output in the black box below with color coding for easy viewing. You can click on the Refresh button in the lower right-hand corner to view the most recent information based on the filters you apply.
All of the log files we have by default are located under the /var/log directory. So you can view them from the Linux CLI as well. You can apply CAT filters to them from the CLI to make the search as custom as you need.


