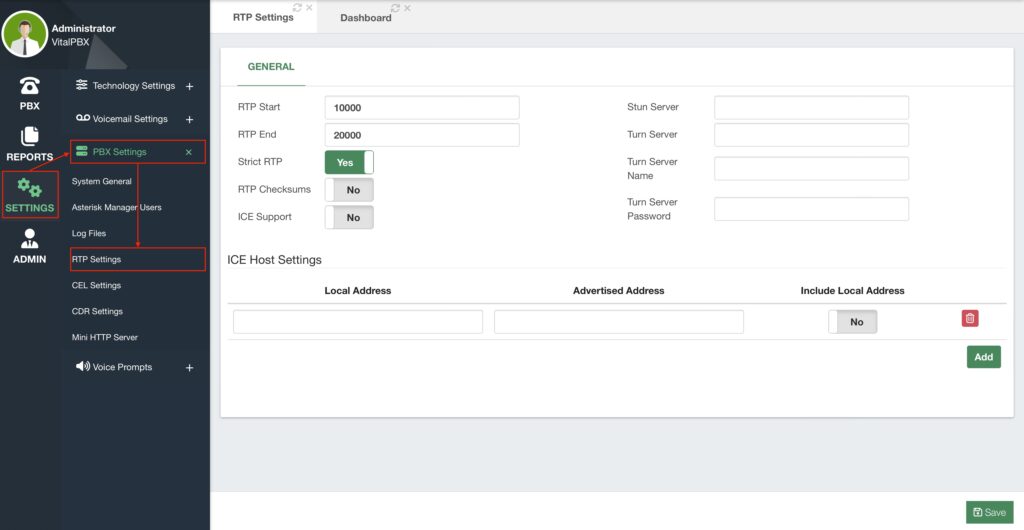
Next, we will take a look at the RTP Settings. These are found under Settings > PBX Settings RTP Settings.

If you require to change the RTP port range, these can be modified with the RTP Start and End fields. By default, these go from port 10,000 to 20,000. If you change these ports, make sure you also make the changes in the Firewall Services under Admin > Firewall > Firewall Services.
These fields can be left with their default values. You can enable or disable Strict RTP, and
RTP Checksums. We recommend you leave Strict RTP on for security purposes. If it is disabled, VitalPBX will not drop packets that come from any source that is not the source for the RTP stream. If you are using a STUN or TURN server you can enter the necessary information here.
Additionally, you can enable ICE Support in this module. If you are using an ICE server, you can enter your settings under the ICE Host Settings. Where the Local Address is a LAN IP Address, and the Advertised Address is a Public IP Address.
If you made any changes here, Save and Apply Changes.


