Sometimes, you must work in an isolated network for your phone system. In these cases, you might be working solely with a network switch. Fortunately, VitalPBX has a built-in DHCP Server to give your devices an IP address.
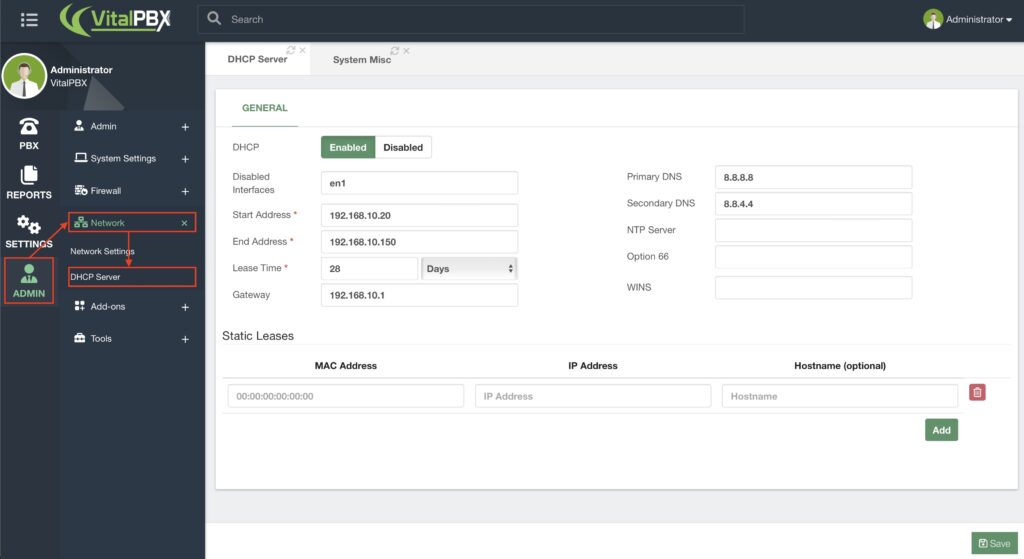
To configure the DHCP settings, we must go to Admin > Network > DHCP Server.

You can set up a complete DHCP pool with an IP address range, Lease Time, Gateway, DNS Servers, and NTP Server. Additionally, you have Option 66, which defines the “Phone Provisioning URL,” so your phone devices pull provisioning information and a WINS server. Under Static Leases, you can define static IP addresses for specific devices using their MAC address.
You can prevent the DHCP server from serving IP addresses to specific interfaces if you are connected with multiple network interfaces.
Ensure there is no other DHCP server in the network to avoid conflicts. Then, click “Save.


