You now have internal communication between extensions, and with NAT Settings and your firewall configurations, you can connect from anywhere. Now, we will need to connect with the outside world. This can be done by configuring Trunks. Trunks are connections between VitalPBX and VoIP providers or other PBX/VoIP systems.
We must go to PBX > Calls Routing > Trunks to start your trunk configurations.
Here, you can create as many trunks as you need. We will not go through all the fields that the trunk configurations have, as you can leave most of them by default unless it is required by the other PBX or VoIP operator.
First, we will go through the most basic requirements to connect with another PBX/VoIP system.
Note: Remember, with VitalPBX 4 and onward, we have deprecated the SIP
protocol. This is due to SIP no longer being supported. PJSIP is now the main
protocol used. PJSIP is completely backward compatible with SIP trunks. Even if
your VoIP Provider uses a SIP trunk, you can easily connect that SIP trunk with a
PJSIP trunk.
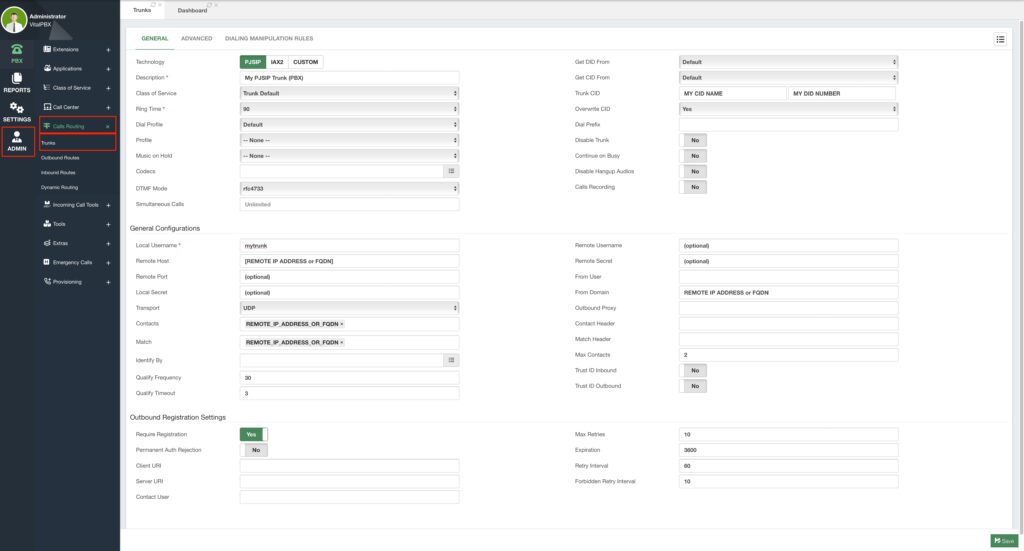
The first step we need to do is to select the technology for this trunk. This can be found in the first section at the top. With VitalPBX 4, we can choose between PJSIP, IAX2, or Custom. Most of the trunks you will create will be using PJSIP. IAX2 trunks can be used when connecting two Asterisk-based systems, and Custom can be used to connect with other protocols, like H323, for legacy PBX systems. For now, select PJSIP.
Next, you will need to enter a Description. This can be anything to identify the trunk. The other field you can configure from here is the Caller ID Name and Number used for this trunk, under Trunk CID. You can use this to Overwrite the External CID from an extension when dialing out through this trunk. Under Overwrite CID, you can choose between Yes, to overwrite the CID always, No, so the CID is not overwritten, or If Not Provided, when an extension or module does not have an External CID.
Trunks can also be enabled or disabled at any time. This way if you want to turn off a trunk without deleting it.
You can leave the rest of the fields for this first section with their default values. For the time being.
Optionally, some additional options you can configure are as follows.
- Class of Service – We will look more in-depth about this later, but this is used to
control the outgoing calls through this trunk. - Simultaneous Calls – The number of simultaneous calls that can go through this
trunk. - Get DID and Get CID From – The header from where you will retrieve the DID or CID
information. - Dial Prefix – A prefix number that is automatically added if needed at the beginning of
the number you are calling through this trunk. - Calls Recording – This will record all the calls going through this trunk. Please note
that enabling call recording in multiple stages of the call, i.e. Extensions, Routes, and
Trunks, will generate duplicates of recording
Most of these can be left with their default values, and are changed only if the remote system requires it.
With everything set in the first section, we can go to the General Section. Here, is where all of our connection configurations will go. From here, we first enter a Local Username. This username is mostly for identification, but keep in mind that if you are connecting to another PBX system that requires authentication, this will be the username you need to enter in that system. If you are using User Authentication in the remote system, you will also need to enter a Local Secret as well.
Next, we enter the Remote Host. This is the IP Address or FQDN for the system we wish to connect with. The Remote Port is optional and is used only if the port for the connection is different in the remote system. When left blank, the default port will be used, i.e. 5060 for PJSIP.
Then we have Contacts and Match. These are the PJSIP configurations needed to have a successful connection. Contact is how the remote system connects with your VitalPBX. This can be set in SIP URI format, sip:REMOTE_IP_ADDR:5060. This setting is not always needed for the connection. Match allows us to match the connection from a specific FQDN or IP Address.
This is everything you need to create a Trunk with User Authentication. You can now Save and Apply Changes.
Additional features that exist for the General Configurations and Outbound Registration are optional and are only modified if required by the remote system.
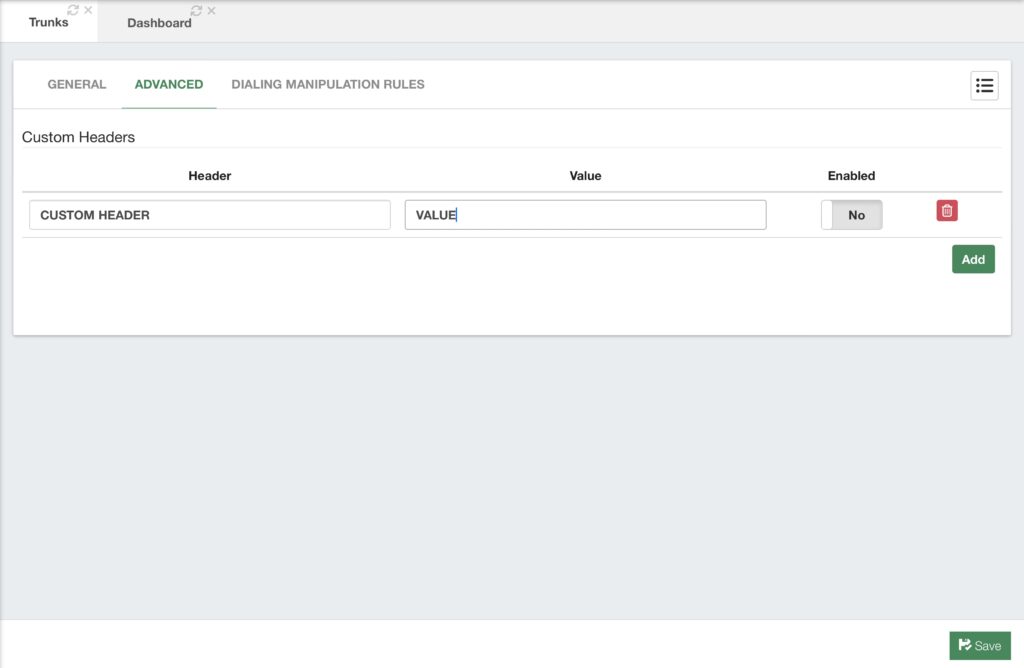
If you require entering a header that is unavailable via the GUI, you can head over to the Advanced Tab and enter any custom header with their respective values.
Once again, explaining all the options for PJSIP would go out of scope with this manual and guide, but they are here if you understand what is required by the remote system you want to connect with.
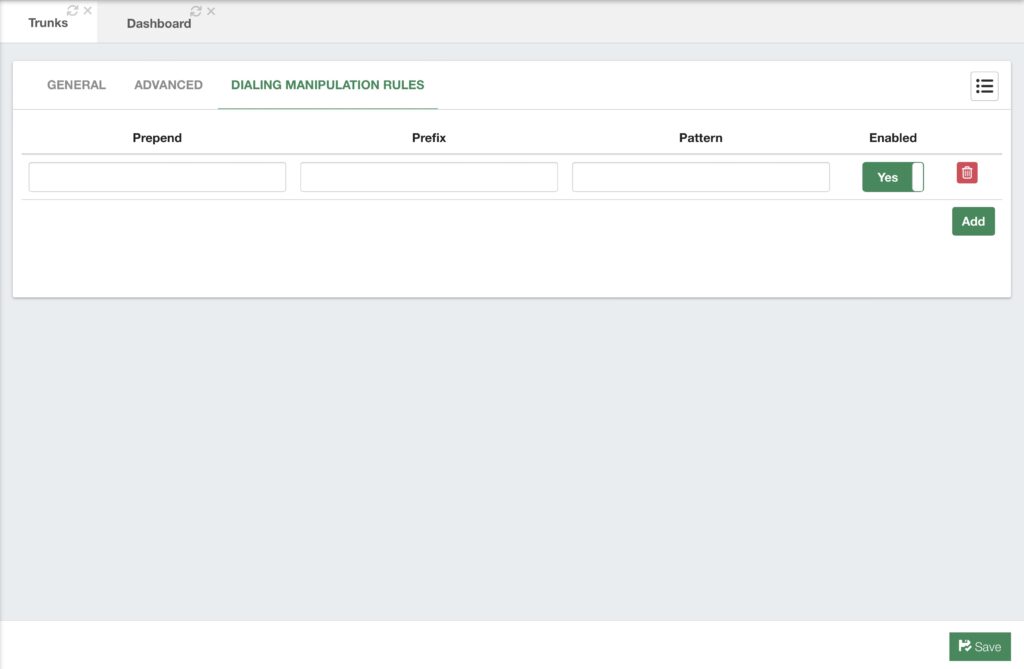
Finally, we have the Dialing Manipulation Rules. This is not required for outbound calling but allows you to manipulate the dialed number depending on the trunk. So you can use this to manipulate the dialed numbers going through this trunk.
Now you have a fully functioning trunk connecting you with another PBX system or VoIP Provider.
There is a sleuth of VoIP providers nowadays, so covering them all in a single guide would be impossible, so we created multiple blogs on our website that cover many VoIP providers we have worked with. You can check them out at the following URL, https://vitalpbx.com/?s=PJSIP.
Note: you may have noticed a lack of DAHDI, or telephony interface options for
telephony interface cards. With VitalPBX 3 and onward support for DAHDI has
been deprecated, and is no longer supported. In case you need to connect
VitalPBX with an E1, T1, FXO, or FXS interface, we recommend using a
Telephony Gateway appliance that will accept the telephony connection and
connect with VitalPBX via PJSIP trunk.
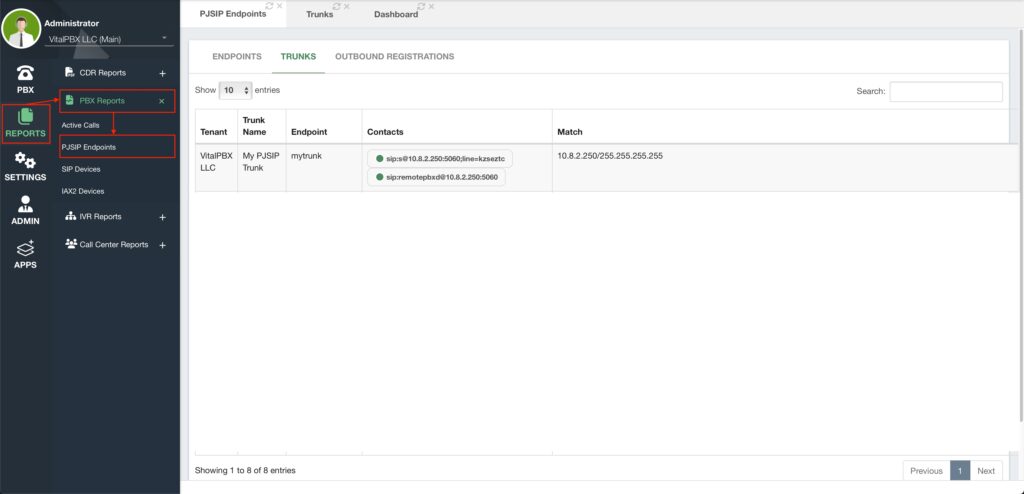
To verify the connection status of your newly created trunk, you can head over to Reports > PBX Reports > PJSIP Endpoints. Here, you can go to the Trunks tab and see the status of your trunk.