You can make your VitalPBX installation your own with the Branding add-on module. This add-on module will allow you to upload your logos, change the application name, change the base color, login design, and much more.
The Branding add-on is a commercial add-on that requires a license to work to its full potential. You can acquire a license separately just for the Branding add-on, or it also comes included with any of our licensing plan subscriptions.
To start using the Branding add-on, you must install it through the add-ons module under Admin > Add-Ons > Add-Ons. Once the add-on is installed, refresh your browser and go to Admin > Tools > Branding.
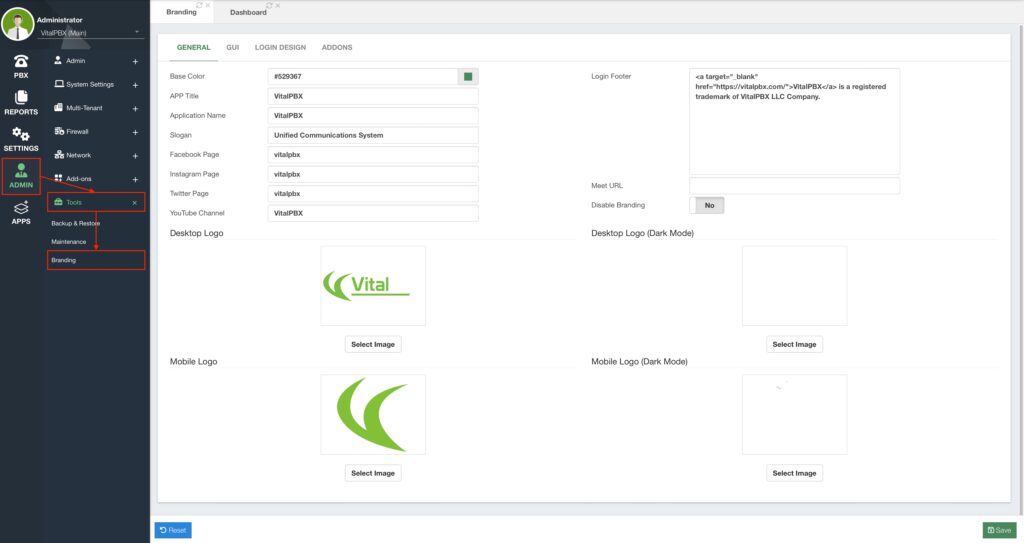
On the General tab, you can change the Base Color for the whole interface, so lettering, highlights, and accented items will use this color instead of the base green. It is also possible to change the APP Title and Name, so there is no mention of VitalPBX on your application. This is perfect if you are using the Multi-Tenant add-on to provide a PBX on the cloud service to your customers. You can change the Slogan and Social media links that are displayed on the login screen, as well as the Login Footer. You can upload your Logos for Desktop and Mobile view for Light and Dark Mode. The mobile logo is also used for the Favicon. You can quickly disable the branding to revert to the default VitalPBX branding at any time. This is useful to check the differences or if an uploaded logo does not fit on the first try.
There is also a Meet URL option. This option will change the base URL for the video conferencing link under PBX > Extras > Video Conferencing. By default, we offer a courtesy server we host based on Jitsi™. You can learn how to set up a Jitsi™-based server in this article we made at https://vitalpbx.com/blog/jitsi-videoconference-with-vitalpbx/. With the Meet URL option, you can change the base URL to your meeting server.
Next, we have the GUI tab.
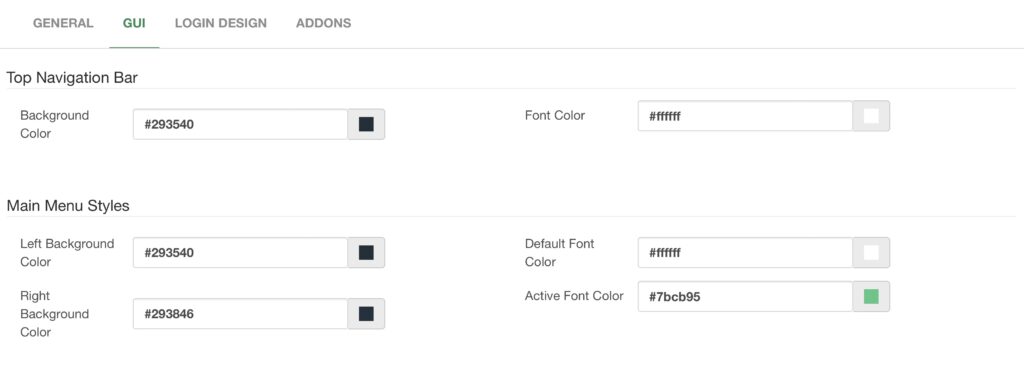
Here, you can change multiple colors found on the VitalPBX Web UI. Giving you more customization options for the Top Navigation Bar and Main Menu on the left-hand side.
Afterward, we have the Login Design tab.
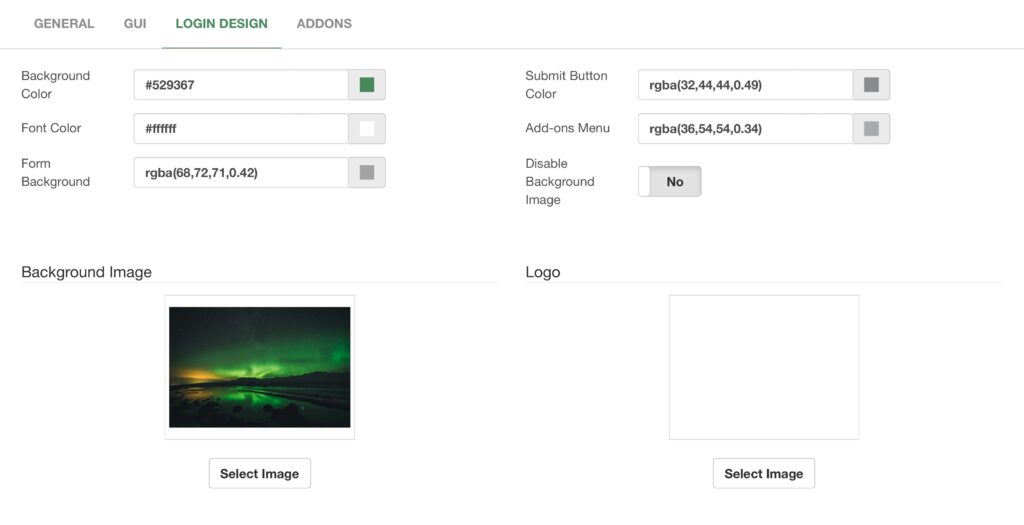
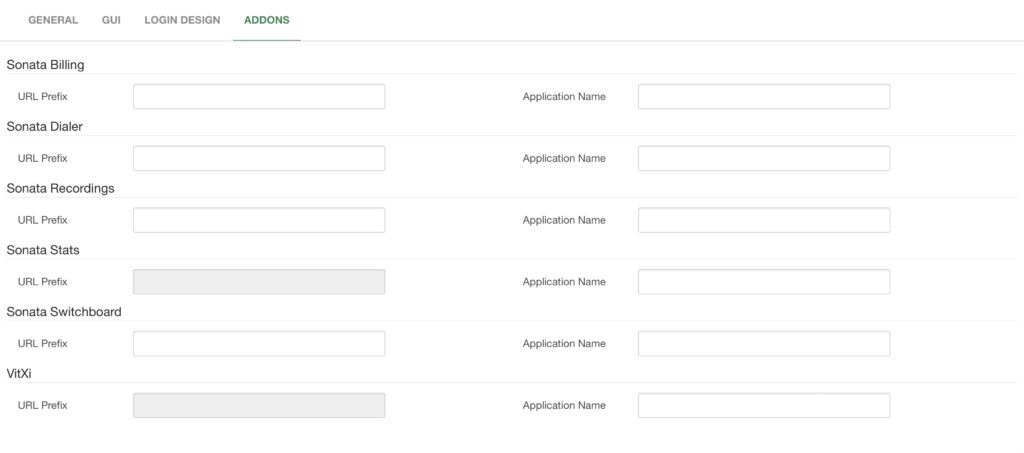
Here, you can change various colors for elements on the Login Screen. As well as the Background Image and Logo used on the Login Screen. You can also disable the background image if you want to use a solid color instead. Finally, if you have a Carrier Plus Licensing Plan Subscription, you get the Branding Plus extended feature. This will add the AddOns tab. In this tab, you can change the Application Name and URL Prefix for the Sonata Suite and VitXi applications. This will also allow Sonata Suite and VitXi to use the same logos you uploaded on the general tab.
Once you are happy with your changes, you can click on Save in the lower right-hand corner. If you are not happy with the styles you have given to your VitalPBX, you can always click on Reset in the lower left-hand corner, reset all the values to their default, and start over.
With the Branding module, you can give your VitalPBX your personal touch and have it align with your company’s brand. Giving your customers a more professional look to the services you provide.


