Next, let’s take a look at the Call Back module. The Call Back module allows you to set an automatic call from VitalPBX to a phone number and connect it with a destination. Usually, you will have a callback for each user that utilizes this feature, with their phone numbers set. To create a callback we must go to PBX > Applications > Call Back.
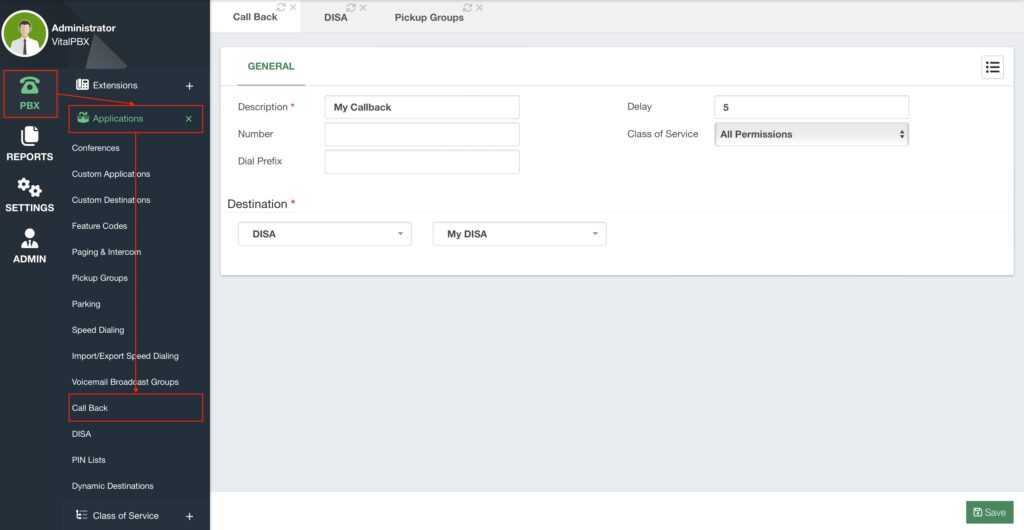
For a callback, we first set a Description so we can identify it. Next, we have the Number and Prefix field. These are used to establish a static number to callback when you reach this callback destination. The prefix is used if it is needed with your outbound routes. If the Number field is left blank, then the Caller ID Number is used instead. You can add a Delay in seconds from when the incoming call ends and the system places the callback. You need a Class of Service since this module places an outbound call, so it needs to have permission to dial the set number. Finally, set the Destination to where the callback will connect with the outgoing call. Save and Apply Changes.
This feature is usually used so it is the business that is charged for the calls instead of your personal phone number. We see this most often used with the DISA module as it will your external phone number and connect you with a DISA so you can use internal features or place outgoing calls from the business’s VitalPBX instead of your personal devices.


